


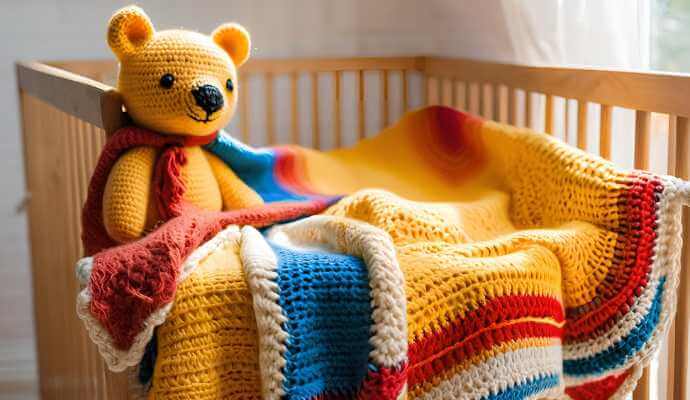
This Winnie the Pooh crochet blanket pattern offers a project that combines creativity with nostalgia.
You can explore the essential materials needed, including the appropriate yarn, crochet hook, and additional supplies.
- Step-by-step instructions will guide you through creating the foundation chain.
- You will learn how to master single crochet stitches.
- You’ll add the Winnie the Pooh design.
Additionally, there are tips for success and variations to help make your blanket uniquely yours.
Materials Needed
Creating a Winnie the Pooh crochet blanket requires selecting the appropriate materials to achieve a cuddly and colorful result that is both aesthetically pleasing and functional.
To start this DIY project, you will need soft yarn in various colors, a suitable crochet hook, and other crafting supplies to support your crochet skills.
Additionally, choosing the right yarn weight is important to ensure that the blanket is cozy while also being durable enough for imaginative play and nursery decor.
What Type of Yarn to Use?
Choosing the right type of yarn is crucial for creating a soft and vibrant Winnie the Pooh blanket that appeals to both children and adults. For a cozy baby blanket, materials like soft cotton yarn or plush yarn are recommended, as they are gentle against a child’s skin and provide warmth during cooler months. Selecting colorful yarn that reflects the whimsical nature of Disney’s character adds a playful element.
Exploring different yarn types reveals a variety of textures and finishes that can enhance the blanket’s overall appeal. For example, acrylic yarn is popular due to its durability and ease of care, making it ideal for a child’s blanket. Conversely, wool yarn offers excellent insulation properties for colder climates, though it may be less suitable for younger children due to potential allergies.
In terms of colors, consider bright yellows reminiscent of Pooh’s iconic fur or soft pastels similar to Piglet, to create visually appealing designs. When selecting yarn, it’s important to take into account personal preferences such as skin sensitivity, desired warmth, and the ease of working the yarn into various stitches.
What Size Crochet Hook to Use?
The size of the crochet hook is important for determining the tightness and drape of a Winnie the Pooh crochet blanket. Using a hook that matches the chosen yarn weight can yield the best results; for instance, a 5.0 mm crochet hook is typically recommended for medium weight yarn. Familiarity with crochet techniques can also assist in selecting the right hook size for creating the desired stitch pattern.
Hook sizes vary from very fine to bulky, accommodating different yarn types, ranging from lace to super bulky. Beginners may find it helpful to start with a medium-sized hook, such as a 5.0 mm or 6.0 mm, as these sizes are versatile and compatible with various yarn weights.
It is also important to understand that hook size significantly impacts stitch definition; larger hooks create looser, airier fabrics, while smaller hooks produce tighter stitches. To achieve the ideal texture for a cozy blanket, experimenting with different hook sizes and yarn weights can help in crafting the perfect drape and warmth, enhancing the overall project.
Additional Supplies
Plus yarn and a crochet hook, several essential crafting supplies can enhance a Winnie the Pooh crochet project and ensure a smooth crafting experience. Items such as stitch markers, tapestry needles, and measuring tapes are useful for keeping track of progress, while scissors and fabric can be handy for any sewing or needlework details that may be added. Gathering the right crochet accessories not only aids in the current project but also enriches overall crafting capabilities.
Other tools, like row counters, can simplify the process by allowing the crocheter to track how many rows have been completed, while ergonomic hooks can provide comfort during long crafting sessions. A yarn bowl can help keep threads organized and untangled, ensuring a hassle-free crochet experience.
For finding high-quality crochet accessories, local craft stores often offer a variety of options, but online retailers can provide a wider selection and sometimes better deals. Having a diverse yarn stash with varying weights and colors opens up opportunities for spontaneous creativity, enabling exploration of different patterns and ideas as they arise.
Step-by-Step Instructions
Creating a Winnie the Pooh crochet blanket can be a rewarding DIY project that highlights crafting skills while resulting in a thoughtful baby gift or nursery decor item.
The step-by-step instructions in this crochet tutorial will assist both beginners and experienced crocheters in making this charming character blanket. With clear written instructions and optional video tutorials available, it is straightforward to follow along and craft a whimsical piece.
1. Creating the Foundation Chain
The foundation chain is the starting point for any crochet project, including a Winnie the Pooh blanket, and serves as the base for the entire piece. For beginners, mastering this technique is important, as it establishes the groundwork for subsequent crochet stitches and the overall design.
To create a sturdy and even foundation chain, it is essential to maintain appropriate tension while working with the yarn.
Begin by making a slipknot and placing it on the hook, pulling the yarn to ensure it is snug but not overly tight. As you create the chain, focus on keeping the size of each stitch consistent; a common mistake is pulling the yarn too tightly or too loosely, which can lead to uneven tension.
If this happens, you can simply unravel the chain and start again, as a well-formed foundation is crucial for the project’s success.
Once the chain is complete, you can easily transition into basic stitches like single crochet or half-double crochet, enhancing your crafting skills and allowing you to create beautiful designs.
2. Single Crochet Across Each Row
Once the foundation chain is complete, the next step in the Winnie the Pooh crochet project is to single crochet across each row, creating a solid and soft fabric for the blanket. This simple crochet technique is suitable for beginners and allows for a uniform stitch pattern that will showcase the whimsical designs incorporated later. Consistency is important, so maintaining even tension while working through each row is essential.
To start, insert the hook into the second chain from the hook and complete a single crochet stitch, ensuring both loops are pulled through evenly to achieve a pleasing texture.
As the work progresses, regularly counting the stitches becomes necessary. A good practice is to recount every few rows to avoid unintentional decreases or increases in stitch count.
Keeping track of the stitches helps maintain a symmetrical appearance and ensures that the rows align with the charming motif of Winnie the Pooh. For those who learn visually, referring to video tutorials can demonstrate the technique step-by-step, making the process clearer and more enjoyable.
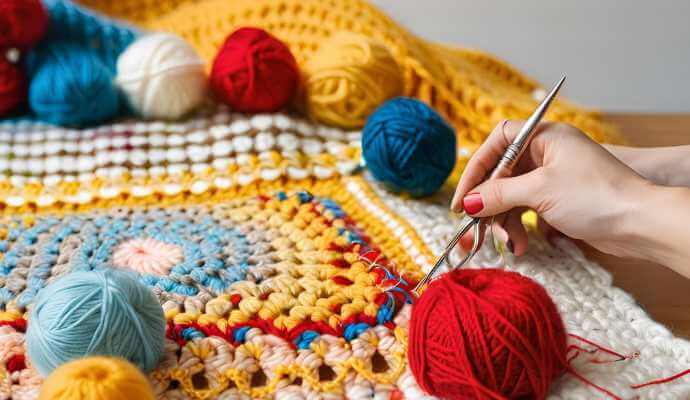
3. Changing Colors
Incorporating various yarn colors into a Winnie the Pooh crochet blanket can enhance the design and add a whimsical touch to the project. Learning how to change colors seamlessly is an important technique in crochet, enabling the creation of vibrant patterns and character designs that reflect the beloved storybook character. By mastering this skill, one can bring the blanket to life with playful hues that will appeal to children.
The process begins with selecting yarn colors, which is crucial; it’s important to choose combinations that complement each other while also capturing the essence of the characters. Once the palette is determined, start the row by completing the last stitch of the old color. Before pulling through the final loop, introduce the new yarn color by wrapping it around the hook. It is important to tighten the stitches for a neat finish and to ensure that tension remains consistent as you continue.
To avoid common pitfalls, such as loose stitches or color bleed, it’s essential to keep an eye on your tension and adjust as needed. Experimenting with various shades and patterns will not only enhance the visual appeal but also allow for a more personalized and unique touch to the crochet project.
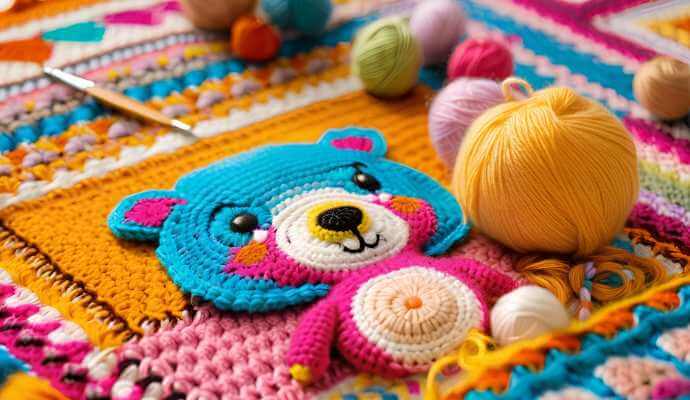
4. Adding the Winnie The Pooh Design
Adding the Winnie the Pooh design to a crochet blanket brings the project to life, highlighting creativity and affection for the character. Whether opting for motifs or employing a graphghan technique, this step involves incorporating the character design in a way that is visually appealing. Following the crochet pattern closely allows one to feature Pooh and his friends in a way that can delight children.
To achieve this, techniques such as appliqué can be used, allowing beautifully crafted Pooh motifs to be attached directly to the blanket. Alternatively, intarsia can be employed, which involves working with different colors in a single row to create a seamless design.
Choosing motifs that represent Pooh’s adventures—like his honey pots or friends such as Piglet—will enhance the overall theme. Personalizing these elements reflects the unique touch of the crocheter, whether through color choices, size adjustments, or added details like embroidered names. Consider including Amigurumi versions of Pooh Bear and other character toys to create a more interactive and playful design.
Engaging with the crochet community for inspiration can also enrich the project by providing fresh ideas and motivation. Joining crochet groups and participating in crochet festivals can expose you to new crochet techniques and crafting trends.
5. Creating the Border
The final touch to a Winnie the Pooh crochet blanket involves creating a border that ties the entire project together and provides a polished finish. A well-executed border enhances the aesthetic appeal of the blanket and secures the edges, helping to ensure that the work lasts for years. There are various crochet stitches and knotting techniques available for achieving a beautiful border, so it is important to choose one that complements the overall design and theme.
From scalloped edges to simple single crochets, the style of the border can significantly alter the blanket’s appearance. For example, a scalloped border offers a soft, whimsical feel that suits the Winnie the Pooh theme, while a more structured double crochet border can introduce a modern touch.
To create a scalloped edge, begin by making a single crochet in the corner, followed by chaining three and skipping one stitch. Repeat this process until reaching another corner. Additionally, consider color choices; using contrasting yarn can result in a striking finish. The right border will frame the blanket and enhance its charm, giving it a finished appearance that draws attention.
Tips for a Successful Crochet Blanket
To ensure the success of a Winnie the Pooh crochet blanket, it’s important to follow several essential tips that can enhance the crafting experience and outcomes. Engaging with the crochet community can provide valuable insights, while refining crocheting techniques can lead to a more polished final product. Utilizing online tutorials and pattern instructions can simplify complex patterns.
From selecting the best yarn colors to practicing stitches, these tips can help create a beautiful, handmade blanket suitable for any baby shower gift or nursery decor. Consider the yarn weight, gauge, and fiber arts techniques to ensure quality results.
Before beginning, take the time to plan the project carefully. Gather all necessary materials, such as the appropriate hooks and stitch markers, to streamline the process. Ensure that your material selection includes high-quality yarn and eco-friendly yarn options.
When ready to start, consider breaking the work into manageable sections. This approach makes the task less overwhelming and allows for specific goals on each crafting day. Use crochet charts and pattern repeat strategies to maintain consistency.
As progress is made, experimenting with different stitches can enhance skills and add a unique touch to the blanket.
Once the blanket is complete, remember to focus on finishing touches, like blocking and weaving in the ends, which can elevate the overall work.
Sharing the crafting journey and seeking feedback from fellow crafters can also provide valuable tips and foster connections within the community.
Possible Variations
There are numerous variations to consider when crocheting a Winnie the Pooh blanket, providing opportunities for creativity and personalization in your project. You can alter the color scheme or include different characters, which can turn a basic blanket into a unique, themed piece that serves as a thoughtful baby gift or home decor item.
The possibilities are vast, making this project enjoyable for crochet enthusiasts of all skill levels.
1. Using Different Colors
Experimenting with different colors can significantly change the appearance of a Winnie the Pooh crochet blanket and provide an opportunity for creativity. By choosing a diverse palette of yarn colors, one can create striking contrasts or soft pastels that reflect the whimsical nature of the beloved characters. This creative choice not only enhances the enjoyment of the project but also results in a unique gift that stands out in any nursery or children’s room.
Understanding the principles of color theory can enhance this creative process. For instance, complementary colors can create a vibrant look, while analogous colors tend to offer a more serene and cohesive feel. To achieve harmony, using a color wheel can help identify colors that work well together, such as pairing soft yellows with light blues or greens.
Successful projects often feature combinations like warm oranges with deep reds, which can capture attention in any space.
By thoughtfully selecting yarn colors, these designs can effectively create a charming and playful atmosphere. Explore colorful crochet techniques to highlight the whimsical design of Winnie the Pooh and his friends.
2. Adding Personalized Touches
Adding personalized touches to a Winnie the Pooh crochet blanket can transform it from a simple project into a cherished keepsake. By incorporating initials, names, or special motifs, it becomes a unique piece that holds sentimental value for the recipient. Personalization enhances the overall appeal and also makes the handmade gift more meaningful. Utilizing DIY gifts strategies ensures every piece is unique.
Selecting colors that reflect the recipient’s personality can be a thoughtful approach, such as using soft pastels for a baby or bold tones for a child. Weaving in beloved characters or favorite shapes can turn the blanket into more than just a functional item; it can become a story in itself.
Including a significant date or a small heart or star can serve as a unique touch. These additions inspire creativity and help transform the project into a heartfelt expression, ensuring that every stitch carries a special message and creates lasting memories.
Frequently Asked Questions
What materials do I need to make a Winnie The Pooh crochet blanket?
To make a Winnie The Pooh crochet blanket, you will need yarn in various colors, a crochet hook, scissors, and a tapestry needle. Consider yarn shops for a diverse selection of colors and textures.
Is this crochet pattern suitable for beginners?
Yes, this Winnie The Pooh crochet blanket pattern is suitable for beginners. The instructions are easy to follow and there are helpful online crochet classes and tutorials available online.
How long will it take to make a Winnie The Pooh crochet blanket?
The time it takes to make a Winnie The Pooh crochet blanket will vary depending on your crochet skills and the size of the blanket. On average, it can take anywhere from 2-4 weeks to complete, making it a delightful seasonal project.
Can I customize the colors of my Winnie The Pooh blanket?
Yes, you can customize the colors of your Winnie The Pooh blanket to your liking. Feel free to use different shades of yarn to make your blanket unique.
Do I need to know how to read a crochet pattern to make this blanket?
Yes, it is helpful to know how to read a crochet pattern to make this Winnie The Pooh blanket. However, there are video tutorials available that can guide you through the process.
Can I sell Winnie The Pooh crochet blankets made from this pattern?
Yes, you can sell Winnie The Pooh crochet blankets made from this pattern. However, please give credit to the original designer and do not mass-produce or distribute the pattern. Consider promoting your merchandise through crafting workshops and crochet blogs.
