


This guide provides instructions for crocheting a Tweety Bird. It covers the basics of crochet, outlines the necessary materials and tools, and presents a step-by-step process for creating the Tweety Bird. Additionally, it includes helpful tips and links to other crochet patterns.
Key Takeaways:
- Use a stitch marker to keep track of your rounds while crocheting Tweety Bird.
- Keep your tension consistent to ensure a uniform look for your Tweety Bird crochet project.
- Experiment with different yarn colors to create your own unique version of Tweety Bird.
- Always use a magic ring technique to start your rounds for a tight and neat finish.
What Is Crochet?
Crochet is a versatile and enjoyable craft that entails creating fabric from yarn using a hooked needle. This art form is frequently used to produce beautiful items such as clothing, blankets, and stuffed toys.
Enthusiasts like Cindy Lively have popularized crochet, which has gained significant traction in recent years as a rewarding hobby that allows for personal expression and fosters a sense of community among crafters.
Whether you are a beginner or an experienced crochet artist, embarking on your crafting journey can lead to the creation of unique and cherished pieces. Using delightful patterns can enhance this experience, making it more enjoyable.
What Are The Basic Crochet Stitches?
The basic crochet stitches are the simplest and most common types of stitches used in all crochet projects. These include the chain stitch, which begins every crochet work, as well as the single crochet and half double crochet stitches, which introduce different textures and patterns. Understanding basic crochet stitches is essential for any crocheter, as they serve as the foundation for every project. Each basic stitch has its specific purpose and contributes to a distinct final product. Mastering these stitches is crucial for creating beautiful crochet items.
The chain stitch is used to initiate every project and forms the foundation chain upon which the rest of the stitches are built. It is also utilized to create various edges and finishes.
The single crochet stitch produces a tight and sturdy fabric, making it ideal for amigurumi and other items that require a strong, durable finish. The half double crochet stitch strikes a balance between flexibility and density, making it well-suited for projects like soft blankets or garments.
Videos and pictures demonstrating basic crochet stitches can greatly enhance a new crocheter’s understanding of their function and application, providing valuable assistance as they embark on their crocheting journey.
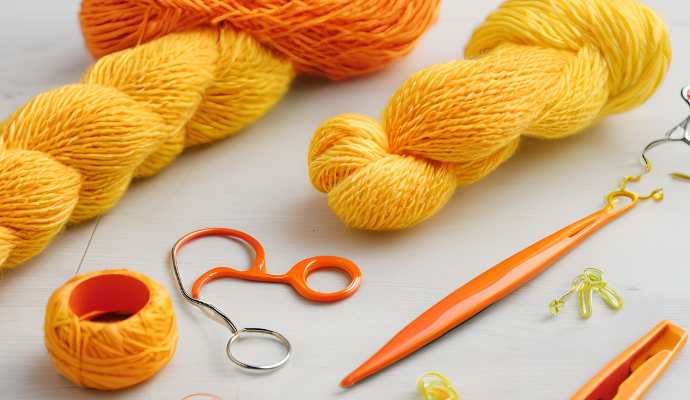
What Materials Do You Need To Crochet Tweety Bird?
To crochet Tweety Bird, you will need several materials, including yarn, embroidery thread, and various crochet tools.
The yarn required consists of bright yellow for the body, orange for the beak and feet, and black for the details, such as the eyes. Additionally, you can use embroidery thread to enhance the details further. For a fun project, check out the Tweety Bird Amigurumi Free Pattern.
What Type Of Yarn Is Best For This Project?
When crocheting Tweety Bird, a cartoon character known for its vibrant colors and cheerful personality, it is essential to use yarn that reflects these qualities. Many crafters prefer Red Heart yarn for this purpose, as it is recognized for its quality and variety.
This yarn is easy to manipulate and provides a beautiful finish, making it an excellent choice for amigurumi projects. Another popular and high-quality option is DMC yarn, which is celebrated for its luxurious feel and rich color palette.
When selecting yarn for amigurumi, both color and texture are important. Consider using Red Heart or DMC yarn for their vibrant colors and quality. Soft and smooth yarn will help achieve the rounded shapes that are characteristic of amigurumi. It is advisable to use worsted weight yarn for crocheting Tweety Bird, as it offers a good balance of thickness and stitch definition.
Always remember to test a small swatch to see how the yarn behaves before proceeding with your project. Testing a swatch helps in determining the finished size and ensuring that the yarn choice meets your expectations.
What Size Crochet Hook Do You Need?
The size of the crochet hook you choose significantly influences the final appearance and texture of your Tweety Bird project. For this particular project, a medium-sized hook is typically recommended to achieve the correct tension when working in rounds. Make sure to test a swatch to ensure your gauge matches the pattern requirements.
Selecting the appropriate crochet hook size is crucial as it determines the tightness or looseness of your stitches, which in turn affects how well your finished product maintains its shape. For instance, using a smaller hook results in tighter stitches, creating a firmer and more structured amigurumi, while a larger hook produces looser stitches, resulting in a softer and floppier amigurumi. Adjusting your hook size can help you match the gauge specified in the pattern.
Commonly used hook sizes range from 2.5mm to 6mm, with each size suited to different yarn weights and designs. Ultimately, choosing the right hook size not only helps achieve the desired aesthetic but also ensures the structural integrity and longevity of the piece. When in doubt, consult pattern requests or join crochet groups on a Facebook page for advice.
What Other Supplies Do You Need?
To create a Tweety Bird, in addition to yarn and a crochet hook, you will need several other supplies.
Stuffing is essential for filling the bird and giving it shape, while felt is required to craft features such as the eyes. Firmly stuff each part to maintain their shape over time. Use black small felt pieces for the eyes. Safety eyes can be added to enhance the bird’s professional appearance.
You will also need scissors to cut the yarn and felt, and a tapestry needle to sew the various parts of the bird together. A stitch marker is helpful for keeping track of rows, ensuring that the production of the toy remains organized and its proportions accurate.
Each of these items is important not only for constructing Tweety Bird but also for improving the quality and longevity of the finished toy. Remember, this pattern is for personal use only.
How To Crochet Tweety Bird?
Tweety Bird Amigurumi is a crocheted stuffed toy. Creating Tweety Bird requires following a detailed amigurumi pattern that guides you through each part of the design step-by-step. This amigurumi pattern ensures that even beginners can achieve a delightful result.
This process ensures that the finished size meets expectations and that the assembly is secure. Make sure to leave a tail between assembling parts for easier sewing. To achieve the desired features of this design, it is essential to use continuous rounds and to count stitches carefully. This will ensure that the finished size and shape are accurate.
Step 1: Make The Body
Technique: Magic Ring
The body of Tweety Bird is crafted using a magic ring, which is worked in continuous rounds to create a cute, plump torso using bright yellow yarn.
Purpose of the Magic Ring:
This technique allows for a tight and clean start, which is essential for maintaining the proper shape of the character. Increase stitches as needed to keep the body’s shape even.
How to Make the Ring:
To begin, create a slipknot, then hold the yarn in your fingers and wrap it around them to form the ring. Next, pull the working yarn through to secure it.
Number of Stitches:
Start the body with six single crochet stitches into the magic ring. Subsequent rounds can increase by two stitches. It’s important to pay close attention to your tension, as any loose ends can create gaps.
Other Tips:
Feel free to blend different shades of yellow and add accents with other colors, but strive to keep the overall look as close to the classic Tweety design as possible. Using black for small details can add depth to the final product.
Step 2: Make The Head
The head of Tweety Bird is shaped by adjusting the stitch count, allowing for precise sizing that matches the body perfectly. Begin stuffing the head as you crochet to ensure it maintains its shape.
To achieve the typical round shape, one can start with a small magic ring and increase the stitch count in the first few rounds to establish the base of the head. Generally, adding six increases during these initial rounds is quite effective in creating the desired roundness.
As the head expands, it is important to carefully manage how the increases contribute to the rounded shape by adding stitches every other round. Once the desired diameter is reached, one should begin incorporating decreases while ensuring that there is enough space for Tweety’s features without significantly altering the overall shape.
By meticulously managing the stitch counts, one can create a well-shaped head that is aesthetically pleasing and proportionately correct.
Step 3: Make The Beak
The Tweety Bird beak is crafted from orange yarn and is designed to be well-stuffed to maintain its shape. It is important to select the right yarn, like DMC Cotton Perle #5, to achieve a smooth and vibrant finish.
Begin by creating a foundation chain of the appropriate length to achieve the desired width for the beak.
- For Row 1, work single crochets back into the foundation chain, gradually increasing the number of stitches to create a rounded shape at the top.
- In Row 2, once you reach the desired height, decrease the stitches evenly to taper the end of the beak.
Ensure the beak is firmly stuffed with fiberfill to prevent it from drooping. Attach the beak to the head using a whip stitch, making sure the stitches are tight but not overly so.
Step 4: Make The Wings
When creating the wings for your project, it’s important to pay attention to the stitch count and ensure that it is proportionate to the body. Using black yarn can provide a striking contrast to Tweety Bird’s bright colors. Ensure to stuff firmly and evenly, so the wings have a neat shape.
Measure the width and length of the wings in relation to the body, as this will determine the appropriate stitch size and total stitch count. To maintain consistency throughout your work, use a single type of stitch, such as single crochet. This will help keep all components uniform as you progress.
Additionally, make sure to maintain even tension to avoid puckering or shrinking of the fabric. When attaching the wings to the body, position them evenly on either side and use pins to hold them in place temporarily. This approach will ensure that the wings appear uniform and complement Tweety’s signature bright yellow without overpowering it.
Step 5: Make The Feet
The feet of Tweety Bird are crafted using single crochet with orange yarn from Red Heart. These feet highlight the significance of shape in crocheting, as they must be rounded at the end with clearly defined toes to align with the original character design.
To achieve the correct shape, it is essential to maintain a low stitch count of approximately 6 to 8 stitches for each foot, ensuring they are not too large while taking on the desired form. Additionally, incorporating a few increases in certain rows will help the tips of the feet achieve the rounded shape necessary for the toes. Remember to leave a tail for sewing.
Attention to detail is crucial, as rounded toes will enhance the overall appearance of the project, making it look much more appealing than squared-off feet. Once the feet are completed, they can be sewn onto the body, using the remaining yarn tails to close off the foot. Careful positioning will accentuate the character’s features, giving Tweety Bird an adorable look. Happy crocheting!
Step 6: Assemble The Parts
Carefully sew the parts of Tweety Bird together, ensuring they are firmly attached and adequately stuffed. Pay attention to the positioning of features like the cheeks to achieve the desired appearance. Make sure the cheeks are properly aligned, and add stuffing firmly to create a balanced look.
To create a sturdy and visually appealing final product, use a stiff yarn that matches the character’s colors. Begin by attaching the head to the body with a whip stitch. Once the head and body are secured, sew on the additional features. This will ensure your Tweety Bird is well-proportioned and represents the character accurately.
Using a contrasting thread color for the pieces being sewn can make it easier to see your work. For the cheeks, lightly stuffing them before sewing will help create a nice round shape that is visually pleasing. If you’re looking for a fun project, check out the Tweety Bird Crochet Pattern by Cindy Lively or join the Facebook page for more tips.
It is important to frequently step back and assess the overall look, making adjustments as needed to achieve the perfect Tweety appearance.
What Are Some Tips For Crocheting Tweety Bird?
The tips for crocheting Tweety Bird are designed to ensure that every aspect of the project proceeds smoothly, resulting in a beautifully crafted and well-made knitted toy.
1. Use A Stitch Marker
Using a stitch marker while crocheting makes it easier to keep track of your rows and stay on schedule with your project, especially when working in rounds. For example, you can mark between rows sc and create a ring of stitches to keep everything organized.
By marking the end of each round, crocheters can quickly assess their progress without having to count rows or risk losing their place. This not only saves time but also reduces the likelihood of errors that can occur when trying to recount stitches after several rounds.
Knowing the location of the starting point for the next round is crucial for maintaining the correct shape of your project. For optimal results, place the marker immediately before the first stitch of the new round to ensure it is clearly visible and helps in creating healthy knitted toys.
2. Keep Your Tension Consistent
Tension in crochet work refers to the tightness or looseness of the stitches, and it plays a crucial role in creating correctly shaped amigurumi toys that are neither too tight nor too loose.
Maintaining consistent tension is essential for both the shape and stability of the toy, as well as its aesthetic appeal. One way to achieve consistent tension is by adjusting your grip on the yarn and hook.
For instance, if you notice that your stitches are becoming too tight, loosening your grip on the yarn can help it flow more smoothly and allow for greater ease of movement. Conversely, tightening your grip can help prevent stitches from becoming too loose, which may create gaps in the fabric.
Achieving balance in tension is necessary because inconsistent tension can result in a misshapen toy or weak seams that may unravel. This is undesirable, as it compromises both the toy’s durability and visual appearance.
3. Use The Right Yarn Color
Choosing the right colors is essential when crocheting a Tweety Bird, as bright colors reflect the character’s true essence and enhance the overall project. Using DMC yarn like DMC Cotton Perle #5 in Blue #312 can add a perfect touch to the character’s features.
Utilizing vibrant shades like yellow and blue captures the character’s likeness while highlighting the brightness of its personality. These lively hues not only represent Tweety Bird effectively but also infuse the project with energy and charm.
4. Stuff The Amigurumi Firmly
Amigurumi pieces should be stuffed tightly to retain their shape and structure, preventing them from becoming floppy or distorted. It is important to achieve the right level of tightness when stuffing; too much stuffing can make the amigurumi too hard, while too little can cause it to droop. Finish stuffing firmly to maintain the shape and stability of the project.
Begin by placing a small amount of stuffing inside and gradually add more, checking the firmness of each part as you go. Ensure that the stuffing is distributed evenly throughout the piece, using your fingers to push it into corners and curves.
By following this careful technique, you will create an amigurumi that is well-proportioned and visually appealing.
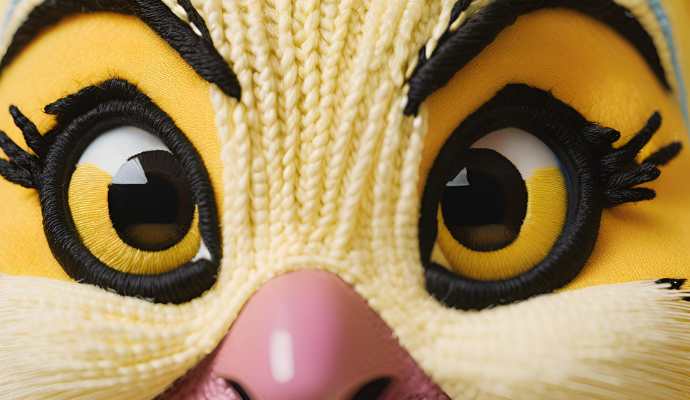
5. Use Safety Eyes Or Embroider Them On
You can enhance your crocheted Tweety Bird by adding eyes in two ways: using safety eyes for a polished appearance or embroidering them for a more hands-on approach. Each option has its own advantages and disadvantages that can impact both the aesthetics and usability of the finished product. You could also use felt black for detailing around the eyes.
Safety eyes provide a clean, finished look and are securely attached, making them ideal for toys that will be heavily used. However, if they come loose, they can pose a choking hazard for small children. On the other hand, embroidery allows for a wider range of expressions and styles, giving the maker the opportunity to infuse personality and uniqueness into the piece.
To attach safety eyes:
- Create a small hole where the eye will be placed.
- Insert the eye.
- Secure it with the washer.
For embroidery, use a contrasting thread color with a back stitch or satin stitch, ensuring that you tie off the thread securely to prevent unraveling.
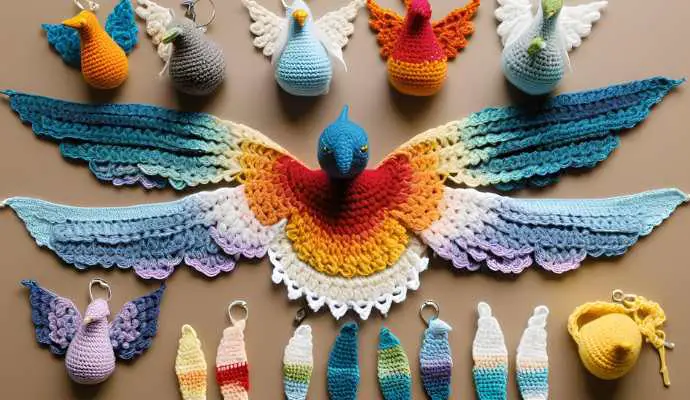
What Are Some Other Crochet Patterns For Cartoon Characters?
Along with crocheting Tweety Bird, there are numerous other crochet patterns for cartoon characters that can enhance your amigurumi design skills and add variety to your crochet projects. Patterns like these can be found on platforms such as Pinterest and Zan Amigurumi.
These patterns often feature beloved characters from a wide array of media.
1. Mickey Mouse
Mickey Mouse Crochet Pattern Description: The Mickey Mouse crochet pattern is a straightforward representation of the iconic character, created using various crochet techniques and supplies.
Mickey Mouse Crochet Pattern Supplies: The supplies typically required include the following:
- Yarn: The primary colors needed are black for the body, red for the shorts, and white for the gloves.
- Hook: A size G (4.0 mm) crochet hook is recommended for beginners, as it allows for comfortable tension and good stitch definition.
Techniques: Specific techniques, such as amigurumi crocheting, which involves creating three-dimensional objects, may be used to form the rounded shapes of Mickey’s head and ears.
Mickey Mouse Crochet Pattern Skills: Basic crochet skills and a bit of patience are essential for this project.
2. Pikachu
Pikachu is one of the most popular Pokémon characters and is often brought to life through crochet. A bright yellow crochet pattern can help you create an adorable version of this beloved character. This pattern, written for enthusiasts of all skill levels, can be a rewarding project.
Choosing the right materials, such as high-quality acrylic or cotton yarn, will enhance the durability of the finished toy while allowing the vibrant colors to shine. Bright yellow yarn will form the foundation of the pattern, while black and orange yarn can be used for the stripes and rosy cheeks, respectively.
Techniques like amigurumi can be employed to crochet Pikachu into a charming toy with three-dimensional features. Adding fun details such as cute little eyes and an expressive smile will help the final creation look delightful and capture the playful personality of the character.
3. Hello Kitty
Crocheting Hello Kitty is a delightful project that allows fans of this iconic character to create their own versions of her beloved design. Enthusiasts typically use patterns that replicate her trademark features, often incorporating soft pastel colors that reflect her characteristic palette of white, pink, and yellow.
Special details, such as her bow and whiskers, require careful attention to ensure accuracy. Unique stitching techniques, like the puff stitch for added texture and the bobble stitch to create the appearance of cheeks, enhance the final result.
With the right materials and a touch of creativity, crocheting this iconic figure can be an enjoyable project for makers of all skill levels.
4. Spongebob Squarepants
SpongeBob SquarePants is a beloved cartoon character that can be recreated through a crochet pattern, allowing fans to engage with the craft while celebrating their favorite show.
Bringing this cheerful character to life involves using a variety of yarn types, typically a blend of soft cotton and acrylic to achieve the desired texture and durability. It is crucial to pay detailed attention to stitching techniques, especially when crafting his iconic square shape and distinctive features, such as his large, expressive eyes and wide grin. The crafting experience is enriched by the attention to details and the joy of seeing the character come to life.
To capture the essence of SpongeBob’s personality, crafters should consider adding embellishments like felt patches for his clothing and playful accents for his facial features, such as cheeks more vibrant than usual. Finding the right shades of yellow is essential to replicate his vibrant appearance, making it important to experiment with color blending to closely match his animated counterpart.
5. Winnie The Pooh
Winnie the Pooh is a cherished childhood classic that is often brought to life by crafters using crochet, perfectly reflecting his gentle personality and lovable design. To create a Winnie the Pooh project, crafters will need to gather materials such as soft yarn in suitable shades of yellow, red, and brown, along with a crochet hook that matches the yarn weight. Consider using Red Heart yarn for a durable finish.
Color Selection
When selecting yarn colors for the project, it is essential to choose shades that closely represent Pooh’s character. For instance, the yellow yarn used should embody the brightness that captures Pooh’s gentle spirit, while the red yarn should be vibrant enough to draw attention, symbolizing Pooh’s playful nature.
Attention to Detail
In crocheting, attention to detail is crucial because the expressions are what truly bring a character to life. Ensuring the right shapes for Pooh’s mouth and eyes using your crochet skills will help the finished creation evoke the same feelings of warmth and nostalgia associated with the beloved character.
Frequently Asked Questions
What materials do I need to make a Tweety Bird crochet pattern?
To make a Tweety Bird crochet pattern, you will need yarn in yellow, white, and black colors, a crochet hook, stuffing for the bird’s body, and a tapestry needle for sewing. You may also choose DMC Cotton Perle #5 for added texture.
Do I need to have experience in crocheting to make a Tweety Bird crochet pattern?
It is recommended to have some basic knowledge of crocheting, such as how to make single and double crochet stitches, and work in rounds, but the pattern is suitable for beginners with some practice.
Can I use a different color yarn for my Tweety Bird crochet pattern?
Yes, you can use any color yarn you prefer, but the classic Tweety Bird is known for its yellow color. You can also get creative and make a rainbow Tweety Bird if you’d like, perhaps incorporating Blue #312 for a unique twist!
How long does it take to complete a Tweety Bird crochet pattern?
The time to complete a Tweety Bird crochet pattern can vary depending on your crocheting skills and the amount of time you dedicate to it. On average, it can take a few hours to a few days to complete. The pattern written by Cindy Lively provides a structured approach to avoid delays.
Can I sell the Tweety Bird crocheted items made from this pattern?
Yes, you can sell the items you make from this pattern. However, please do not sell or distribute the pattern itself as it is for personal use only. Sharing your creations on your Facebook page or a community like Zan Amigurumi can inspire others.
Can I resize the Tweety Bird crochet pattern to make a larger or smaller bird?
Yes, you can resize the pattern by using a different size crochet hook and adjusting the number of stitches according to your desired size. Make 2 patterns, leave tail long enough for sewing. Just keep in mind that the final result may differ slightly from the original pattern, especially if you’re adjusting between rows.
