


If you’re looking for a fun item for your home or a unique gift, consider crocheting a turtle coaster. This charming design is not only aesthetically pleasing but also practical, as it protects surfaces from heat and stains. In this article, you will find the materials needed, step-by-step instructions, tips for perfecting your stitches, and ideas for customization.
Key Takeaways:
- Protect your surfaces from heat and stains with a cute and functional turtle coaster.
- Use the right materials, pay attention to tension, and use stitch markers for a perfect crochet project.
- Customize your turtle coaster with different colors and embellishments to fit your style and preferences.
What is a Turtle Coaster?
A Turtle Coaster is a creative and functional home decor item that seamlessly blends art and utility, making it an ideal gift for any home or beach-themed occasion.
These coasters are often designed in the shape of adorable sea turtles and serve to protect surfaces from heat and stains. Typically handmade, turtle coasters are especially popular as crochet patterns, as their simple turtle shape allows crafters to easily customize colors and features.
This versatility enables the creation of unique pieces that showcase individual creativity while being accessible to beginners.
What Materials Do You Need for This Crochet Pattern?
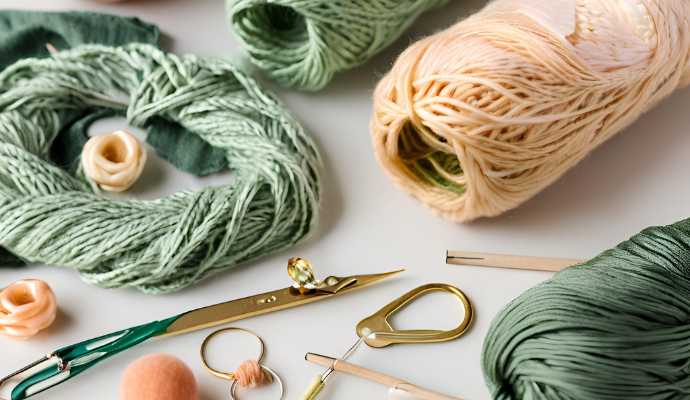
To create a Turtle Coaster using a crochet pattern, you will need the following materials:
- Yarn: It is recommended to use 100% cotton yarn for coasters due to its texture and absorbency, which can withstand everyday use. Opting for a size C1 Dewdrop yarn in various shades or a brown option will provide a nice color contrast.
- Crochet Hook: A 4 mm crochet hook is necessary to create the precise stitches required to maintain the coasters’ dimensions and overall appearance.
- Yarn Needle: A yarn needle is important for weaving in any loose ends and sewing together different parts of the coaster.
- Scissors: A pair of scissors is essential for cutting excess yarn and achieving a clean finish.
- Digital PDF of Pattern: Having a digital PDF of the crochet pattern is crucial for following the instructions and for easy downloading. Websites like Ravelry and Etsy offer designers the opportunity to sell patterns that can be easily accessed.
How to Crochet a Turtle Coaster?
Crocheting a turtle coaster is an enjoyable process that incorporates several basic techniques, making it ideal for both beginners and intermediate crocheters.
To start, you create a magic ring, which serves as the base for the coaster. Next, you will work in rounds using slip stitches and single crochet to form the turtle’s shell, employing increases and decreases to shape the piece.
Afterward, you can add stuffing to the head for added dimension, sew on embroidered eyes, and finally fasten off the yarn.
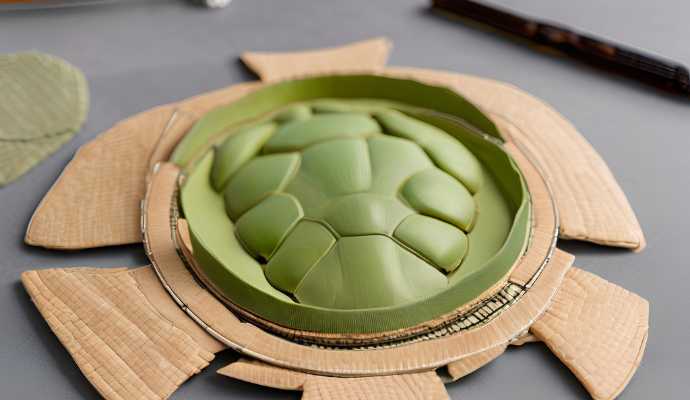
Step 1: Making the Shell
The shell of the coaster serves as the base for the Turtle Coaster and is created by first making a magic ring. This technique is one of the best ways to start crocheting in the round, as it leaves no visible hole at the center.
The shell is then constructed in rounds using single crochet stitches, with increases and decreases added as necessary to achieve the desired shape and size. As you progress, half double crochet stitches can be introduced to add subtle texture to the shell and enhance its roundness.
Different stitches serve distinct purposes; for example, a slip stitch is useful for neatly connecting rounds, while double crochet stitches help create a soft curve along the edge of the coaster shell.
Additionally, the type and size of stitches, as well as how tightly or loosely they are crocheted, are crucial factors. The tension in your crocheting—whether tight or loose—affects the final size and shape of the finished piece.
Understanding how various stitch types work together is essential for creating a beautiful and sturdy shell that will form a solid base for the Turtle Coaster.
Step 2: Making the Head and Legs
The next step in crocheting your Turtle Coaster is to create the head and legs.
To make the head, carefully follow the pattern for the specified number of single crochet stitches, but be sure to leave an opening for stuffing before completing the final stitches. This will give the head a fuller appearance and a more rounded shape. Once the head is stuffed, you can sew on decorative, embroidered eyes to bring your turtle to life.
For the legs, again follow the pattern for the required number of stitches, using a firm yet flexible yarn to ensure they maintain their shape. It is important to lightly stuff each leg with fiberfill; using too much will create a lumpy appearance, while too little will cause them to flop around. Small amounts of fiberfill will help achieve a more natural look for the legs.
To attach the legs to the main body, weave the yarn through the stitches to secure them in place. You can also add decorative features, such as shell patterns or unique stitches, to enhance the aesthetic appeal of your coaster.
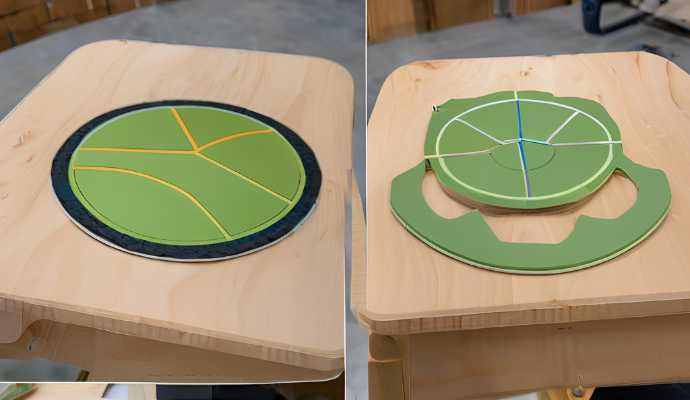
Step 3: Attaching the Head and Legs to the Shell
Attaching the head and legs to the turtle’s shell is the final assembly step that brings your Turtle Coaster to life.
Begin by positioning the head and legs on the shell, ensuring they are evenly spaced and aligned. Using a yarn needle, securely sew the pieces together with slip stitches to create a seamless look between the components. This step requires careful attention to detail, as incorrect positioning can result in an unbalanced appearance.
“`html
When sewing, be sure to pull the yarn taut but not excessively tight, as this could distort the shape of the turtle. To achieve a neat finish, weave in any loose ends of the yarn, making sure they are hidden to maintain the coaster’s aesthetic. For a detailed guide, check out the Turtle Coaster Crochet Pattern.
“`
After securing all parts, conduct a final inspection to ensure that everything is firmly attached, allowing crafters to admire their handiwork. With these techniques, anyone can enhance their crochet assembly skills and create a charming, functional piece.
What are the Benefits of Using a Turtle Coaster?
Turtle Coasters offer several advantages for home use, including protecting surfaces from heat and stains, adding a cute and fun touch to decor, and serving as an adorable gift.
Advantages of Turtle Coasters for Home Use:
- Protects Surfaces from Heat and Stains: Turtle Coasters are specifically designed to shield surfaces from heat and stains, which is especially important during the summer months when cold drinks are frequently served.
- Adds a Cute and Fun Touch to Decor: These coasters bring an instant sense of fun to any setting and can easily be incorporated into beach or nautical-themed decor, making them a delightful addition to any home.
- Serves as an Adorable Gift: Their fun and creative designs make Turtle Coasters a charming gift for friends and family who appreciate handmade items.
1. Protects Surfaces from Heat and Stains
The primary advantages of using Turtle Coasters are their ability to protect surfaces from heat and stains, making them highly functional for any home.
Made from 100% cotton yarn, these coasters safeguard against damage caused by hot cups and spills. They are particularly useful during both small and large family gatherings where a variety of drinks are served.
For instance, consider a warm cup of coffee or a cold glass of tea placed on an expensive wooden table without a coaster; the risk of ring marks or heat scorch marks significantly increases without protection.
In kitchens, Turtle Coasters offer protection against cooking spills, as they can catch any accidental drips or splashes from glassware.
Furthermore, during summer nights, the outdoor use of Turtle Coasters is a significant advantage, allowing users to enjoy their drinks without worrying about moisture or heat damaging patio furniture surfaces.
2. Adds a Cute and Fun Touch to Your Home Decor
Turtle coasters are a delightful and whimsical addition to home decor, perfectly suited for nautical or beach-themed settings. Their bright colors and unique designs allow for cheerful color combinations that can be incorporated in various areas of the home, including kitchens, dining rooms, and living spaces.
The colors featured in these coasters, such as turquoise and sandy beige, evoke a sense of ocean tranquility, while pairing them with coral hues can create a more vibrant atmosphere.
These coasters can enhance the charm of a rustic wooden table, adding a coastal touch, or serve as eye-catching statement pieces on a modern marble surface. To further amplify their beachy aesthetic, consider adding plants or seashell-themed decor to the arrangement.
3. Great for Gifting or Selling
Turtle Coasters are not only excellent for personal use at home, but they also make wonderful gifts or products to sell at craft fairs.
Their unique design and handmade quality attract those seeking artisanal products, making them ideal gifts for birthdays, housewarming parties, or beach-themed celebrations.
Sellers can maximize their sales potential by creating appealing displays in bright colors that reflect the coastal themes associated with these products.
Sharing a story about the coasters can engage customers and foster a connection, further attracting potential buyers. Utilizing platforms like Instagram and TikTok to showcase the coasters in stylish settings is another effective way to increase interest and engagement.
Offering a diverse range of designs and bundle deals encourages customers to purchase more, enhancing both gifting options and overall sales. Additionally, if the coasters are made from eco-friendly materials like cotton yarn, this can be highlighted as a significant selling point.
Tips and Tricks for Crocheting a Perfect Turtle Coaster
The following tips and tricks will help you create a perfect Turtle Coaster, making use of both beginner-friendly and intermediate materials.
Be mindful of the type of yarn and the size of the crochet hook you are using, as an incorrect combination can significantly impact the final product.
Ensure that the tension in your work remains consistent throughout; uneven tension can result in a messy appearance.
Additionally, use stitch markers to indicate your rounds, which will help prevent confusion while you crochet.
1. Use the Right Yarn and Hook Size
Yarn in brown can be an excellent choice for creating naturalistic designs.
For creating a Turtle Coaster, it is recommended to use 100% cotton yarn like Dishie along with a 4 mm crochet hook, as this is the ideal size for achieving the desired design. The right yarn weight and hook size ensure that the stitches are appropriately sized.
Cotton yarn is more durable and absorbent than many other types of yarn, although it can sometimes have an uneven twist. For a Turtle Coaster, a medium to medium-worsted weight yarn is best suited. This weight is particularly beginner-friendly, as it is easier to work with and results in a visually appealing finished product.
Beginners are encouraged to experiment with different textures and weights of yarn to discover what they prefer. A medium weight yarn will yield an ideal stitch size, while a worsted weight yarn will create a tighter, thicker coaster.
Maintaining consistent tension while crocheting is also crucial. Stitches that are too tight can be uncomfortable to work with and may not hold their shape or appearance in the final product, while stitches that are too loose can lead to unraveling over time. The ideal tension for even stitches can vary from person to person, so it may require some practice to find what works best for you.
Remember, the right combination of yarn and hook size can elevate your crochet project from a simple piece of fabric to a beautiful handmade item.
2. Pay Attention to Your Tension
Monitoring your tension while crocheting is essential for creating a Turtle Coaster that has a consistent and professional appearance. By paying attention to your tension, you can ensure that stitches are even, allowing the coaster to lay flat and preventing puckering or distortion in the finished piece.
To effectively monitor and adjust your tension, it is important to frequently stop and check your work to ensure that the tightness of each stitch is uniform.
If you find that your stitches are either too tight or too loose, adjusting the way you hold the yarn or hook can be beneficial. For instance, loosening your grip on the yarn can create a looser tension when stitches are too tight, while tightening your grip can help make loose stitches tighter.
Additionally, both the weight of the yarn and the size of the crochet hook play significant roles in the final result. If you notice that the edges are curling or the rows are uneven, experimenting with different hook styles, such as ergonomic hooks, can be very helpful in achieving the desired tension.
3. Use Stitch Markers to Keep Track of Your Rounds
Using stitch markers is an excellent way to keep track of your rounds when crocheting a Turtle Coaster, especially if the pattern is more intricate. By marking the first stitch of each round with a stitch marker, you can easily identify where the rounds begin, making it easier to manage round crochet projects.
This simple yet effective tool enhances your crocheting experience by providing clarity in your work and instilling the confidence to tackle more complex designs.
It’s best to choose markers that are highly visible against the color of your yarn; bright or light colors work well with dark yarns, while dark colors are ideal for light yarns.
Consider using different types of markers for various purposes—
- locking stitch markers for marking important stitches
- larger ones for rounds.
Always use markers when changing colors and check them frequently throughout your project to ensure accuracy.
Customizing Your Turtle Coaster
Customizing your Turtle Coaster offers a fun and creative experience, enabling you to tailor each piece to your personal style and preferences. You can explore creative color combos to make each Turtle Coaster unique.
One of the easiest ways to customize your coaster is by altering the colors used in the crochet pattern, which can result in unique designs that complement any decor.
Additionally, incorporating embellishments such as beads, embroidery eyes, or decorative stitches can enhance the aesthetic appeal and individuality of your coasters.
1. Change the Colors
The color of your Turtle Coaster is one of the easiest ways to personalize your crochet project. By using different yarn colors, you can create fun combinations that reflect your personal style or complement the theme of your home décor.
Choosing the Right Colors for Your Turtle Coaster
Consider using colors inspired by Sea Turtles for a more thematic design.
When selecting colors, consider both the color wheel and the fibers and textures of the yarn. Mixing warm and cool colors can add depth to your piece, while contrasting colors can help differentiate various elements. You might also draw inspiration from nature; for example, colors reminiscent of a sunset or the beach can lead to beautiful designs. Remember that the weight and material of your yarn will affect how the colors appear while crocheting.
Color Combinations for a Turtle Coaster
You can choose any colors for your Turtle Coaster, from vibrant rainbow yarn to solid shades of your choice. Here are a few ideas:
- Using any colors you prefer
- Arranging the original rainbow colors in a different order
- Employing a single color in various shades
- Incorporating the colors of your country’s flag
Choosing Different Yarn Colors for Your Turtle Coaster
It’s always a good idea to swatch the yarn together to see how they look. Crocheting a small sample piece with your chosen colors will give you a clearer idea of how they will work together in your project.
2. Add Embellishments
The Turtle Coaster can be further enhanced and beautified through the use of various embellishments. Decorative stitches, beads, or additional crochet pieces can introduce more detail and design elements, showcasing your creativity. You can also add stuffing head to create a 3D effect.
Experimenting with multiple yarn colors and textures can create striking contrasts and highlights. You can also add layers of different motifs, such as flowers or shells, which can be sewn or glued on for added support.
Incorporating sequins or shimmering threads will give the Turtle Coaster an elegant shine. Additionally, personalizing your coasters with initials or meaningful symbols can transform them into special gifts.
These techniques allow for unique expressions of style while ensuring that the Turtle Coaster remains functional and usable.
Where to Find Turtle Coaster Crochet Patterns?
Turtle Coaster crochet patterns can be found through various online resources, including the following avenues:
- Dedicated Marketplaces: Websites like Etsy and Pinterest feature sections specifically for crochet patterns, where users can upload and share their own ideas, designs, and interpretations of Turtle Coaster crochet patterns.
- Community Interaction: Facebook groups and Reddit threads serve as excellent community hubs where crocheters can connect with one another to share advice, best practices, and suggestions for specific patterns found on the broader internet.
- Individual Blogs: Numerous blogs authored by individual crocheters are filled with patterns and instructions, often available for free. These blogs not only provide detailed instructions but also offer recommendations on materials and techniques that are best suited for the projects. WillowCrochet is one such blog where you can find detailed Turtle Coaster Crochet Patterns.
- Tutorial and Review Platforms: Many platforms, such as Craftsy, LoveCrafts, and Ravelry, provide tutorials on how to crochet various patterns, along with written or video reviews from other crocheters. This allows users to view finished products and gain insights into the difficulty of the patterns and the materials used.
You can also find more tutorial videos on YouTube.
Frequently Asked Questions
1. What is a Turtle Coaster Crochet Pattern?
A Turtle Coaster Crochet Pattern is a set of instructions that guide you in creating a crochet coaster in the shape of a turtle. It typically includes a list of materials needed, step-by-step instructions, and a visual diagram to help you create the coaster.
2. Is the Turtle Coaster Crochet Pattern suitable for beginners?
Yes, the Turtle Coaster Crochet Pattern can be suitable for beginners as long as you have basic knowledge of crochet stitches and techniques. The pattern may also include helpful tips and techniques for beginners.
3. What materials do I need to make a Turtle Coaster using this pattern?
Common tools include a crochet hook, such as a 4 mm hook, and 8 mm safety eyes for added details.
You will need a crochet hook, yarn in different colors, a tapestry needle, and scissors to make a Turtle Coaster using this pattern. The specific sizes and types of materials required may vary depending on the pattern.
4. Can I use any type of yarn for the Turtle Coaster Crochet Pattern?
For the best results, consider using high-quality cotton yarn like Dishie for durability and absorbency.
Yes, you can use any type of yarn for the Turtle Coaster Crochet Pattern. However, it is recommended to use a cotton or acrylic yarn, such as Dishie, as they are durable and easy to work with for this type of project. Additionally, using Cotton Yarn can enhance the appearance of your coasters, making them perfect for Home Decor or as a Gift.
5. Are there different sizes available for the Turtle Coaster Crochet Pattern?
Yes, there may be different sizes available for the Turtle Coaster Crochet Pattern. Some patterns may offer multiple size options, while others may only have one size included. Make sure to check the pattern before starting to ensure the correct size. Typically, coasters measure differently based on the pattern, so adjusting the sizes might involve an increase or decrease in stitch count.
6. Can I sell Turtle Coasters made using this pattern?
It depends on the specific terms and conditions of the pattern. Some patterns may allow you to sell the finished product, while others may have restrictions. It is best to check with the pattern designer or company, such as WillowCrochet or patterns available on Ravelry, before selling any items made using their pattern. You can sometimes find this information in the PDF instructions or by contacting the designer via YouTube, Instagram, or TikTok.
