


Are you ready to bring a beloved character to life with your crochet skills and creative patterns?
This guide will help you create your very own Puss in Boots plush toy using a well-crafted crochet pattern. It includes all the materials needed and detailed, step-by-step instructions.
Whether you’re an experienced crocheter or a beginner looking to try something new, you’ll find helpful tips, customization ideas, and safety advice for your Puss in Boots amigurumi projects.
Grab your yarn, crochet hook, and stitch markers, and let’s get started on this fun amigurumi project!
Key Takeaways:
- Get creative with your materials by using different colors and textures of yarn to give your Puss in Boots a unique look.
- Follow the step-by-step instructions carefully to ensure your Puss in Boots comes out looking just like the beloved fairytale character.
- Make sure to always prioritize safety when using crochet toys, such as securing all parts tightly and avoiding small parts that may be hazardous for children.
Materials Needed for the Pattern
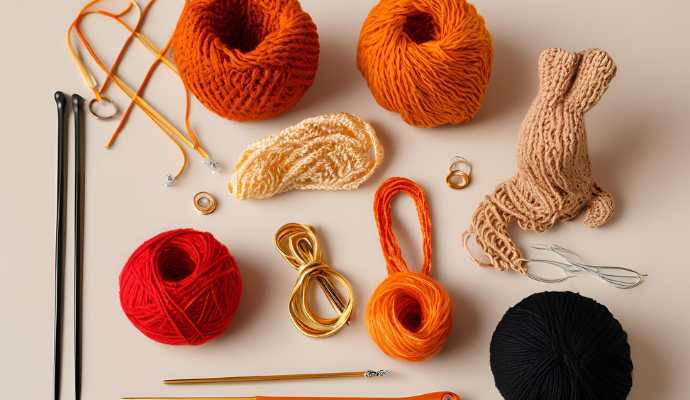
Creating a Puss in Boots amigurumi requires various materials, including different yarn types like golden orange, red, and black yarn, fibers, and other supplies needed to craft a crochet doll of the beloved fairy tale character. Don’t forget to use safety eyes for added expression.
Yarn: The most commonly used yarn for the body of the Puss in Boots amigurumi is golden orange, often made of acrylic yarn for durability. Additionally, red yarn is used for his hat and sash, white yarn for his gloves, black yarn for his belt and boots, and yellow yarn for the sword ornament.
Eyes: Safety eyes are typically used for amigurumi, but simpler alternatives can be made using white and black yarn. For an even easier version, wool felt or fabric paint can be utilized. Little Yarn Friends often recommend safety eyes for a polished finish.
Stuffing: Fiberfill stuffing is the standard choice for amigurumi, ensuring the finished doll maintains its shape and is lightweight. Other options such as cotton or wool scraps and shredded paper can also be used.
Glue: Fabric glue is helpful for attaching various elements of the amigurumi, especially when attaching pieces like the ears or accessories.
Basic Safety Equipment: Essential safety items include scissors, a yarn needle, and a measuring tape.
Basic Crochet Tools: The necessary crochet tools comprise a crochet hook, yarn needle, stitch markers, and a small pair of scissors.
1. Yarn
When creating your Puss in Boots amigurumi, the choice of yarn significantly influences the final appearance of the project, with a preference for golden orange yarn for authenticity.
For this crochet pattern, it is recommended to use golden orange yarn for the main body, black yarn for the boots and detail areas, and red yarn for the accessories.
The type of yarn fiber is also crucial, as it affects both the aesthetic and durability of the doll. A blend of acrylic and wool strikes the right balance between softness and strength, making it an ideal choice for amigurumi projects.
A smooth texture is preferable, as it facilitates easier crocheting and results in a more polished finished product. Yarn brands like Red Heart offer a variety of options, while specialty yarns can be sourced from platforms like Etsy and Ravelry.
When searching for the perfect yarn for your Puss in Boots amigurumi, it is helpful to read reviews to ensure you select the best yarn for your specific needs.
2. Crochet Hook
Choosing the right crochet hook is essential for creating your Puss in Boots amigurumi, as it directly impacts the tightness and overall quality of your stitches. It is generally recommended to use a crochet hook that matches the size of the yarn weight you select, ensuring that your single crochet and double crochet techniques are executed as intended, especially in continuous rounds.
The size of the hook affects how well the stitches hold together and influences the appearance of your final amigurumi. Lighter yarns should be paired with smaller hooks, as they create tighter, neater stitches that maintain their shape. Conversely, thicker yarns work best with larger hooks, resulting in a looser and more comfortable drape.
A common recommendation is to use a 4mm hook for worsted weight yarn or an even larger size for bulky options. Each hook size produces a different gauge, which can significantly affect the final look of the adorable character you wish to create.
3. Stuffing
Fiberfill is the most commonly used stuffing for amigurumi dolls, such as Puss In Boots Crochet Pattern. Its softness and durability help the finished doll maintain its shape while keeping it lightweight.
Additionally, fiberfill is hypoallergenic, making it an excellent choice for individuals with allergies or sensitivities.
To achieve an even distribution of stuffing in the limbs and body of the amigurumi, fill each part gradually from the end. This technique will prevent lumps and uneven spots in the finished doll.
If more control is needed, a chopstick or a similar object can be used to pack the stuffing into tighter areas.
4. Scissors
A good pair of scissors is an often-overlooked but essential tool for any crochet project, including your Puss in Boots amigurumi and other crochet accessories.
Quality scissors enable you to cut yarn accurately and cleanly, making it easier to achieve neat color changes and finish your projects with precision.
Selecting the right pair involves more than simply grabbing any old scissors from your drawer. You should consider factors such as sharpness, which can significantly impact the ease of cutting through various yarn textures, and comfort, especially if you’re working on larger projects that require prolonged use.
Well-designed scissors feature ergonomic grips that help prevent hand fatigue, making them an essential part of your crafting toolkit.
Within the crafting community, these tools are valued not only for their utility but also for their ability to enhance the overall crafting experience, allowing creators to focus on their artistic expression without the frustration of struggling with subpar cutting tools.
Step-by-Step Instructions
The instructions for creating your own Puss in Boots amigurumi provide a detailed, step-by-step guide to following the crochet pattern, with photo demonstrations and pattern details to assist throughout the process.
Each stage of the process, which includes making the head, body, legs, tail, and other parts, incorporates essential crochet techniques such as the magic ring, single crochet, and double crochet, all of which are necessary for achieving a professional-looking finished doll.
This guide will share both the pattern instructions and photo demonstrations to assist you throughout the process.
1. Head and Body
To begin your Puss in Boots amigurumi, start by crocheting the head and body, typically created using a magic ring to establish a firm base for working in continuous rounds. The magic ring technique not only helps you form a seamless shape but also prepares the body for the final decorative details, such as the belly fur and boot patterns.
- First, create a slip knot and chain two. This will allow you to crochet into the first chain, forming a tight circle.
- Once the magic ring is secured, chain one and start the first round with single crochet stitches, ensuring that you work the stitches evenly around the circle to develop the rounded shape of Puss’s head.
- For the body, continue using single crochet in continuous rounds, increasing the stitch count as necessary to achieve a fuller shape.
- Regularly check the size of your work and adjust your stitch size as needed to ensure that the head and body fit together correctly for a polished final result.
2. Legs and Feet
After completing the head and body, the next step is to create the legs and feet, which will add the distinctive features of your Puss in Boots amigurumi. The legs will utilize boot patterns and techniques such as single crochet and slip stitch to provide strong support and balance to your finished doll.
Amigurumi legs and feet contribute both strength and design elements to the character. When selecting the yarn and hook size, it is important to consider the overall appearance you wish to achieve and choose accordingly so that the boot patterns align with your desired look.
A common technique for making the legs involves using a series of single crochet stitches. This method creates tight stitching that maintains its shape well and allows for clearly defined parts.
You might also consider using different colors and stitches, such as the slip stitch, which helps secure the top of the boot in place and gives your character a polished appearance. The complexity of the boots can enhance your design, so don’t hesitate to incorporate various techniques.
3. Arms and Hands
The next important step in creating your Puss in Boots crochet doll is to make the arms and hands, which add both function and personality to your amigurumi. Be sure to follow the assembly instructions and use the appropriate crochet techniques to achieve the correct shape and proportions. For a detailed guide, check out this Puss In Boots Crochet Pattern, available as a Ravelry download for $8.79 USD.
Start by selecting a yarn color for the arms that matches the main body color. You will primarily use single crochet stitches and slip stitches to ensure a clean finish.
As you crochet, gradually decrease the stitches toward the wrist to create a tapered appearance, preventing the arms from looking too bulky. Once you have crocheted the arm and hand pieces, lightly stuff them to give them shape, and securely sew them onto the body at the shoulders.
Ensuring a secure attachment will allow the arms to be posed without drooping, giving your doll a polished and completed look.
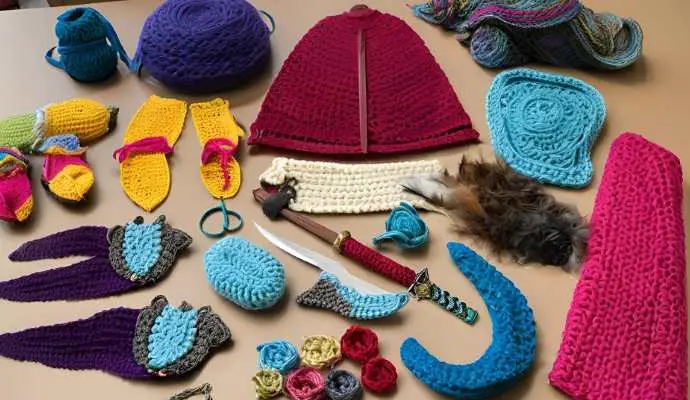
4. Ears, Tail, and Accessories
To complete your Puss in Boots amigurumi, you will need to create the ears, tail, and accessories like boots and a hat that are essential to the character, giving your crochet project its unique look. By employing specific crochet techniques such as the magic ring, single crochet, and double crochet, you can make these features distinct and adorable, seamlessly attaching them to the completed project.
- Crochet the Ears: Use a combination of single and double crochet stitches to create ears that have a nice texture while remaining sturdy. Consider using black yarn for contrast against the head body made with golden orange or white yarn.
- Crochet the Tail: Make a longer chain and utilize slip stitches for a sleek finish. Ensure the tail matches the main body by using continuous rounds to maintain a consistent look.
- Crochet the Accessories: For accessories like the hat and boots, use the work-in-the-round technique to achieve a defined shape and appearance. You might choose a red yarn for a standout piece or use black yarn for traditional boot patterns.
- Attach the Finished Pieces: After creating each component, carefully attach them to the main body using a yarn needle. Ensure that they are securely fastened while preserving their whimsical characteristics. Using safety eyes can enhance the doll’s expressive features. Your finished character will truly benefit from this meticulous attention to detail.
Tips and Tricks for Crocheting Puss in Boots
Here are some tips and tricks for crocheting your Puss in Boots amigurumi, drawn from the best practices and experiences of other crafters. These suggestions not only simplify the process but also inspire creative customizations.
Beginner crafters should opt for medium-weight yarn, such as acrylic yarn, that is easy to handle and forgiving in texture. More experienced crocheters may prefer to work with exotic fibers or blends that achieve their desired look and feel.
Proper yarn management is essential; ensure your skeins are untangled to avoid frustration. Consider using a yarn bowl or bag to keep everything organized. A stitch marker is also a helpful tool for keeping track of your rounds in larger projects.
Stitch precision is also crucial. Maintain even tension throughout your work, and take the time to practice your stitches before starting the project to ensure consistent results.
If you notice mistakes, such as uneven seams or missed stitches, don’t hesitate to unravel and begin again—this is a natural part of the learning process.
Finally, don’t forget to express your creativity by experimenting with colors or adding unique details like clothing or accessories to make your amigurumi truly one-of-a-kind. The crafting community often shares projects and ideas on platforms like Instagram and Facebook, providing inspiration for your next creative endeavor.
How to Customize Your Puss in Boots
Customizing your Puss in Boots amigurumi provides an opportunity to express your creativity and personal style, resulting in a unique creation that reflects its maker.
By experimenting with different colors and adding embellishments, you can turn your crochet doll into a one-of-a-kind character that stands out in any collection.
1. Change the Colors
Color is one of the simplest and most effective ways to customize your Puss in Boots amigurumi. By simply changing the yarn colors used throughout the project, you can create a completely new and unique version of the original character.
Techniques such as the join-as-you-go method can provide smoother transitions with less noticeable changes, while the carry-the-yarn method allows for subtle shifts where the colors blend together.
When selecting a color palette for your Puss in Boots amigurumi, you might choose to stay close to the original character’s colors or experiment with unconventional combinations, such as a dark navy blue paired with bright orange or a palette of soft pastels.
This approach not only creates a visually striking effect but also offers a different avenue for creative expression.
2. Add Embellishments
Embellishments for your Puss in Boots amigurumi can enhance its design and personality. From tiny accessories to decorative features, these elements allow you to personalize your crochet doll and showcase your skills and creativity.
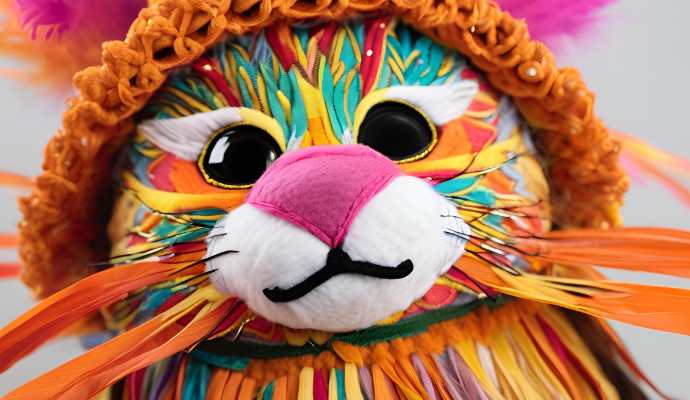
For example, this Puss in Boots amigurumi sports a scarf that matches its boots and hat, along with a tiny heart accessory on its hat. Consider adding whimsical hats, playful scarves, or unique facial features, such as expressive eyebrows or intricate whiskers.
Each accessory can reflect different aspects of the creator’s personality, adding layers of storytelling to the finished piece. A vibrant scarf might suggest a fun-loving spirit, while a more traditional hat could evoke a sense of nostalgia.
“`html
By thoughtfully selecting these embellishments, you can not only elevate the charm of your amigurumi but also leave a personal touch that resonates with others, making your creation truly one-of-a-kind. For inspiration, check out this Puss In Boots Crochet Pattern. Alternatively, explore pattern details on Ravelry for a download price of $8.79 USD. Both platforms offer a plethora of creative patterns and assembly instructions suitable for different skill levels.
“`
Safety Tips for Using Crochet Toys
Ensuring the safety of crochet toys, such as your Puss in Boots amigurumi, is essential when these items are intended for children or pets.
By following safety tips—such as securely attaching safety eyes and using non-toxic materials—you can minimize hazards and create a safe and enjoyable crafting experience.
It is important to use durable stitches to prevent seams from coming apart, and to regularly check for loose threads that could pose choking hazards. Additionally, features should be age-appropriate, and very small parts should be avoided when making toys for young children. Materials such as fiberfill for stuffing should also be safe and non-toxic.
The crafting community can share valuable information and experiences regarding best practices to help others learn the safest ways to create toys. By taking these safety precautions, crafters not only enhance their enjoyment of the creative process but also foster confidence in the safety and quality of their handmade toys, which can bring comfort and happiness to their recipients.
Frequently Asked Questions
What is a Puss in Boots crochet pattern?
A Puss in Boots crochet pattern is a set of instructions for creating a crochet toy or decoration in the shape of the famous fairy tale character, Puss in Boots.
Do I need prior crochet experience to make a Puss in Boots crochet pattern?
While it would be helpful to have some basic crochet skills, most Puss in Boots crochet patterns come with detailed instructions and are suitable for beginners.
What materials do I need to make a Puss in Boots crochet pattern?
Typically, you will need yarn in various colors, a crochet hook, stuffing, and any additional embellishments, such as buttons or beads. The specific materials may vary depending on the pattern you choose.
Can I sell items made from a Puss in Boots crochet pattern?
It is best to check the copyright and terms of use for the specific Puss in Boots crochet pattern you are using. Some designers may allow you to sell the finished product, while others may have restrictions.
Are Puss in Boots crochet patterns suitable for children?
As with any handmade toy, it is important to follow safety guidelines and supervise young children while playing with the finished product. Some patterns may include small parts that could pose a choking hazard.
Can I modify a Puss in Boots crochet pattern to make it my own?
Yes, you can always add your own personal touches to a crochet pattern to make it unique. However, it is important to respect the designer’s copyright and not claim the pattern as your own.
