


This guide for crocheting a hat for a cat provides details on the appropriate type of yarn and crochet hook to use, along with step-by-step instructions, tips, and tricks to ensure a comfortable fit.
Key Takeaways:
- Use the right materials, such as a proper yarn and crochet hook, for a successful hat for your cat.
- Follow the step-by-step instructions carefully to create a cute and cozy hat for your feline friend.
- Personalize your cat’s hat by adjusting the size and adding embellishments for a unique touch.
Materials Needed for the Hat for Cat Crochet Pattern
Crochet Cat Hat: Materials, Techniques, Colors, and Patterns
To create a crochet cat hat, you will need the following materials. These include considerations for fabric choice and cat-friendly patterns to ensure a comfortable fit and stylish hat.
Yarn Color and Fabric Choice:
Cat hats come in a wide array of colors, and your choice of yarn color will depend on the desired look of the finished product. Consider festive yarn colors for holiday hats like a Christmas hat or Thanksgiving hat to align with specific seasonal themes.
Yarn Type and Fabric Choice:
The type of yarn you choose should align with the project’s goals, such as ensuring the cat hat has specific durability and comfort. Consider using lightweight yarn for summer projects or warm yarn for cozy, festive hats during the colder months. Two common types of yarn for crochet cat hats are cotton yarn and acrylic yarn.
- Lightweight Yarn: Ideal for quick projects, especially for the holiday season or creating festive cat costumes like a Santa hat or elf hat.
- Cotton Yarn: This type of yarn is breathable, durable, and has a nice drape. It is easy to wash and maintains its shape without stretching or sagging. However, cotton yarn is generally more expensive than acrylic, making it less ideal for a cat hat.
- Acrylic Yarn: Acrylic yarn is a more affordable option that comes in a wide variety of colors and textures, making it a popular choice for crocheted cat hats. However, it is not as breathable as cotton and tends to retain moisture.
Crochet Techniques and Tips:
Understanding various crochet techniques and tips will enhance your overall project. These techniques will not only make your crochet cat hat more visually appealing but also allow you to incorporate cute designs and functional features, such as ear holes for a snug fit and comfort. Additionally, consider exploring free patterns and beginner-friendly crochet tips to expand your creativity.
Crochet Stitches and Techniques:
The different crochet stitches include the slip knot, chain stitch, single crochet stitch, double crochet stitch, half double crochet stitch, and treble crochet stitch. Each stitch offers a unique look and feel, which can be used to add texture or design elements to your crochet cat hat.
What Type of Yarn Should You Use?
The choice of yarn for crocheting a cat hat significantly influences both the feel and aesthetic of the final product. Lightweight yarn is ideal for creating a cat hat intended for the holiday season, while warmer yarn is better suited for the colder months of the year.
Selecting yarn in various colors can enhance a cat hat project by aligning it with a specific holiday theme or seasonal pattern, making the cat’s accessories more visually appealing.
Along with their seasonal advantages, lightweight yarn also tends to drape better and is more appropriate for intricate designs and layering. For a cheerful visual effect, pastel pinks or soft blues are excellent choices.
Conversely, warm yarn provides the comforting sensation that cats appreciate during colder weather, with rich earth tones or vibrant colors like deep burgundy and forest green producing stunning visuals.
Textured yarn can introduce a tactile element to the project, adding depth and dimension. Careful selection of these elements can ensure that the final crocheted cat hat is not only a cozy addition to a pet’s wardrobe but also a stylish fashion accessory.
What Size Crochet Hook is Needed?
Choosing the right hook size for a crochet cat hat is crucial, as it affects the fit of the hat by altering the tension of the stitches. Beginners should explore crochet techniques to determine the best hook size based on their chosen yarn and the desired fit of the hat.
The hook size should correspond to the type of yarn used, as different yarn types—such as worsted, bulky, or lace weight—require specific hook sizes for optimal results. For example, a bulky yarn paired with a larger hook will create a snugly, loosely draped hat, while a finer yarn may require a smaller hook to maintain the design’s structure and form.

Additionally, the stitches in the selected pattern (such as doubles or singles) will influence the most suitable hook size. Experimenting with various hook sizes can help you discover how the overall elasticity and drape of the hat are affected, ensuring that each design not only looks good but also fits comfortably on various head shapes.
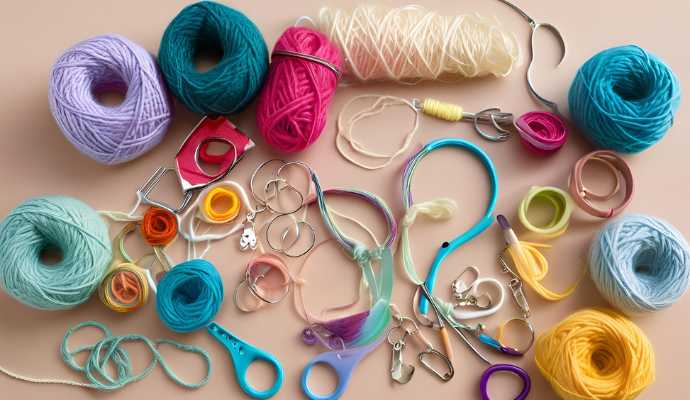
Additional Materials Needed
To complete your crochet cat hat, you will need a few additional materials beyond just yarn and hooks. Depending on your chosen cat patterns, consider incorporating pom-poms, a yarn needle, stitch markers, and adjustable straps.
Here’s a breakdown of these extras:
- Pom-Poms: These playful decorative elements add a fun touch to the hat.
- Yarn Needle: This is essential for finishing off stitches.
- Stitch Markers: These help you keep track of your crochet stitches as you work, especially important when creating intricate cat patterns or playful patterns for a unicorn hat or Viking cat design.
- Adjustable Straps: These ensure a comfortable fit for your cat, allowing for personalized hats that can accommodate various cat head sizes or even transform into a snug dog hat for your best friend.
- Safety Eyes or Felt: Use these to create adorable facial features that bring your design to life, especially in playful patterns like a unicorn hat or crown hat.
- Ribbons or Floral Trims: These can add a whimsical touch, making the hat both functional and decorative.
Decide on the placement of these decorative elements early in the process to ensure they complement the overall style of the hat. Using contrasting colors or textures can create intriguing visual effects, but be careful not to overwhelm the design.
Step-by-Step Instructions for the Hat for Cat Crochet Pattern
The crochet cat hat is a fun and easy project that is suitable for crocheters of all skill levels.
With step-by-step instructions, you will learn various crochet stitches to create a functional and stylish cat hat. This simple pattern allows for the exploration of fun designs and decorative elements, making it a quick project that you can complete in no time.
Step 1: Start with a Magic Ring or Magic Loop
The first step in creating your crochet cat hat is to start with a magic ring, also known as a magic loop. This method provides a seamless starting point for your project. The magic ring crochet technique ensures a snug fit around the base of the hat, eliminating any visible holes and resulting in a professional finish. This technique is crucial for various crochet techniques like creating ear holes or incorporating pom-poms with ease.
This technique is essential for beginner crocheters looking to expand their skills. Mastering this basic technique is important for ensuring that your hats fit snugly around the head and will pave the way for more complex designs like a bucket hat or floral designs.
To create a magic ring, wrap the yarn around your fingers in a loop, ensuring that you leave a long enough tail to work with later. Next, insert your crochet hook into the loop, grab the yarn, and pull it through to create a slip stitch or slipknot.
As you practice, pay attention to the tension of your loop; if it’s too loose, your stitches may unravel, while a loop that is too tight will make it difficult to work into. Beginners should experiment with making the magic ring using different types of yarn and hook sizes to discover the tension that works best for them.
Step 2: Single Crochet into the Magic Ring
As you prepare to create your crochet cat hat, the next step after making your magic ring is to work a single crochet into the ring. The single crochet stitch is the most fundamental crochet stitch; it is simple to execute and serves as a great foundation for learning more complex designs, such as a crochet cat hat or holiday hats.
Another important consideration when making your crochet cat hat is how you will incorporate decorative elements, such as colorful yarn or yarn pom-poms. You can add these embellishments by using knots or weaving them into the single crochet stitches as you progress. These decorative features not only enhance the structure of the piece but also contribute to a neat and tidy overall appearance, which is essential for any crocheted project.
Working into the magic ring ensures that the center of your design will be tight, preventing any holes that could detract from the finished look. As you build up the rows, think about how to integrate decorative elements like tiny ears or other embellishments that will elevate your base design, such as playful patterns for a Halloween hat or pumpkin hat.
This is the stage where your creativity can truly shine, whether you choose to experiment with different textures or incorporate unique designs that reflect your personality. For example, you can create a stylish Viking cat hat or a whimsical unicorn hat to complement the cat’s playful nature.
Step 3: Increase the Number of Stitches for Personalized Hats
To ensure that your crochet cat hat has the proper shape and fit, it is important to gradually increase the number of stitches during this step. Accurately following your pattern will create fun patterns and allow for a snug fit around your cat’s head. Understanding the crochet techniques for increasing stitches will help you achieve the desired results without compromising the quality of your work. Consider adding adjustable straps for a more comfortable fit and exploring pattern ideas like a Rachel or Amelia-inspired crochet cat hat.
Begin by identifying the points in your pattern where increases are necessary; these are often located at the beginning of each round or along specific sections. For instance, if your pattern instructs you to increase every third stitch, you would crochet two stitches and then increase by crocheting two stitches into the same original stitch. Consistency is key—if you make too many or too few increases, it will distort the shape of your hat.
For beginners, it can be helpful to use stitch markers to denote your increase points, ensuring you keep track accurately. If you follow the instructions correctly, you will end up with a well-fitting hat that maintains its intended shape and attractiveness.
Step 4: Continue Increasing Stitches
Increasing the number of crochet stitches is crucial for shaping your crochet cat hat, ensuring it widens and fits your cat’s head properly. Mastering this step is essential for learning crochet techniques that enable your hat to conform to various cat sizes and cat-friendly designs.
Be sure to follow the pattern’s instructions for increasing stitches to maintain the integrity of your project. To assist with these increases, consider marking the first stitch of each round, possibly using a slip stitch. This will help you identify the beginning of your row, making it easier to count rounds and know where to start in the next round.
Step 5: Create the Brim of the Hat
Creating the brim of the crochet cat hat is an enjoyable part of the process, as it enhances the style of the final product. A well-structured brim is crucial for ensuring that the hat fits comfortably and securely on the cat, offering a comfortable fit.
Various crochet techniques can be employed to add decorative elements to the brim. One popular method is using a double crochet stitch, which provides a solid and flexible foundation. Experimenting with different yarn weights can also introduce interesting textures to the brim. Consider lightweight yarn for a snug fit.
Additionally, colorful yarn or beads can be added as embellishments to make the hat stand out. For those feeling more adventurous, incorporating a scalloped edge or using a contrasting color at the transition can create a striking visual effect.
These small details not only showcase the maker’s creativity but also ensure that the hat remains practical and comfortable for the cat.
Step 6: Add Ears to the Hat
Adding ears to your crochet cat hat is a fun way to enhance the overall look of your project. You can use various crochet cat patterns to create ears of different shapes and sizes, which will significantly increase the cuteness factor of your hat. Whether you opt for pointed Viking cat ears or rounded unicorn hat ears, this addition is sure to draw more attention to your creation.
To get started, choose a yarn color and stitch pattern for the ears that complements the style of your hat. You can create ear shapes by crocheting two identical pieces that can either stand tall or flop over, depending on your desired aesthetic. Don’t forget to include ear holes for a more realistic and comfortable fit for your cat.
Once the ears are completed, sew them securely and evenly onto the top of the hat to frame the face nicely, ensuring that any loose ends are tucked in.
For added flair, consider incorporating contrasting colors or fun accents, such as embroidery or buttons, to the ear pieces. These details can help tie the entire crochet hat design together and make your project even more charming.
Step 7: Finish off the Hat
The final touches on your crochet cat hat are essential steps that ensure your project is completely finished, allowing you to secure and tidy up all elements. Begin by checking the fit and comfort of the hat, making any necessary adjustments, and considering the addition of decorative features such as pom-poms or personal touches to make the hat more suitable for your pet.
- Loose Ends: Start by weaving in any loose ends securely to prevent unraveling, ensuring that all components are well attached to one another.
- Hat Fit: Verify that the brim fits snugly, adjusting as needed to ensure your pet’s comfort.
- Beautification: Consider sewing fun decorative pieces onto the hat, such as little ears or a small bow on the side, to enhance its playful appearance.
- Wording or Designs: Use fabric paint to add your pet’s name or a fun paw print design for a personalized touch.
- Beauty: You may also want to add sequins or beads for an extra bit of shine.
Tips for Crocheting the Perfect Hat for Your Cat
Crocheting the perfect hat for your cat requires careful attention to detail and a few helpful tips to ensure the final product is both adorable and functional.
From selecting the right yarn color to adjusting patterns for a comfortable fit, these suggestions are designed to assist beginner crocheters in achieving their desired results. By emphasizing the importance of practice and patience, you’ll be enableed to refine your skills and create personalized hats for your feline friend.
Tip 1: Use a Smaller Hook for a Smaller Cat
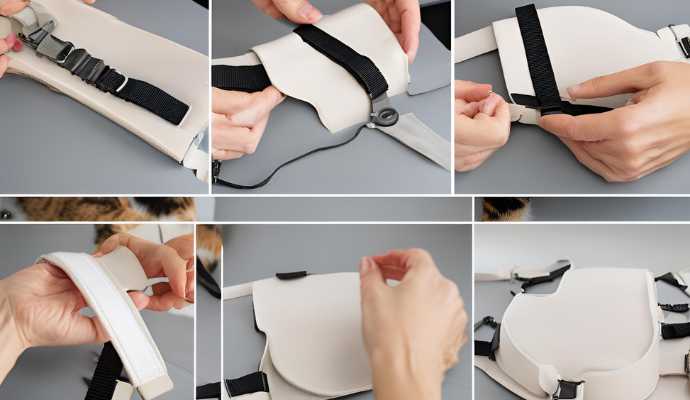
One important tip for crocheting the perfect hat for your smaller cat is to use a smaller crochet hook, which helps ensure a snug fit. This adjustment can significantly impact the hat’s fit and comfort, as well as enhance your crocheting techniques.
Consider incorporating adjustable straps to achieve the best possible fit for your feline friend. Using a smaller crochet hook results in tighter stitches, creating a more secure and comfortable design while effectively trapping warmth within the fabric. This is especially beneficial during colder months, keeping your small cat cozy while looking stylish. Choose warm yarn to further enhance the hat’s insulation.
When creating adjustable straps, it’s advisable to use a soft yarn to prevent any irritation against their delicate skin. You might also consider using a simple button or toggle closure to allow for easy adjustments, ensuring that the hat remains snug without being overly tight, so your cat can enjoy wearing it without discomfort.
Tip 2: Adjust the Number of Stitches for a Larger Cat
Adjusting the number of stitches for a crochet hat designed for a larger cat is essential to ensure a comfortable and cat-safe fit. Modifying these numbers based on your cat’s size will help guarantee that the hat is the correct size while still allowing you to use your chosen patterns. This approach increases the likelihood that your cat will enjoy wearing the hat.
To begin, measure your cat’s head circumference with a soft measuring tape. Take your measurements just above the ears and around the widest part of the head. From this measurement, you can determine the starting stitch count for the body of the hat. If your cat’s head is on the larger side, consider adding a few extra stitches for added wiggle room.
For larger cats, patterns with open stitches can provide a softer feel, while using materials such as cotton or wool blends will add both durability and comfort. It is also important to regularly check for consistency in tension and to utilize tight stitch patterns to ensure that the hat withstands your cat’s play and care. Opt for a suitable fabric choice like acrylic for its stretch and comfort.
Tip 3: Add Embellishments for a Personal Touch
Using embellishments is an excellent way to personalize crochet cat hats and add playful patterns and decorative elements. Yarn pom-poms and themed appliqués are popular choices that can reflect both your cat’s personality and your creative spirit. Consider cute designs for a more personalized touch.
These additions can elevate even the simplest projects, transforming them into accessories your pet will love. Fun designs such as stripes, polka dots, or whimsical motifs like fish or mice can infuse a cheerful element into the hats. Additionally, sewing on felt shapes or buttons can provide interesting visual appeal.
Incorporating color gradients or crochet flowers can further enhance the aesthetic, making the hats suitable for various occasions, from festive gatherings to casual outings.
This creative process not only highlights artistic design but also allows the hat to embody the unique spirit of your beloved feline companion.
Frequently Asked Questions about Crochet Cat Hats
1. Can I get free patterns for a cat hat?
Yes, there are many websites and blogs that offer free crochet patterns for cat hats. Simply search for “Hat For Cat Crochet Pattern Free” and you will find a variety of options to choose from.
2. Do I need to have advanced crochet skills to make a cat hat?
No, there are plenty of beginner-friendly patterns available for cat hats. Just make sure to read the instructions carefully and practice the basic crochet stitches before attempting the project. Exploring simple projects can help you gain confidence in your crochet skills.
3. Can I customize the cat hat pattern to fit my cat’s size?
Yes, most crochet patterns can be easily adjusted to fit the size of your cat. You can either use a larger or smaller yarn or adjust the number of stitches in the pattern to make it bigger or smaller. Using the magic loop technique can also help achieve the perfect fit.
4. Are there any specific materials or tools I need to make a cat hat?
Apart from yarn and a crochet hook, you may also need a pair of scissors and a yarn needle to complete the cat hat project. Some patterns may also require additional materials such as buttons, pom-poms, or decorative elements for embellishment.
5. Can I sell cat hats made from free crochet patterns?
It depends on the specific pattern and its copyright terms. Some patterns may allow you to sell the finished product, while others may not. It’s best to check the terms of use before selling any items made from a pattern. Consider joining a Crochet Club for networking and sharing pattern ideas.
6. Are there any other crochet patterns available for cats besides hats?
Yes, there are many other crochet patterns for cats available online for free or for purchase. Some popular options include cat sweaters, toys, and even costumes. You can also get creative and adapt other patterns to fit your cat’s size and needs. Look out for cat costumes and accessories that can be used during the holiday season.
