


The Froggy Bucket Hat is an excellent way to showcase your crochet skills while creating a fun accessory that is both practical and whimsical for people of all ages. This frog bucket hat crochet pattern includes the following features:
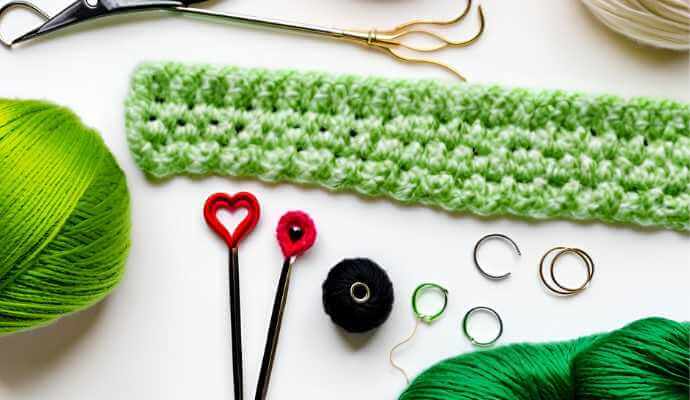
– **Materials:** Yarn, a crochet hook, and some stitch markers.
– **Instructions:** Detailed guidance on how to create the brim, crown, and whimsical crochet details, such as the froggy’s eyes using the puff stitch.
– **Tips and Variations:** Suggestions for customizing the hat according to your design preferences.
Dive into this delightful crochet project that is sure to bring a smile to someone’s face! Share photos of your finished hats on social media for crafting inspiration.
Key Takeaways:
- Crocheting a froggy bucket hat is a fun and creative project that requires basic materials such as yarn, crochet hook, stitch markers, tapestry needle, and yarn needle.
- Knowing the abbreviations and stitches used in the pattern is essential for successfully crocheting a froggy bucket hat, including techniques like the magic circle, single crochet, and half double crochet.
- By following the steps outlined in the pattern, you can easily crochet a froggy bucket hat with a unique brim, crown, and froggy details. The pattern also includes tips for using the magic ring technique for a seamless start.
Materials Needed for the Pattern
A whimsical frog bucket hat is typically crafted from yarn in cheerful pastel colors, such as spring green, and requires a few basic materials to achieve a well-designed finished product. This creative project is perfect for spring crafting and can be adjusted for different sizes, including baby, toddler, and adult.
The necessary supplies include:
- Yarn: Choose cheerful pastel colors like spring green.
- Crochet Hook: Select one based on the weight of the yarn you are using.
- Tapestry Needle: This is essential for weaving in ends and sewing pieces together, especially for attaching whimsical elements like crochet eyes.
- Stitch Markers: These are useful for marking stitches and rows, especially when working on larger projects.
Having the right materials is crucial to the success of any creative project, as the choices you make will influence the techniques you can employ during the process. Make sure to use quality yarn supplies from reputable yarn shops to enhance your crocheting experience.
This is what makes crocheting a frog bucket hat, or any type of hat, an enjoyable endeavor for both beginner and advanced crocheters alike. Using quality yarn from reputable brands, such as Red Heart, Bernat, or Premier Yarns, will enhance your overall experience while making the frog bucket hat and improve its durability. For more crafting tips and pattern credit, you can follow the crochet community on platforms like Ravelry, Etsy, Instagram, and Facebook.
Yarn
Frog Bucket Hat Yarn Recommendations
- Color: Choose bright and cheerful colors, particularly spring green and pastel shades, as these reflect the whimsical nature of the design.
- Brand: Opt for any of the major yarn brands, such as Red Heart, Bernat, or Premier Yarns. These brands are known for their durability, ease of use, and ability to produce excellent crochet results.
When selecting yarn, consider both color and weight, as the weight can significantly affect the drape of the final product. For warm weather accessories, cotton or cotton blends are preferable due to their breathability and comfort, especially when using single crochet or half double crochet techniques. Incorporating cheerful colors and pastel shades can enhance the whimsical nature of your design.
These materials create a light and durable product that is ideal for casual use. By choosing well-known brands, you can ensure better consistency, allowing for greater confidence in crafting a frog bucket hat with appealing aesthetics and high-quality craftsmanship.
Crochet Hook
Choosing the right crochet hook is essential for ensuring that your frog bucket hat is comfortable and has the proper gauge swatch. The size of the hook you use will depend on the yarn weight and the crochet techniques you plan to employ, such as the magic circle, back loop only stitches, or front loop only stitches.
A correctly sized crochet hook enhances your creative project by allowing for smooth stitching and consistent tension, resulting in a professional-looking hat that is comfortable to wear.
To determine the appropriate crochet hook size, check the yarn label, which typically provides a recommended range of hook sizes. Making a gauge swatch will help you assess not only the tension but also ensure that your results match the intended measurements, avoiding unpleasant surprises later on. Using ergonomic hooks can also enhance your crafting sessions by reducing hand strain.
Ergonomic hooks can also significantly improve long crafting sessions by reducing strain on the hands and fingers with their comfortable grip.
Experimenting with different hook types and sizes enables crafters to discover what works best for them, ultimately enhancing the crocheting experience.
Stitch Markers
Stitch markers are invaluable tools in crochet, offering essential assistance to crafters in tracking their progress and ensuring accuracy in patterns, such as the frog bucket hat. They can indicate the start of rounds, differentiate between stitch types, and aid in complex crochet techniques, making them particularly useful for projects with multiple intricacies and details. Whether you’re working on an eye assembly or other decorative parts, stitch markers can help maintain precision.
Incorporating stitch markers into your crafting toolkit can enhance your crocheting experience by making the process more efficient, allowing you to focus on creativity while minimizing the risk of mistakes.
There are several types of stitch markers, each serving different functions. For example, locking stitch markers easily clip onto stitches, while slip-on markers are ideal for temporary use during pattern rows. Understanding how to use these tools properly can significantly enhance the overall finish of your completed project.
To use stitch markers effectively, place the marker in the last stitch of a row or round to keep track of your progress, and simply slide it along as you continue crocheting. When it’s time to remove them, it is crucial to lift them out carefully to avoid disrupting the evenness of your crochet fabric.
Tapestry Needle
A tapestry needle is a specialized type of yarn needle used to finish a frog bucket hat by weaving in loose ends and attaching components such as crochet eyes. These needles are designed for sewing with yarn and feature a large eye that accommodates yarns of various weights. They play a crucial role in enhancing the security and durability of the whimsical crochet elements of the frog bucket hat. Using a tapestry needle correctly can turn your creative project into a polished and professional-looking accessory.
Incorporating a tapestry needle into your crafting supplies offers several advantages, including increased durability of projects and a more polished finish that showcases your craftsmanship.
Choosing the right needle size is essential; a needle that is too small can split fibers and cause frustration, while one that is too large may leave holes in the fabric. The thickness of the yarn and the complexity of the project significantly influence the best needle size for a particular task.
When selecting a tapestry needle, it is important to consider the thickness of the yarn, ensuring that the needle can accommodate not only its thickness but also its flexibility. The project’s complexity also plays a vital role in determining the most suitable type of needle. For instance, using a thicker yarn like worsted weight with a blunt yarn needle is generally simpler than working with very thin yarn that requires a delicate needle for intricate designs.
To weave in ends effectively, one easy technique is to work in the same direction as the stitches. This approach makes it easier for the needle and yarn to slide into the fabric and renders the ends less noticeable in the finished piece. Employing a simple back-and-forth motion can further help conceal the ends, resulting in a seamless appearance.
Abbreviations and Stitches Used
The frog bucket hat pattern utilizes several common abbreviations and crochet stitches. Familiarity with these will ensure you understand the instructions and can execute the design accurately.
The Magic Circle (also known as the magic ring) is a method for starting rounds that creates a tight closure at the center of the project, allowing you to crochet in the round.
The Single Crochet is a fundamental stitch frequently used to form the base of many crochet projects.
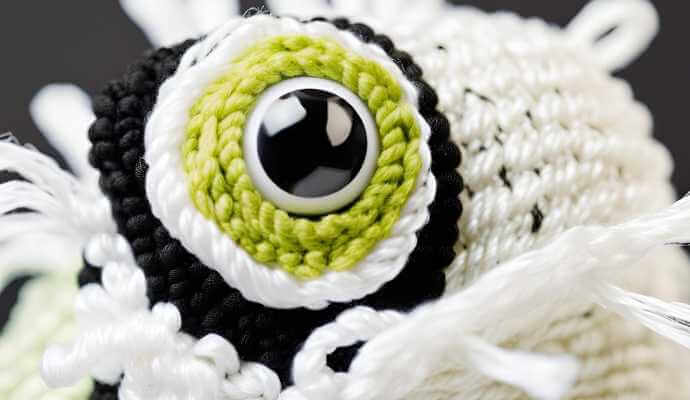
The Puff Stitch is a decorative stitch that produces a raised texture, and in this project, it is used to create the frog’s eyes and tongue. Incorporating this stitch adds a playful and detailed touch to the overall design.
How to Crochet a Froggy Bucket Hat
Crochet Frog Bucket Hat Pattern by Yuvik
This pattern is available for free, and it includes affiliate links for recommended yarn supplies and crochet kits.
Description:
Creating a whimsical frog bucket hat is an enjoyable and creative project that allows you to showcase your skills while crafting a unique design perfect for spring. This pattern is brought to you by The Weaving Witch (Ashly), a well-known name in the crafting community. This tutorial will guide you through the entire process, starting with a magic circle and progressing to the crown, where you’ll add those adorable froggy details.
Each step highlights essential crochet techniques, ensuring that you achieve a professional finish that not only looks good but also feels great to wear. With the right materials and a bit of patience, you’ll soon have a charming accessory that will delight both children and adults.
Skill Level: Intermediate
Size: Adjustable
Materials:
- Yarn: Category 3 (DK/Light Worsted) 100% Cotton
- 100 g (3.5 oz) in Spring Green
- 100 g (3.5 oz) in White
- 50 g (1.75 oz) in Yellow
- 50 g in Black
- Hook: 3.00 mm (C-2)
Plus the yarn and hook, the pattern recommends having a pair of scissors, a yarn needle, and some stitch markers on hand. For best results, use yarn brands like Red Heart or Bernat, and follow the gauge guidelines provided.
Pattern Features:
This pattern is designed to crochet the frog in multiple parts, allowing for customization of the hat’s shape and size as needed. The finished hat makes a perfect baby gift or an adorable accessory for your children during the spring season. You can also adapt the pattern to fit toddlers and adults.
Where to Find the Pattern:
This frog bucket hat pattern can be accessed for free on the Yuvik website.
Step 1: Crochet the Brim
The first step in creating your cute frog bucket hat crochet pattern is to crochet the brim, which provides the overall structure and style of the design. Begin by crocheting a test swatch, also known as a gauge swatch, to ensure that your starting chain stitches are the appropriate size for the brim, allowing it to fit comfortably.
You can use basic crochet stitches, such as single crochet, half double crochet, and back loop only, to define the brim and provide a sturdy foundation for your pattern.
To achieve the proper shape, select a stitch count that is even across your crochet rows. For instance, a chain of 60 stitches is a good starting point, but be sure to adjust it based on your test swatch. The initial chain not only determines the size but also influences the width of the brim.
Use a stitch marker to track the beginning of each row and keep count of the stitches you complete. If you wish to create a slight upward curve for added volume, incorporate short rows into the brim.
If your swatch indicates that the brim is too tight or too loose, don’t hesitate to rip it out and adjust your hook size or tension. Remember, the brim’s quality depends not only on its size and shape but also on the evenness of your stitches and tension, which will contribute to the overall appearance of your frog hat.
Step 2: Crochet the Crown
After completing the brim, the next step is to crochet the crown of the frog bucket hat, which adds to its unique design and fun shape.
The base of the crown is created by making a magic circle, also known as a magic ring, and crocheting in the round, using various techniques to gradually increase its size. This part of the bucket hat project encourages creativity and variation while ensuring that the fit remains comfortable and secure.
It is important to crochet the crown with relaxed tension to achieve a smooth finish. You can experiment with increasing stitches every round or every few rounds. Using stitches like double, half-double crochet, and incorporating front loop only can enhance texture and depth, as can the choice of different yarns from yarn brands like Red Heart or Bernat.
If you find the crown too tight or too loose during the process, simply switch hook sizes or adjust the number of rows as needed. Feel free to further embellish the design with your own patterns or color combinations.
Step 3: Add the Froggy Details
The final step in completing your frog bucket hat is to add the froggy details that will bring your whimsical design to life, making it truly unique and fun.
Start by assembling the crochet eyes, which can be crafted using contrasting yarn colors and techniques such as eye assembly and puff stitch to create an adorable froggy expression. By incorporating playful embellishments, you enhance the hat’s charm while showcasing your creativity and skills as a member of the crochet community. Consider using yarn supplies from popular yarn shops or exploring yarn brands like Premier Yarns for vibrant options.

To get started, gather your crochet supplies, including various yarn shades for the eyes and a tapestry needle for finishing. Begin by crafting two circular pieces for each eye, using a contrasting shade to make them stand out.
Once completed, employ the puff stitch technique to give the eyes dimension, and securely attach them to the front of the hat with a needle and thread.
For an extra touch of personalization, consider adding quirky details like a cheeky smile or rosy cheeks made of soft felt.
Lastly, don’t forget to capture the finished product and share it on social media platforms like Instagram or Pinterest. Your creations could inspire others in the crafting community, fostering a vibrant exchange of ideas and techniques, and earning pattern credit where due.
Tips for Crocheting a Perfect Froggy Bucket Hat
These crochet tips are essential for crafting a froggy bucket hat and enhancing your creative expression, making it a truly whimsical crochet project.
Tension and gauge swatch: The way you hold your crochet yarn and hook, known as tension, significantly impacts the final product. Therefore, it’s crucial to pay attention to it. Always create a gauge swatch before starting your final project, as this is the only way to accurately determine your tension.
Seasonal patterns: Incorporating seasonal patterns is a fantastic way to express yourself through crochet. For a froggy bucket hat, consider a design that celebrates summer.
Color: Select cheerful colors that reflect your personality. You can enhance the theme of your froggy bucket hat by choosing greens like spring green and yellows that mimic the colors of a real frog, perfect for spring crafting.
Community: Engaging with the crochet community—whether through classes, social media, or other avenues—can inspire your creativity and introduce you to new patterns and techniques to explore.
Froggy Bucket Hat Variations
Once you have mastered the basic crochet pattern, you can create different variations of the froggy bucket hat according to your preferences.
By using various colors, sizes, and types of yarn, you can craft a unique version of this whimsical crochet project. Options include hats for toddlers, adult sizes, or even seasonal variations, making them excellent showcases for your skills or thoughtful baby gifts.
1. Different Yarn Colors
One of the simplest yet most effective ways to personalize your frog bucket hat is by experimenting with different yarn colors, turning this cheerful accessory into a unique statement piece. Consider pastel colors for a soft touch, or explore bold hues for a vibrant impact.
Pastel colors evoke a playful vibe, making them ideal for spring crafting. However, don’t hesitate to explore bolder hues or multicolored yarns to add depth to your design.
By incorporating various colors, you gain the freedom to express your style while creating a whimsical touch that is both eye-catching and fun. For a look that captures the essence of nature and summer adventures, consider pairing vibrant greens with sunny yellows or deep blues.
Alternatively, mixing earth tones with a pop of bright pink or orange can bring a cozy warmth to your bucket hat, perfect for fall outings.
To maintain balance, select one or two dominant colors and use the others as accents, allowing each shade to shine without overwhelming the overall look.
Applying color theory principles, such as complementary or analogous combinations, can further enhance the visual appeal, inviting endless exploration into palettes that truly reflect your individual taste.
2. Adding Embellishments
Adding embellishments is an excellent way to enhance the design of a frog bucket hat. This approach allows for a unique creation that reflects individual creativity and personal taste. The possibilities are endless when it comes to experimenting with colors, shapes, and materials.
For instance, incorporating crocheted butterflies or whimsical stars can add charming details, while a touch of glitter can introduce a playful sparkle to the overall look.
When selecting embellishments, it’s important to consider stitching methods, such as surface slip stitch or using safety pins, to ensure secure attachment. Creating a theme or color scheme can help unify the different elements, resulting in a more cohesive and appealing accessory.
This process not only allows for personal expression but also encourages others to appreciate the effort and creativity that goes into crafting a unique fashion statement.
3. Adjusting the Size
You can customize your frog bucket hat to fit any size, from adult to toddler, by learning how to adjust the sizing. This process involves modifying the gauge swatch and the number of stitches used in the hat’s construction.
Simple adjustments to the pattern’s stitch count and hat height ensure that this piece remains a versatile addition to any crochet repertoire, regardless of the intended wearer. The sewing and crochet community serves as an excellent resource for learning about sizing adjustments and other valuable tips that can enhance your crafting skills and improve your results on every project.
One effective method for determining how much to adjust your hat is to create a gauge swatch using the yarn and hook size you plan to use. Be sure to record the number of stitches per inch.
If you want to make the frog bucket hat tighter, simply reduce the number of stitches you make. Conversely, add stitches if you prefer a looser fit. You can also adjust the height of the hat by increasing or decreasing the number of rows. This adjustment allows for different styles, such as a slouchy hat or a beanie shape.
To gain insights on sizing adjustments, consider sharing your own modifications and results with fellow crafters. The feedback and ideas you receive can help you further improve your techniques and achieve even better results.
Frequently Asked Questions
What materials do I need to make the Froggy Bucket Hat Crochet Pattern?
To make the Froggy Bucket Hat Crochet Pattern, you will need a size G/4.00mm crochet hook, worsted weight yarn in green, white, and black, scissors, a yarn needle, and some scrap yarn for detailing.
Is this pattern suitable for beginners?
Yes, the Froggy Bucket Hat Crochet Pattern is suitable for beginners with basic crochet skills. The pattern includes detailed instructions and photos to help guide you through the process, making it an ideal creative project for new crafters.
Can I make adjustments to the hat size?
Yes, you can adjust the hat size by changing the hook size and/or using thicker or thinner yarn. The pattern includes instructions on how to make the hat in different sizes.
How long does it take to complete this pattern?
The time it takes to complete the Froggy Bucket Hat Crochet Pattern will vary depending on your crochet speed and experience level. On average, it can take 2-4 hours to complete this fun project.
Are there any special stitches used in this pattern?
No, the Froggy Bucket Hat Crochet Pattern by The Weaving Witch only uses basic crochet stitches such as single crochet, double crochet, half double crochet, and slip stitch. The pattern includes explanations and photos for each stitch, making it perfect for a unique and whimsical crochet project. Consider using yarn supplies in cheerful and pastel colors like spring green for a more seasonal pattern.
Can I sell hats made from this pattern?
Yes, you can sell hats made from the Froggy Bucket Hat Crochet Pattern. However, please provide pattern credit to the original designer, The Weaving Witch, and do not sell or distribute the pattern itself. Feel free to share photos of your creations on social media platforms like Instagram and Facebook to engage with the crochet community. Using a tapestry needle, stitch marker, and crochet hook will help you achieve the perfect finish, and don’t forget to check your gauge swatch for accurate sizing, whether you are making a baby, toddler, or adult size hat.
