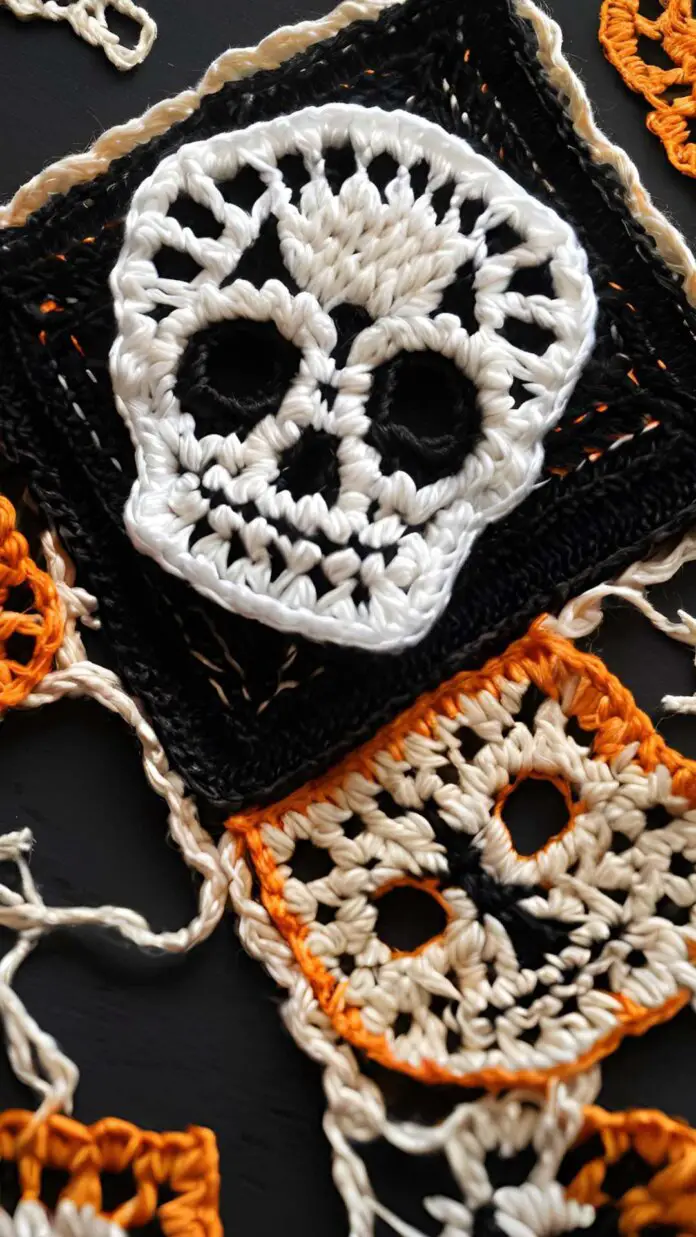
The Skull Granny Square brings a distinctive charm to your crochet projects. This playful and quirky pattern merges traditional granny square techniques with a Halloween theme, making it perfect for Halloween-themed decorations or unique accessories. In this article, you will find a step-by-step guide for creating the Skull Granny Square, along with helpful tips for joining squares and adding beautiful borders.
Key Takeaways:
- Learn how to crochet a skull granny square using a magic ring and different rounds.
- Easily join the skull granny squares to create a unique and spooky blanket.
- Add a personal touch to your blanket with a single crochet, shell, or picot border.
How to Crochet a Skull Granny Square
Crocheting a Skull Granny Square is a fun and creative way to celebrate the Halloween season while connecting with your favorite crafting community and producing a delightfully spooky finished product.
This crochet pattern merges the traditional granny square stitch with an eye-catching skull design, making it an excellent choice for crocheters looking for an easy pattern that highlights both technique and artistry.
Selecting the right yarn, such as black and white, will enhance the overall appearance of your project, ensuring that your finished piece is both beautiful and thematically appropriate.
1. Start with a Magic Ring
To begin your Skull Granny Square, create a magic circle. This common crochet technique enables you to initiate your project without leaving a hole in the center, ensuring a secure foundation for your design. Using a crochet hook that matches your yarn choice will help in achieving precise stitch symbols and maintain the integrity of your skull project.
2. Round 1: Create the Center Circle
In Round 1 of your Skull Granny Square, you will create the center circle. To ensure an accurate stitch count, which is critical for the integrity of your crochet pattern, use a variety of stitch symbols.
Begin by making a slip knot to attach the yarn to the hook, and then chain four to form a loop. Next, work double crochets into this loop, aiming for a total of eight double crochets. It is essential to count your stitches accurately, as this first round will establish the shape of your entire project.
Any deviation from the intended stitch count can result in an uneven square later on. Therefore, as you crochet, pay close attention to the stitch symbols and follow the pattern diligently.
3. Round 2: Create the First Skull
This is the second round of crocheting the skull based on the pattern you designed. In this round, you will demonstrate your skills by combining various stitch techniques and stitch symbols as you create the skull using black yarn. For those aiming for a size small or custom sizing, consider adjusting your panel measurement and gauge measurement to ensure your project fits perfectly.
You should utilize single crochet and slip stitches to define the contours of the skull, while maintaining even tension throughout the stitches to ensure a well-shaped result.
When transitioning from one stitch type to another, it is important to keep the yarn taut but not too tight, as excessive tension can distort the shape. The dense fabric created by the black yarn enhances the details of your work and provides a high-contrast appearance that highlights your craftsmanship.
4. Round 3: Create the Second Skull
In Round 3, you will apply the method you developed in Round 2 to complete the second half of the skull. Paying careful attention to your stitching techniques with both black and white yarn will help ensure that your crochet pattern remains symmetrical and consistent.
To achieve a balanced design, it is essential to closely count your stitches throughout the rounds, taking into account the chain space and corner stitch. During color changes, remember to carry the unused color along the edge to avoid bulkiness at the seam. When switching colors, leave a long enough tail to weave in later, which contributes to an aesthetically pleasing finished product. If you encounter pattern confusion, refer back to the stitch symbols to stay on track.
Additionally, maintaining tight stitches is necessary to ensure that the skull’s features are well-defined. Be mindful of your stitch tension, as inconsistent tension can result in uneven stitches, detracting from the overall charm of your creation.
5. Round 4: Create the Third Skull
In Round 4, your focus will be on creating the third skull while carefully tracking your stitch count and yarn choice to ensure consistency and quality in the appearance of your crochet pattern.
The Importance of Stitch Count: This round incorporates various stitches, such as double crochets and slip stitches. Tracking your stitch count is essential to ensure that you use the correct number of each stitch.
The Importance of Yarn Choice: Selecting the appropriate yarn color and weight, such as worsted weight, is crucial for enhancing the overall appearance of your project. Choose yarn that complements the previous skulls and achieves the final look you desire. For a creative design idea, check out this Free Skull Granny Square Crochet Pattern. Additionally, using a blocking board can help in setting the correct shape and size for your squares.
By considering both of these factors, you can ensure that your finished piece has a professional look.
6. Round 5: Create the Fourth Skull
In Round 5, you will apply your skills to create the fourth skull by using stitch symbols and selecting yarn that enhances the overall appearance of the crochet pattern.
It is essential to use the stitch symbols correctly, as they form the foundation of the intricate details in the skull pattern. Each symbol represents a specific type of stitch, ensuring that the pattern develops smoothly.
When selecting yarn, you may choose soft cotton for a light finish or strong acrylic for increased durability, both of which can significantly affect the texture and visual impact of the finished piece.
As you proceed, consider how the color and weight of your yarn will contribute to achieving the desired outcome and setting the tone for your creation. For those interested in sweater making or creating a beautiful cardigan, adjusting the sleeve length and adding a ribbed border can enhance the overall look, making it ghoulishly gorgeous for the Halloween season.
7. Round 6: Create the Fifth Skull
In Round 6, you will focus on working the fifth skull, emphasizing an accurate stitch count while employing various stitch methods that enhance the overall quality of your crochet pattern.
Utilizing the double crochet and slip stitch techniques will help you achieve the desired spooky appearance, particularly suitable for the Halloween season, as these methods can improve both the texture and visual appeal of the skull and bones designs.
As with all rounds, maintaining the correct stitch count is crucial at this step; any mistakes can result in pieces that do not lay correctly when finished. Measuring squares accurately and ensuring standard sizing will contribute to a flawless assembly, particularly in projects like a baby blanket or colorful cardigan.
While black yarn is preferred for a frightening effect, it also provides a good contrast against lighter colors, allowing the features of the skull to stand out.
Additionally, it is best to avoid twisting your work as you crochet, as this will contribute to a more polished final product.
8. Round 7: Create the Sixth Skull
Round 7 will focus on creating the sixth skull by utilizing stitch symbols and alternating between black and white yarn for the crochet pattern. Paying attention to body width and sleeve width will help in achieving the desired fit, especially if you’re planning to incorporate the skulls into a larger garment like a cardigan.
To successfully make this piece, it is essential to follow the pattern closely while managing the yarn carefully. Adhering to the stitch symbols will help the creator minimize mistakes and ensure a smooth transition between the two colors.
Alternating yarn colors is crucial for the visual impact of the piece, particularly for a Halloween project, as the contrasting black and white colors are fitting for the occasion. It is important to maintain consistent tension when switching colors to avoid unevenness in the skull pattern.
9. Round 8: Create the Seventh Skull
In Round 8, you will be creating the seventh skull, so it’s essential to closely monitor your stitch count and make careful yarn choices to maintain the continuity of your crochet pattern.
As you begin this round, be sure to count every stitch as you work to avoid any unintended increases or decreases that could alter the intended shape. Using a pattern that is easy to follow is crucial, as any errors in counting can lead to problems.
The type of yarn you choose is also significant for the overall appearance; for instance, a cotton yarn will yield a smoother finish, while a wool blend will add a pleasing texture.
Experimenting with different fibers can help achieve the desired look while ensuring that your stitches remain even and well-defined, resulting in a more refined and professional finish for the skull.
10. Round 9: Create the Eighth Skull
In Round 9, you will finish the eighth skull by employing various stitch techniques. This will create a cohesive appearance while utilizing both black and white yarn to produce contrast in your crochet design. Consider using invisible joining for a seamless look, especially if you’re working with square columns or aiming for a smooth transition in your crochet project.
11. Round 10: Create the Ninth Skull
In Round 10, you will be creating the ninth skull by utilizing your skills in stitch symbols and yarn selection to preserve the integrity of your crochet pattern and advance your ongoing project.
It is crucial to carefully follow the stitch symbols in the pattern for this round to ensure that all features align correctly with the rest of your work. This round may introduce new stitches or variations, so take your time to familiarize yourself with how they are applied.
The choice of yarn will significantly influence the final appearance of your skull; using softer or fuzzier yarn will create a more playful look, whereas stronger, tightly spun yarn will result in more defined features.
Experimenting with color variations will also enable you to personalize your skull while still adhering to the foundational structure of the pattern.
12. Round 11: Create the Tenth Skull
In Round 11, you will create the tenth skull in your Halloween-themed skull project. To ensure that your stitch count is accurate, it’s important to use various stitch techniques, such as understanding the magic circle and stitch symbols, which will help guarantee that your crochet pattern is correct and visually appealing.
13. Round 12: Create the Eleventh Skull
Round 12 is the final round in which you will complete the eleventh skull. Once you finish, you will have a clear understanding of how to read stitch symbols correctly and how the choice of yarn, such as black yarn or white yarn, can contribute to achieving a consistent, polished appearance in your crochet pattern. This round also emphasizes the importance of blocking on a blocking board to ensure custom sizing and structural integrity.
14. Round 13: Create the Twelfth Skull
In Round 13, you will create the twelfth and final skull. It is important to pay close attention to your stitch count and utilize good stitching techniques, such as maintaining the correct chain space and corner stitch, to successfully complete your crochet pattern. This round will complete your ghoulishly gorgeous Halloween-themed project.
This crucial step is essential for achieving the desired appearance and ensuring the structural stability of the project. Frequently check your stitch count, as any variation can lead to an uneven look or size at the finish of your pattern.
Employing different stitch techniques can add dimension and uniqueness to your skull design. Be sure to thoroughly review your work before starting this round, as it will facilitate a smooth joining of squares.
How to Join the Skull Granny Squares
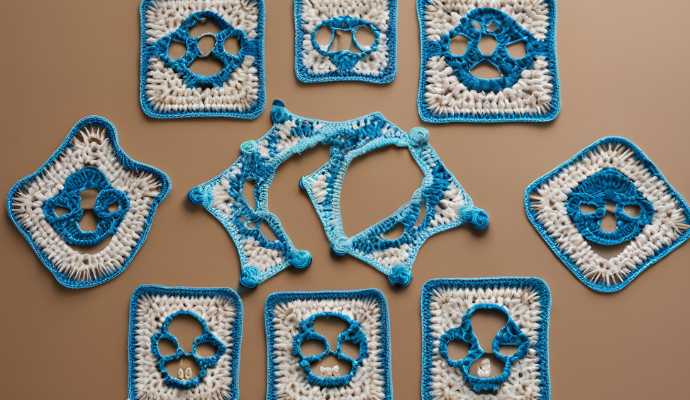
The next step after completing all twelve skull granny squares is to join the individual pieces together using your preferred joining method, such as invisible joining, creating a cohesive crochet project that showcases your effort and creativity. Consider the placement of background colors to enhance the visual appeal of the completed project.
1. Lay Out the Squares
Before joining the squares of your crochet project, it is advisable to lay them out to visualize how you want the final piece to look, taking into account the total squares and square columns. This allows you to ensure that the colors and patterns work harmoniously together. Not only does this approach enhance the overall quality of your project, but it also provides an opportunity to make adjustments before the pieces are joined, ensuring that the body width and sleeve width are as desired for your granny square sweater.
The placement of colors can significantly influence the final appearance and feel of the blanket or shawl, impacting the project’s visual appeal. It is important to consider the balance of light and dark tones; some individuals may choose a gradient or a well-balanced mix of contrasting colors.
Additionally, varying the arrangement of intricate patterns can prevent a monotonous look while maintaining a cohesive design.
By taking the time to engage in this initial planning step, every crocheter can enhance their project, resulting in a beautiful finished piece to be proud of.
2. Sew the Squares Together
Your Skull Granny Square crochet project is complete once you sew the squares together using a tapestry needle. This step is essential for creating a Skull granny square cardigan or blanket, transforming your project into a colorful cardigan that is both functional and stylish. Using a tapestry needle will ensure a secure and neat joining method, adding to the project’s durability.
To achieve a finished look, you can employ different joining techniques, such as:
- Whip stitch
- Slip stitch
The whip stitch is a durable option, creating seams that can withstand the stresses of everyday use, while the slip stitch offers an almost invisible join for a seamless appearance. Using a tapestry needle not only facilitates easier maneuverability through multiple strands of yarn but also helps secure the seams, enhancing the overall durability of the final product.
A strong seam will ensure that all your hard work endures, resulting in a project that is both beautiful and functional.
How to Add a Border to the Granny Square Blanket
Adding a border to a granny square blanket offers several benefits, including enhanced aesthetics and a polished finish.
This finishing touch allows the crochet project to feel complete and ready for display or use.
1. Single Crochet Border
A single crochet border is one of the simplest yet most effective ways to finish your granny square blanket, providing a clean and cohesive appearance while enhancing the overall crochet pattern. This technique not only adds durability to your work but also creates an elegant frame that beautifully defines each square. Consider using easy border techniques and standard sizing for a beautiful cardigan or baby blanket.
To get started, choose a contrasting or complementary yarn color that will stand out against your existing design. After securing your yarn with a slip knot, insert your hook into any corner stitch and make your first single crochet, ensuring that you maintain even tension.
Continue working along each side of the blanket, making corner stitches for neat turns. Before you know it, your project will be transformed with a polished finish that feels both professional and inviting.
If you’re looking to elevate your crochet skills quickly, this option should definitely be on your list!
2. Shell Border
Shell borders are a decorative finishing technique that enhances the appearance of granny square blankets by adding intricate textures to the overall crochet project. These borders frame the blanket while introducing a delightful texture that captures attention.
To create a shell border around your granny square blanket, begin by selecting your preferred yarn and choosing a crochet hook that matches its thickness.
Next, work a foundation row around the edges of the blanket, ensuring that the spacing is consistent and evenly distributed. Once the foundation row is complete, form the shells using a combination of double crochets, chains, and slip stitches. Typically, each shell consists of five double crochets followed by a chain space.
To maintain consistency, count your stitches carefully and use a stitch marker to indicate intervals if needed. Along with their decorative qualities, shell borders provide a snug and comforting finish to the blanket.
3. Picot Border
The picot border is a decorative element that enhances the design of your granny square blanket and significantly improves your crochet pattern. This border not only provides a beautiful finish to the edges but also clearly defines the project’s outline, contributing to a stunning finished product that crochet enthusiasts will admire.
To create a picot border, you will use double crochets, chain stitches, and slip stitches to form small loops that resemble tiny petals. These loops serve as an eye-catching design feature that elevates the overall appearance of any crochet piece.
Additionally, crafters can experiment with various colors and yarn weights, as the picot border is versatile and can be incorporated into a wide range of styles.
Frequently Asked Questions
What is a Free Skull Granny Square Crochet Pattern?
A Free Skull Granny Square Crochet Pattern is a crochet pattern that teaches you how to create a square-shaped design with a skull motif using the popular granny square crochet technique. It is a fun and unique project for the Halloween season or for fans of skulls and other macabre designs. This pattern may require understanding basic crochet terms and using worsted weight yarn for durability and texture.
Where can I find a Free Skull Granny Square Crochet Pattern?
You can find a Free Skull Granny Square Crochet Pattern online, on various crafting and crochet websites such as Ravelry, Pinterest, and AllFreeCrochet, often alongside other favorite projects among the crafting community. You can also find patterns on the blogs of independent crochet designers who often provide insightful tips on sweater making and panel measurement.
Do I need any special materials to make a Free Skull Granny Square Crochet Pattern?
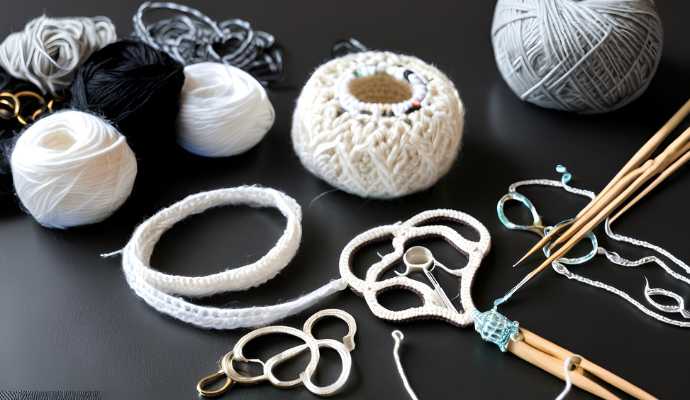
No, you do not need any special materials to make a Free Skull Granny Square Crochet Pattern. You will need basic crochet supplies such as yarn, a crochet hook, and scissors. Some patterns may also require a tapestry needle and stitch markers to help keep track of your stitch count and panel measurement.
Is the Free Skull Granny Square Crochet Pattern suitable for beginners?
It depends on the specific pattern and the level of crochet experience the beginner has. Some patterns may be more advanced and require knowledge of more complex stitches, such as the chain space and magic circle, while others may be more suitable for beginners. It’s always a good idea to read through the pattern before starting to make sure you have the necessary skills and supplies, including the appropriate yarn weight and crochet hook size for the project.
Can I customize the Free Skull Granny Square Crochet Pattern?
Yes, you can definitely customize the Free Skull Granny Square Crochet Pattern to your liking. You can choose different colors of yarn, adjust the size of the square using a blocking board, or add your own personal touches to the skull design for a ghoulishly gorgeous finish. The beauty of crochet is that you can make each project your own, exploring options like custom sizing and various ribbed border styles.
Are there other similar Free Granny Square Crochet Patterns available?
Yes, there are many other Free Granny Square Crochet Patterns available with different designs and themes. Some popular ones include floral granny squares, animal granny squares, and holiday-themed granny squares, which are perfect for creating a colorful cardigan or baby blanket. You can easily find these patterns online, and they are a great way to expand your crochet skills and create unique projects that can be showcased within the crafting community.


