


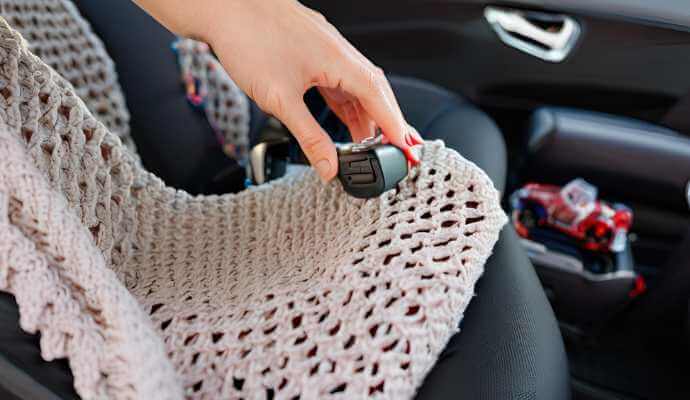
A custom car seat cover is an excellent way to protect your vehicle’s interior while showcasing your crochet skills. This guide provides all the information you need, including the necessary materials such as yarn and crochet hooks, along with step-by-step instructions for creating your own unique design. Additionally, it features sections on customization options, pattern notes, and helpful tips to ensure your crochet project is a success, making it a great baby gift.
Key Takeaways:
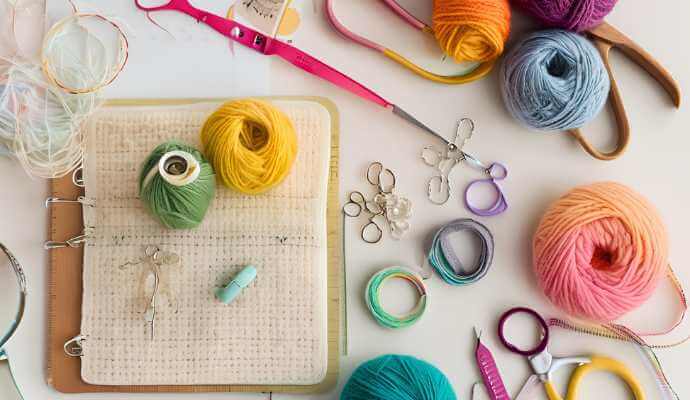
- Before starting your car seat cover crochet project, make sure you have all the necessary materials such as yarn, crochet hook, tape measure, scissors, and stitch markers.
- When choosing yarn for your car seat cover, consider the weight, fiber content, and care instructions to ensure durability and comfort for your baby, especially for a summer baby who might need a lightweight and breathable fabric.
- Personalize and add variety to your car seat cover by incorporating stripes, color blocks, different stitches, and appliques. Utilize pixel charts or create a C2C (corner to corner) design. Don’t be afraid to get creative!
What Materials Do You Need for the Crochet Pattern?
Using the right crochet supplies is essential for successfully completing your crochet project for a car seat canopy or cover. It is important to select high-quality yarn and an appropriate crochet hook, as well as necessary tools such as a tape measure, scissors, and stitch markers.
Having the proper crochet supplies will ensure that your project is not only stylish but also safe and comfortable for your infant. Additionally, accessing video tutorials can help you visualize the assembly process, which is particularly valuable for creating this unique type of baby accessory.
1. Yarn
Choosing the right yarn for your crochet project is crucial, especially when creating a car seat cover for your baby. The yarn needs to be soft, comfortable, and safe for your infant’s sensitive skin, ensuring the fabric is both stylish and practical.
When selecting yarn, look for textures that are gentle against the skin and colors that are visually appealing yet calming. For baby projects, synthetic fibers like acrylic are often recommended, as they are typically hypoallergenic.
Red Heart With Love is a popular choice among crafters due to its wide range of colors and soft texture. Another excellent option is Bernat Blanket Yarn, which provides a plush surface and warmth, making it ideal for baby items.
Most importantly, ensure safety by using materials that do not contain any harmful chemicals.
2. Crochet Hook
The crochet hook is an essential tool in your crochet toolkit, and selecting the correct size to match your yarn gauge is vital for achieving the appropriate stitch definition and tension in your car seat cover. For projects like a C2C Owl or other intricate designs, understanding your gauge is crucial.
Different types of crochet hooks can enhance your crafting experience. For instance, ergonomic crochet hooks, such as the Clover Amour, are popular due to their comfortable grip, which allows for long crochet sessions without discomfort.
Crochet hooks are made from various materials, including aluminum, wood, and plastic, each offering a distinct feel and glide when working with different types of yarn.
When choosing the right size hook, it is important to consider the weight of the yarn; lighter weight fibers, such as lace and sport yarns, typically require smaller hooks to create tighter stitches, while heavier weight yarns, like bulky and super bulky, necessitate larger hooks to prevent the fabric from becoming too tight or stiff.
By practicing these techniques, crafters can improve their skills and ultimately create a product they will be proud of. Utilize video tutorials to enhance your crochet skills and tackle more complex projects with confidence.
3. Tape Measure
A tape measure is the most commonly used tool in crochet for measuring and checking gauge and dimensions, ensuring the proper sizing of items like car seat canopies.
Accurate measurements are crucial for the success of a project, as they directly affect both the function and appearance of all crochet items. When used correctly, a tape measure helps crocheters achieve consistent results across their projects by providing accurate tension and size measurements.
To begin, set up a clear workspace; using a flat, straight, and taut tape measure will yield the most precise readings. Doubling back on measurements can be particularly helpful, especially with complex patterns, as small discrepancies can accumulate over time.
By following these steps, crocheters can ensure they achieve the desired fit and finish every time, enhancing their skills and satisfaction with their projects.
4. Scissors
Scissors are essential tools for cutting yarn and finishing a car seat cover project cleanly and professionally among crochet supplies.
Various types of scissors can enhance the crocheting experience. Smaller, sharper scissors designed for embroidery are particularly suitable for crochet work, as they allow for precise cutting without causing excessive fraying on detailed projects.
Larger fabric scissors can be used on thicker materials for quicker cutting. Regardless of the type, having a steady hand and scissors that provide a comfortable grip significantly contributes to achieving cleaner lines and a more polished final product.
5. Stitch Markers
Stitch markers are essential tools for crocheters, enabling you to keep track of your rows and stitches while creating your car seat cover. They are particularly useful for marking the beginning and end of rounds, as well as specific stitch patterns, which enhances the overall crocheting experience and provides a smoother workflow.
For intricate designs, placing stitch markers at the start of each round or at other critical points can help minimize the risk of losing your place. Additionally, for advanced techniques such as color changes or increases and decreases, markers can be employed to separate sections, promoting better organization and clarity.
Ultimately, utilizing stitch markers leads to a more enjoyable and efficient crocheting process, allowing you to tackle even the most complex patterns with ease.
How to Choose the Right Yarn for Your Car Seat Cover?
When selecting the appropriate yarn for your car seat cover, it’s important to consider the yarn weight, fiber content, and care instructions. This will help ensure that the final product is not only aesthetically pleasing but also functional and safe for your baby.
1. Consider the Weight of the Yarn
The weight of the yarn significantly influences the comfort and usability of your car seat cover, particularly for a summer baby who needs a lightweight and breathable fabric.
Using a lighter yarn, such as sport weight or even lace weight, can provide an ideal solution for warm weather, ensuring that the baby stays cool while still being protected. In contrast, heavier options like bulky and worsted yarn add thickness and warmth, making them perfect for cooler months.
Understanding the different yarn weights helps caregivers determine the appropriate level of insulation and drape for various climates, enabling them to create a beautifully functional car seat cover that meets their specific needs throughout the year.
2. Look at the Fiber Content
Selecting the right fiber content for a car seat cover is crucial, as materials like cotton or bamboo are soft against a baby’s skin and help safeguard against allergies.
These options not only provide a gentle touch but also offer breathability, which is essential for maintaining a comfortable temperature during travel. Breathable covers can help prevent overheating and irritation, reducing discomfort for both the baby and the caregiver.
When choosing hypoallergenic options, it is important to look for products labeled as free from harmful chemicals and dyes, as these substances can trigger allergic reactions. Additionally, opting for fiber materials with a lower environmental impact, such as organic cotton or sustainably sourced bamboo, ensures safety for your baby as well as for the planet. Consider Vanna’s Choice or Bernat Blanket Yarn for their gentle touch and excellent durability.
3. Check the Care Instructions
Before finalizing your yarn choice for the car seat cover, it is essential to read the care instructions, as the yarn must withstand frequent washings and provide long-lasting durability.
Different types of yarn react differently to washing and drying processes, and some yarns are inherently more durable than others. Certain fibers may experience shrinkage, loss of shape, or color fading when exposed to heat or moisture.
To protect your crochet project, it is advisable to select yarns that are labeled as machine washable or those designed for enhanced durability. Always use gentle cycles and low heat when washing, and store your finished car seat cover in a cool, dry location. This ensures the longevity of your baby accessory, even when facing different weather conditions like wind or cold.
Step-by-Step Instructions for Crocheting a Car Seat Cover or Canopy
The fundamentals of crocheting a car seat cover involve starting with a chain stitch, creating individual panels, joining those panels together, adding a border, and applying finishing touches.
1. Start with a Chain Stitch
The chain stitch is the foundational stitch for your crochet project and serves as the critical first step in creating a secure base for your car seat cover. This simple yet essential technique allows even beginners to achieve a uniform and stable foundation, which is particularly important for more intricate stitches that will be used later on.
To create the chain stitch, you will need a crochet hook and yarn, ensuring that you select a hook size that matches your yarn material. Consider using colors like Popsicle Blue or Raspberry for a vibrant design.
Start by making a slip knot. Hold the yarn in your dominant hand and wrap it around the crochet hook. Then, pull the yarn through the slip knot to form a loop, which will become your first chain stitch. Continue this process, making sure to count each stitch as you go. For a creative crochet project, check out this Car Seat Cover Crochet Pattern Free.
For those who prefer visual learning, there are numerous video tutorials available online that demonstrate each step in action, helping you ensure that you are executing the chain stitch correctly. Additionally, these videos often provide pattern notes and tips on maintaining consistent gauge throughout your work.
2. Create the Foundation Row
The foundation row is crucial as it determines the width of your car seat cover and establishes the structural integrity of the piece. It is essential to count each stitch carefully; skipping or adding even one stitch could result in an uneven edge at the end of your project. Using a yarn needle can help in managing and securing loose threads efficiently.
Taking the time to familiarize yourself with the stitch pattern can be very beneficial. Consistent tension is important, as it impacts not only the appearance of the completed cover but also its fit. Ensure you have the right crochet supplies, including Red Heart With Love yarn, to achieve optimal results.
A common recommendation is to stop frequently to check your tension and adjust it as needed, ensuring that all your stitches lie evenly. If you are uncertain about the best tension to use, it is advisable to practice on a swatch of material before proceeding with the larger cover.
3. Work in the Round
Working in the round is an essential crochet technique that enables you to create a smooth and continuous structure for your car seat cover, ideal for projects like a Car Seat Canopy or an infant blanket. This method provides a seamless finish, eliminating the need for joining seams, which can often result in gaps.
To begin, start with a foundation chain and then crochet in a circular manner, ensuring that you join each round with a slip stitch in the first stitch to maintain the structure. If you are working with multiple colors, like Blue Hawaii or Peacock, it’s important to pay attention to color changes. This can be accomplished by completing the last stitch of one color with the new color, which helps avoid holes.
Additionally, maintaining even tension as you work will significantly reduce the likelihood of gaps appearing in the finished project, resulting in a well-crafted item.
4. Create the Body of the Car Seat Cover
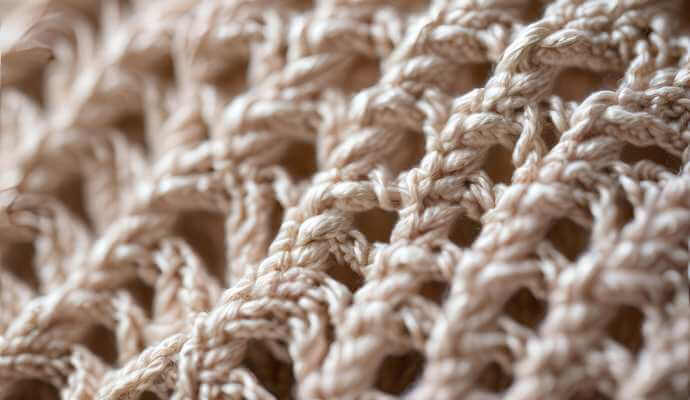
The body of the car seat cover is where the chosen crochet pattern and stitches are applied, adding both texture and visual interest. Utilizing unique design elements like shell stitches and bobble stitches can elevate the style of your project.
For a successful design, popular techniques such as shell stitches, bobble stitches, or a double crochet pattern featuring numerous ridges and channels can create a beautiful and tactile experience. Adding personalized touches like a pixel chart or C2C design can further enhance the uniqueness of your piece.
Utilizing contrasting colors like Raspberry, Pink, and Lime can enhance the overall appearance, but it is essential to select a yarn that is soft and non-irritating for delicate skin, like Vanna’s Choice, while also being durable enough to withstand wear and tear.
Additionally, using a softer yarn like Bernat Blanket Yarn for the interior sections provides added comfort and combines textures without compromising the safety of the baby.
5. Add Finishing Touches
The finishing touches for a car seat cover encompass any embellishments or features that fulfill the project’s visual and functional objectives. These may include adding buttons, straps, or other accessories that enhance both the performance and appearance of the seat cover. Incorporating safety precautions is also crucial in ensuring the project remains safe for a baby.
Like other sewing projects, the finishing touches for car seat covers can significantly improve the overall aesthetic and ensure the cover’s longevity. For instance, weaving in the ends of yarn prevents fraying, while blocking the fabric helps the cover maintain its intended shape. Using fleece as a lining material can add an extra layer of warmth and comfort.
Decorative stitching or patches not only conceal mistakes but also add character to the design. It’s advisable to incorporate decorative stitches or patches using materials that complement the vehicle’s interior. Materials such as faux leather or distinctive button designs that align with the vehicle’s theme can elevate the final result of your project.
How to Customize your Car Seat Cover Crochet Pattern?
You can personalize your crochet pattern for a car seat cover to create a unique design while ensuring it remains functional and safe for your baby.
1. Add Stripes or Color Blocks
Incorporating stripes or color blocks into your car seat cover design can result in an eye-catching and playful aesthetic that enhances the overall appearance of the cover.
This technique offers limitless customization options, allowing you to tailor the design to reflect personal tastes or complement the car’s interior decor by experimenting with various colors and their combinations.
When selecting colors, it is beneficial to use a palette that harmonizes well, which can be inspired by a color wheel or the hues associated with a particular season. Changing yarn colors can be accomplished easily by using a simple knot or by carrying the yarn up the side for a neater finish.
Most importantly, maintaining consistent tension throughout your work will ensure that the yarn changes appear even and uniform, resulting in a more professional look.
2. Incorporate Different Stitches
Incorporating various stitches into the crochet pattern of your car seat cover can significantly alter its texture and appearance, enabling unique designs and personalization.
For instance, a traditional single crochet creates a tighter and more durable fabric, while a double crochet results in a more open and airy texture that is ideal for warm climates.
Other popular choices include the shell stitch, which offers a delicate scalloped edge, and the bobble stitch, which adds a fun 3D effect. Each of these stitches influences the design, feel, and functionality of the seat cover in everyday use.
Experimenting with different techniques allows you to achieve both stylistic and functional goals, resulting in a truly personalized design.
3. Personalize with Appliques
Appliques can be used to personalize the design of a car seat cover, creating a unique crochet project if chosen wisely. It is essential to select a theme that you will enjoy and that complements your car’s interior. Consider using Grids for Kids patterns or themes like C2C Owl for a playful touch.
Popular themes include:
- Floral designs
- Animals (especially for children’s seats)
- Geometric shapes
All of which can enhance the patterns in the crochet itself. Once you have chosen a theme, it is advisable to sketch or visualize how the appliques will integrate into the overall design. Care should be taken to ensure that the appliques fit harmoniously within the design and do not overshadow the piece, unless that is the intended effect.
Additionally, the yarn should match the durability of the seat cover materials while ensuring that it remains easy to clean. The method of attaching the appliques, whether through sewing or fabric glue, should be selected based on the expected usage and wear of the seat cover, as well as the desired level of security for the appliques.
Tips and Tricks for Crocheting a Perfect Car Seat Cover
Here are some suggestions and guidance on how to crochet a car seat cover that can help you enhance your crocheting skills while ensuring a high-quality result that is safe, functional, and visually appealing for your baby.
1. Use Stitch Markers to Keep Track of Your Rows
Incorporating stitch markers into your crochet project is an effective way to keep track of your rows, ensuring consistency in your car seat cover. These simple tools serve as visual aids that help maintain even tension and prevent unintentional decreases or increases in stitch count by marking the beginning of each round or row.
Stitch markers are beneficial not only for crochet projects but also for those who are learning how to crochet. Proper placement of stitch markers makes it easier to keep track of your progress and reduces the frustration that often comes from losing your place.
Overall, using stitch markers enhances organization in crochet projects and significantly improves the quality of the finished product. They are particularly useful for complex patterns like Megan Meyer’s Hugs & Kisses or Left in Knots designs shared on Facebook Group or Instagram.
2. Check Your Gauge Before Starting
Checking your gauge before starting a crochet project is essential to ensure that your car seat cover fits perfectly and meets your design specifications. A proper gauge not only affects the final appearance and texture of the piece but also determines how accurately it conforms to the intended dimensions. Clover Amour hooks are recommended for maintaining consistent gauge.
To measure your gauge, crochet a small swatch using the yarn and hook you plan to work with, then count the number of stitches and rows per inch. If your gauge does not match the pattern, you will need to adjust your hook size or tension. If the piece is too tight, try using a larger hook; if it is too loose, opt for a smaller size.
Remember, addressing gauge discrepancies early on will save you time and frustration later, ensuring that your project turns out exactly as you envisioned.
3. Take Breaks to Avoid Hand Fatigue
Taking breaks while crocheting is beneficial for preventing hand fatigue and ensuring comfort as you work on your car seat cover. This is especially important when creating larger items like a baby blanket or summer baby changing mat, where prolonged periods of crafting are required.
Incorporating ergonomic practices into your crafting routine can enhance your overall experience and allow you to spend more time enjoying these activities.
Regularly standing up to stretch or performing simple wrist and finger exercises can help relieve tension and prevent repetitive strain injuries.
For instance, rolling your shoulders or flexing your fingers every 30 minutes can make a noticeable difference.
While these suggestions may seem like minor habits, they can cumulatively lead to a more enjoyable and pain-free crafting experience, enabling you to engage fully in your creativity.
For more crochet tips and tricks, you can join craft communities on social media or find detailed guides that explore techniques like assembly, working with different fabric types, and ensuring safety through thoughtful design choices.
Frequently Asked Questions About Car Seat Crochet Projects
What is a car seat cover crochet pattern and how is it useful?
A car seat cover crochet pattern is a set of instructions that guide you on how to create a car seat cover using the technique of crochet. These patterns, which can include a pixel chart or stitch guide, are usually available for free online or can be purchased as a physical copy. Some popular patterns include the C2C Owl and Grids for Kids designs.
Why would I want to use a free crochet pattern for a car seat cover for my baby?
Using a free crochet pattern for a car seat cover allows you to create a customized cover for your car seat without having to spend money on a pre-made one. It also gives you the opportunity to add your own personal touch and style to the cover, making it a unique project. Additionally, it can be a thoughtful baby gift, perfect for ensuring privacy and comfort for your infant during outings.
Are all car seat cover crochet patterns and designs the same?
No, there are many different patterns available for car seat covers. Some may have intricate designs while others may have a more basic and simple design. It is important to choose a pattern that suits your skill level and desired style. Patterns can also vary in terms of materials used, such as yarn types like Bernat Blanket Yarn or soft fleece.
Do I need to have crochet skills to use a free car seat cover pattern?
It is helpful to have some basic knowledge and experience in crochet before attempting to use a free car seat cover pattern. However, many patterns cater to different skill levels and provide instructions for beginners. You can also find video tutorials that guide you through the process step by step.
What materials and supplies do I need to create a car seat cover using a free crochet pattern?
The materials needed may vary depending on the pattern, but typically you will need yarn, crochet hooks, and a tapestry needle. Some patterns may also require additional materials such as buttons, embellishments, or even fabric for added style. Using quality supplies like Clover Amour hooks and Vanna’s Choice yarn can improve your project’s finish. Additionally, crochet accessories like a yarn needle and stitch markers are essential for assembly and finishing touches.
Can I sell car seat covers or other crochet projects made from a free crochet pattern?
It is important to check the terms and conditions of the specific pattern you are using, as some may allow you to sell the finished product while others may not. If the pattern does not permit selling, it is best to respect the designer’s wishes and not sell the product. Always ensure to follow any safety precautions specified in patterns, especially when creating items for infants. For more tips and community support, you can join platforms like Facebook Group or follow influencers on Instagram.
