


If you’re looking to create a cozy and charming accessory, the crochet cat beanie is the perfect project for you. This delightful beanie not only keeps you warm but also allows you to showcase your creativity. In this article, we will cover everything you need to know to get started, including the necessary materials, step-by-step instructions, tips for perfecting your technique, and ideas for customizing your beanie to make it uniquely yours. Here’s how to make a crochet cat beanie:
Key Takeaways:
- Choose the right materials: Use a soft and durable yarn, a crochet hook appropriate for your yarn weight, and stitch markers.
- Master the basic crochet techniques: Learn the magic ring, single crochet, increase and decrease stitches, and changing colors to create the perfect cat beanie.
- Get creative with customization: Personalize your cat beanie by adding bows, flowers, or different colored cat faces. Don’t be afraid to experiment and have fun with embellishments.
Materials Needed for Crochet Cat Beanie (Video Tutorial Available)
Creating a cute and practical crochet cat ear beanie is a fun and easy project, especially for beginner crocheters seeking a lightweight endeavor that results in a warm hat. This cozy crochet project is perfect for beginners and easy to follow.
One crucial step in this process is to gather all the necessary materials beforehand to ensure that the crocheting goes as smoothly as possible. You will need tools like a yarn needle, stitch marker, and scissors, which are essential for the project.
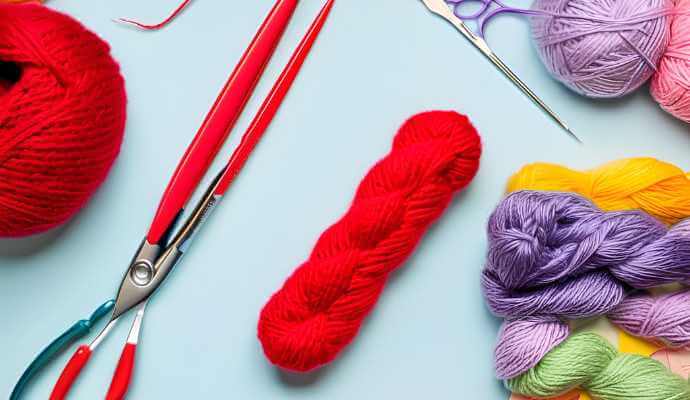
The most important material is the yarn; for this project, we recommend using acrylic yarn, such as Red Heart Super Saver, which offers the softness, breathability, and durability needed to make this cozy beanie. Acrylic yarn is known for being warm and practical for projects like this one.
Additionally, having the right tools on hand, such as stitch markers and a yarn needle, will make the crocheting experience much easier and help manage loose ends efficiently.
What Type of Yarn Should You Use?
When selecting yarn for a crochet cat ear beanie, acrylic yarn is an excellent choice due to its warm and breathable qualities, making it ideal for both aesthetics and comfort.
The insulated structure of acrylic yarn allows the finished product to be warm and cozy while remaining comfortable to wear without overheating. Additionally, acrylic yarn is highly durable, enabling the finished beanie to withstand daily wear and tear without losing its shape or color.
Furthermore, it is machine washable and dries quickly, ensuring the finished product looks fresh with minimal effort. Acrylic yarn does not pill easily, allowing your crochet cat ear beanie to maintain its appearance over time. Whether for blankets, sweaters, or amigurumi, its versatility is unmatched.
Its smooth surface works well with various crochet stitches, enhancing the visual appeal of the design. Among crafters, the Red Heart brand, particularly its Super Saver line, is popular for its wide range of colors and affordability.
What Size Crochet Hook Should You Use? (Free Pattern and Tutorial Included)
The size of the crochet hook is crucial when creating a cat ear beanie, as it influences both the size of the finished project and the tightness or looseness of the final product.
Using a hook that is too small will result in a stiff fabric with minimal stretch, while a hook that is too large will create a loose, airy texture that may not behave as intended. This is particularly important when adhering to the gauge of a pattern, which is essential for achieving a well-fitted project that meets the maker’s expectations in size and design.
The weight of the yarn is also a significant factor when selecting the appropriate hook size; chunky yarn requires larger hooks, while finer yarn is best suited for smaller hooks. By following the gauge recommendations, you can ensure a beautifully finished cat ear beanie that showcases your crochet skills and fits well.
Other Materials Needed
Plus yarn and a crochet hook, other essential materials needed to create your crochet cat ear beanie include:
- Scissors for cutting yarn
- A yarn needle
- Stitch markers
Scissors are necessary for cutting the yarn at the end of the project or when changing colors. A sturdy yarn needle is useful for weaving in any loose ends, ensuring a more professional finish. Meanwhile, stitch markers help keep the crocheting process organized, making it easier to track stitch counts and changes in the pattern. For additional help, refer to our video tutorial or ad-free printable PDF.
Utilizing these materials will enhance your crocheting experience and help you achieve a neat, professional-looking result.
Step-by-Step Instructions for Crochet Cat Beanie
Crochet Cat Ear Beanie Pattern with Step-by-Step Instructions
Materials:
- Yarn: Weight 4 (Medium) – 100% Acrylic – 75m/82yd per 50g skein
- Color A: Cream – 1 skein
- Color B: Beige – 1 skein
- Hook: 5 mm (H-8)
- Scissors
- Tapestry Needle (for weaving in ends)
- Stitch Markers
Size:
- Youth/Adult: 18″ (46 cm) circumference, 7.5″ (19 cm) height
- Child: 16″ (41 cm) circumference, 7″ (18 cm) height
Gauge: 11 stitches x 11 rows = 4″ (10 cm)
Abbreviations:
- ch – chain
- sc – single crochet
- sl st – slip stitch
- hdc – half double crochet
- st – stitch
- st(s) – stitches. Keep track of your stitch count for accuracy.
- inc – increase
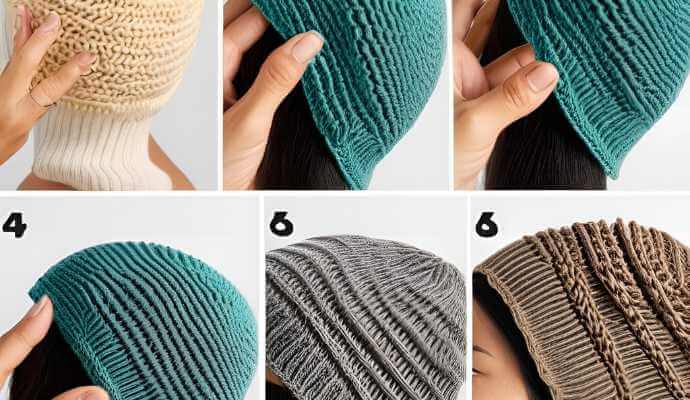
Note: The pattern is crocheted in the round, creating a beautiful, rounded top beanie.
Instructions: Follow this ad-free, printable PDF for a detailed guide.
Headband: This part uses the half double crochet stitch for a flexible fit.
- Ch 4. Join with sl st to form a ring.
- Round 1: Ch 2 (counts as first hdc). Work 9 hdc in the ring. Join with sl st to the top of the first hdc. (10 hdc) Use the magic ring method to avoid gaps.
- Round 2: Ch 2. Work 1 hdc in the same st as joining. Work 2 hdc in each st around. Join with sl st to the top of the first hdc. (20 hdc)
- Rounds 3-8: Repeat round 2 until the beanie is 19″ (48 cm) wide.
- Round 9: Ch 2. Work 1 hdc in the same st as joining. Work 1 hdc in the next st around. Join with sl st to the top of the first hdc. (30 hdc)
- Rounds 10-15: Repeat round 9 until the beanie is 20″ (51 cm) wide.
- Round 16: Ch 2. Work 1 hdc in the same st as joining. Work 1 hdc in the next 2 st around. Join with sl st to the top of the first hdc. (40 hdc)
- Rounds 17-22: Repeat round 16 until the beanie is 19″ (48 cm) tall.
- Round 23: Ch 2. Work 1 hdc in the same st as joining. Work 1 hdc in the next 3 st around. Join with sl st to the top of the first hdc. (50 hdc)
- Rounds 24-28: Repeat round 23 until the beanie is 20″ (51 cm) tall.
- Round 29: Ch 2. Work 1 hdc in the same st as joining. Work 1 hdc in the next 4 st around. Join with sl st to the top of the first hdc. (60 hdc)
- Rounds 30-34: Repeat round 29 until the beanie is 19″ (48 cm) wide.
- Round 35: Ch 2. Work 1 hdc in the same st as joining. Work 1 hdc in the next 5 st around. Join with sl st to the top of the first hdc. (70 hdc)
- Rounds 36-42: Repeat round 35 until the beanie is 20″ (51 cm) wide.
- Round 43: Ch 2. Work 1 hdc in the same st as joining. Work 1 hdc in the next 6 st around. Join with sl st to the top of the first hdc. (80 hdc)
- Rounds 44-49: Repeat round 43 until the beanie is 19″ (48 cm) tall.
- Round 50: Ch 2. Work 1 hdc in the same st as joining. Work 1 hdc in the next 7 st around. Join with sl st to the top of the first hdc. (90 hdc)
- Rounds 51-57: Repeat round 50 until the beanie is 20″ (51 cm) tall.
- Round 58: Ch 2. Work 1 hdc in the same st as joining. Work 1 hdc in the next 8 st around. Join with sl st to the top of the first hdc. (100 hdc)
- Rounds 59-66: Repeat round 58 until the beanie is 19″ (48 cm) wide.
- Round 67: Ch 2. Work 1 hdc in the same st as joining. Work 1 hdc in the next 9 st around. Join with sl st to the top of the first hdc. (110 hdc)
- Rounds 68-70: Repeat round 67 until the beanie is 20″ (51 cm) wide.
- Fasten off and weave in ends.
Ears (Make 2, Using Half Double Crochet):
- Ch 4. Join with sl st to form a ring.
- Round 1: Ch 2 (counts as first hdc). Work 9 hdc in the ring. Join with sl st to the top of the first hdc. (10 hdc)
- Round 2: Ch 2. Work 1 hdc in the same st as joining. Work 2 hdc in each st around. Join with sl st to the top of the first hdc. (20 hdc)
- Round 3: Ch 2. Work 1 hdc in the same st as joining. Work 1 hdc in the next st around. Join with sl st to the top of the first hdc. (30 hdc)
- Rounds 4-6: Repeat round 3 until the ear is 2″ (5 cm) tall.
- Round 7: Ch 2. Work 1 hdc in the same st as joining. Work 1 hdc in the next 2 st around. Join with sl st to the top of the first hdc. (40 hdc)
- Rounds 8-9: Repeat round 7 until the ear is 3″ (8 cm) tall.
- Round 10: Ch 2. Work 1 hdc in the same st as joining. Work 1 hdc in the next 3 st around. Join with sl st to the top of the first hdc. (50 hdc)
1. Magic Ring
The magic ring technique is an essential skill in crochet, serving as the foundation for many projects, including your cozy cat ear beanie. This method creates a tightly closed center for circular crochet designs, effectively eliminating the gaps that can occur with traditional chain methods. It is an integral part of simple crochet patterns, especially for creating a professional finish.
As a result, the finished product has a more polished appearance, and the size of the starting loop can be more easily adjusted to meet the project’s requirements. Beginners and those new to cozy crochet should focus on adjusting the tension of the yarn as it is wrapped around their fingers to achieve the right balance between comfort and snugness.
Committed practice of this technique is crucial, as it underpins numerous other crochet endeavors and ultimately contributes to a more refined and professional look in their work.
2. Single Crochet
The single crochet stitch is the next step in creating your crochet cat ear beanie after completing the magic ring. This stitch forms the body of the warm and cozy hat and is one of the most fundamental stitches in crochet. It is used in a variety of projects, such as fingerless gloves and blankets, but it is especially important for the beanie’s shape and warmth.
To perform a single crochet stitch, insert your hook into the next stitch, yarn over, and pull up a loop, leaving you with two loops on the hook. Then, yarn over again and pull through both loops on the hook. Repeat this process around the ring; the density of the stitch contributes to a tighter structure.
For those who prefer visual learning, many online videos demonstrate how to execute this stitch. The density of the single crochet stitch is what adds warmth to the beanie, making it both functional and stylish.
3. Increase and Decrease Stitches
Understanding how to increase and decrease stitches is essential for shaping your crochet cat ear beanie, as these techniques ensure that you maintain the correct number of stitches while creating a rounded top.
4. Changing Colors
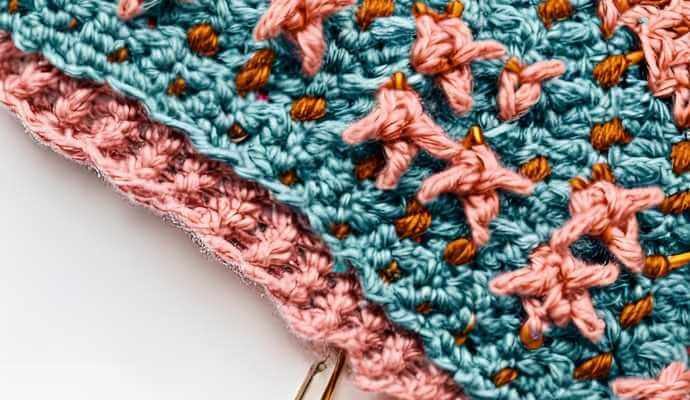
Color changes in crochet play a significant role in creating unique designs and adding character to finished pieces, such as a whimsical crochet cat ear beanie. A color change allows the crocheter to express their personal tastes and preferences while enhancing the overall aesthetic of the piece.
To achieve a smooth transition between colors, the old color should remain in the stitch until the new color is ready to be pulled through. For example, when changing from pink to gray, complete the pink stitch while leaving the gray yarn in the stitch, and then finish the stitch with the gray. This technique minimizes loose ends and results in a neater edge.
When selecting color combinations, consider pairing black with a bright neon green or classic gray with a pastel blue to enhance the finished beanie while ensuring a seamless color transition.
5. Creating the Cat Ears
The most recognizable feature of crochet cat ear beanie hats is their distinctive cat ears, which can be easily created using basic crochet techniques and a bit of creativity. To make the cat ears, follow these steps:
- Start with a foundation chain of 10 stitches.
- Work single crochet in those 10 stitches for approximately 8 rows until you achieve a rectangular shape.
- To form the triangular points of the ears, decrease one stitch on either side of the foundation chain in the last three rows of your project.
This method is the simplest and quickest way to make cat ears, but you can customize the length, shape, or size in various ways. For instance, you may want to increase the length of your initial chain stitch for larger ears or decrease the stitches in a more rounded manner for a softer shape. Using acrylic yarn can also influence the final look and feel of the ears.
This hands-on, personalized approach to enhancing the crochet beanie hat allows for greater self-expression through the selection of colors and patterns.
6. Adding the Cat Face Details
The cat face details are the finishing decorative touches that can make a crochet beanie project unique and personalized. These details can be added using felt, embroidery thread, or fabric paint, offering a variety of textures and styles. Consider using a yarn needle for precise stitching and secure ends.
Felt is an excellent choice for creating the eyes, nose, and mouth, as it can be easily cut into desired shapes and securely stitched onto the crochet beanie. Embroidery techniques can also be employed to craft whimsical eyes and expressive features, giving the beanie a soft and playful appearance. Using stitch markers can help in planning and placing these features accurately.
For those who prefer a more artistic approach, fabric paint can be utilized to apply vibrant colors and distinctive designs, ensuring that each beanie is truly one-of-a-kind. Mixing and matching materials to reflect personal style and preferences is highly encouraged.
Tips and Tricks for Crocheting the Perfect Cat Beanie
Tips and Tricks for Crochet Cat Ear Beanies:
These essential tips and tricks will help you achieve a successful crocheting experience and create a well-crafted final product.
1. Use Stitch Markers
Using stitch markers is an essential tip for any crocheter, as they help keep track of progress and ensure accurate stitch counts throughout your crochet cat ear beanie project. They assist in maintaining dimensions and avoiding mistakes during complex patterns.
There are various types of stitch markers, including locking, ring, and magnetic markers, each offering different benefits.
Locking stitch markers are particularly useful for marking the start of a round, as they make it easier to see the beginning of the round and keep it secure as you continue crocheting.
Flexible ring markers are ideal for indicating where increases or decreases occur, which helps manage complex patterns.
With proper use of stitch markers, crocheters can detect small mistakes early on, preventing them from developing into larger problems.
2. Count Your Stitches
Counting your stitches is essential in crocheting, as it ensures the accuracy of your work and helps minimize mistakes when making your crochet cat ear beanie. Incorporating slip stitches and half double crochet can add variety to your stitches and texture to your design.
Maintaining the correct stitch count enhances the quality of your project and can help you avoid significant sizing issues later on. If a stitch is added or skipped, it can undermine the very foundation of your design, resulting in a poorly fitting beanie.
To keep track of your stitch count more effectively, consider using stitch markers to indicate important points in your work, as they serve as useful visual reminders.
Frequently counting your stitches and measuring your progress at specific intervals will help you stay confident and on track, making the crocheting process more enjoyable and fulfilling.
3. Don’t Be Afraid to Frog (Undo) Your Work
Every crocheter makes mistakes, and knowing when to “frog” (or undo) your work is an essential part of the learning process, especially when creating your crochet cat ear beanie. Keeping scissors and a yarn needle handy can make this process more efficient, allowing for clean removal and re-use of yarn.
While it’s natural to feel a slight aversion to frogging, as it involves undoing your hard work, mastering this technique is one of the quickest ways to enhance your crocheting skills.
Beginners should remember that frogging is not a sign of failure; rather, it is an important opportunity to learn and refine your techniques.
To unpick stitches properly without damaging the yarn, gently pull the yarn from the last stitch, ensuring that you only grab the correct strands.
This method helps keep your yarn in pristine condition, allowing it to be reused for future projects. So, don’t hesitate to practice this skill—it’s a significant milestone on your journey to becoming a skilled crocheter.
Additional Ideas for Customizing Your Cat Beanie
The crochet cat ear beanie can be customized in various ways, offering a wide selection of embellishments and patterns to choose from. Free pattern tutorials and video tutorials can provide additional creative ideas and ensure an easy project completion.
1. Adding a Bow or Flower
Adding a bow or flower to your crochet cat ear beanie design can enhance its cuteness and give this cozy project a unique flair. These embellishments not only increase the charm of the beanie but also allow for personalization, enabling crafters to express their individual style. Using a whip stitch can provide a neat finish when attaching these decorations.
To create a simple bow, crochet a rectangle, fold it in half, and sew through the center to secure it in place. For a flower, crochet a small circle with scalloped edges for petals, using bright yarn to achieve the desired colorfulness.
When attaching these decorations, consider placing them on the side of the beanie or at the base of the cat ears. This positioning makes them more visible and provides a focal point that enhances the overall attractiveness of the design.
2. Using Different Colors for the Cat Face
Using different colors for the facial features of your crochet cat ear beanie allows for creativity and personalization, making each beanie unique to its creator. Experimenting with various color palettes can truly bring your design to life, whether you choose Red Heart’s Super Saver in Aran Fleck or other vibrant yarns.
For a whimsical touch, consider using soft pastels like blush pink, mint green, or baby blue. Alternatively, you can make a bold statement with vibrant colors such as deep purple, bright orange, and sunny yellow.
To seamlessly incorporate these colors, adjust the original pattern by adding contrasting hues to the eyes, nose, and whiskers, enhancing the overall appearance.
When managing yarn changes, securing new colors at the back of your work helps maintain clean transitions. Be sure to weave in the ends carefully for a polished finish, ensuring that your personalized creation is both eye-catching and durable.
3. Adding Embellishments
Adding embellishments such as buttons, sequins, or unique stitching techniques can significantly enhance the visual appeal of your crochet cat ear beanie. These creative touches not only make the beanie stand out but also allow the creator to express their individual style. Utilize an ad-free, printable PDF pattern for detailed instructions and easy reference.
Consider incorporating decorative stitches like shell or popcorn stitches to create texture, or sewing on patches that reflect personal interests or themes. Experimenting with yarns of varying colors and textures can yield stunning effects, transforming a simple beanie into a truly eye-catching accessory.
Encourage creativity by trying out different combinations and placements for these features, inviting each reader to personalize their cozy crochet projects and showcase their unique artistic voice. Whether it’s a cute hat with cat ears or a warm beanie, each creation can reflect your personal style.
Frequently Asked Questions
What is a crochet cat beanie pattern?
A crochet cat beanie pattern is a set of instructions and guidelines for creating a beanie hat in the shape of a cat using crochet techniques, often featuring cat ears to enhance the cute factor.
Where can I find a free crochet cat beanie pattern?
There are several websites and online communities dedicated to sharing free crochet patterns, including crochet cat beanie patterns and tutorials. A simple internet search can help you find a variety of options to choose from, and many of these offer ad-free, printable PDFs.
Do I need to be an experienced crocheter to make a cat beanie?
While some basic crochet skills may be helpful, there are many beginner-friendly crochet cat beanie patterns available that include detailed instructions and video tutorials. These easy projects often guide you through the process with step-by-step guidance, making them perfect for beginners.
What materials do I need to make a crochet cat beanie?
Most crochet cat beanie patterns will list the necessary materials, but you will typically need acrylic yarn in different colors, a crochet hook, scissors, a stitch marker, and a yarn needle to secure ends and weave in loose ends.
Can I customize a crochet cat beanie pattern?
Yes, you can! Crochet cat beanie patterns are versatile and can be customized in many ways, such as changing the colors, adding embellishments, adjusting the dimensions or size to fit different head sizes, or even incorporating a whip stitch for a unique touch.
Is it possible to sell cat beanies made from a free crochet pattern?
It depends on the terms of the pattern’s creator. Some patterns may allow for selling finished products, while others may not. It’s always best to check the pattern’s terms or contact the creator for clarification. Many free patterns with affiliate links may have restrictions on commercial use.
