


To crochet a rubber duck, simply follow the pattern instructions that outline the necessary materials and provide step-by-step guidance for each stage of the process. These guidelines will be beneficial for both advanced crocheters and beginners alike. Additionally, you will find useful tips, ideas for customizing your project, and insights into the benefits of this enjoyable hobby.
Key Takeaways:
- Crocheting a rubber duck pattern can be a fun and rewarding project for all skill levels.
- Crocheting has numerous benefits, such as stress relief and creativity, making it a great hobby to pursue.
- When making a rubber duck pattern, it is important to use the right materials and follow the instructions carefully for the best results.
What Is a Rubber Duck Crochet Pattern?
A rubber duck crochet pattern is a design used to create crocheted rubber ducks. These patterns are often inspired by the Little Yellow Duck Project, which promotes creativity and community involvement. They can vary in complexity to accommodate crocheters of all skill levels and typically include several key components:
- Stitch counts: This indicates the number of stitches in a given row or round.
- Color changes: Instructions detailing how and when to change the yarn color.
- Copyright compliance: Many patterns are intended for personal use only and should not be sold.
One of the most popular uses for rubber duck crochet patterns is in making Duckie lovies. These soft toys resemble baby ducks and make perfect gifts or heirloom pieces.
Why Make a Rubber Duck Crochet Pattern?
A rubber duck crochet pattern is designed for creating a charming rubber duck or duckling through crocheting. Developing a new crochet pattern enables crocheters to hone their skills, contribute to community initiatives such as the Little Yellow Duck Project, and experience the emotional satisfaction and creativity that crocheting brings.
Additionally, rubber duck crochet patterns foster social connections through community crochet workshops and clubs, offering comfort and joy as gifts or collectibles for both children and adults.
What Are the Benefits of Crocheting?
Crocheting, including creating rubber duck crochet patterns, offers numerous benefits such as enhanced creativity, relaxation, and socialization. These advantages extend beyond the simple joy of crafting.
The practice of crocheting fosters creativity and artistic expression, providing an excellent outlet for exploring one’s artistic side while producing beautiful and functional items. This creative process not only stimulates the brain and facilitates personal expression but also instills a sense of control over the final product.
Furthermore, the repetitive motion involved in crocheting has a calming effect that can significantly reduce stress and anxiety levels. The rhythmic nature of crocheting acts as a form of meditation, allowing the mind to take a break from the hustle and bustle of daily life, much like yoga.
Joining crochet groups or workshops enables individuals to make friends and share their talents with others. Whether in-person or online, crochet communities cultivate relationships and create networks that enhance the enjoyment of the craft.
In many ways, the social aspect of crocheting is just as important as the craft itself, serving as a means to connect with like-minded individuals. Gathering with others who share similar interests to work on projects together fosters an environment where participants can exchange tips and techniques, as well as share life stories and experiences.
These additional social interactions contribute to a sense of belonging, which can uplift spirits and improve overall mental well-being.
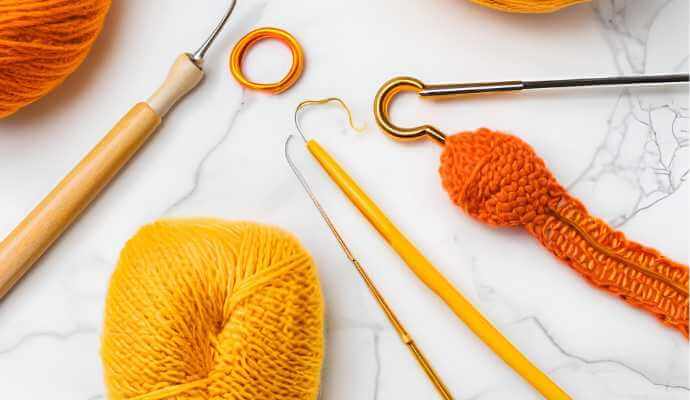
What Materials Do You Need for a Rubber Duck Crochet Pattern?
The material requirements for the rubber duck crochet pattern include yarn, yarn weight, crochet hook size, stuffing, safety eyes, and various miscellaneous items.
The specific characteristics of these materials are essential for achieving the desired durability and aesthetic of the finished product. For instance, the yarn weight plays a significant role in determining the final size of the Duckie lovey, while the choice of yarn type influences the Duckie’s shine and softness.
This guide provides a detailed explanation of the material requirements.
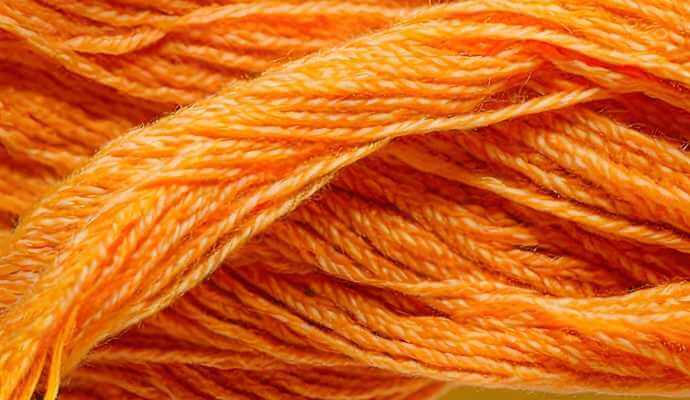
What Type of Yarn Should You Use?
When selecting yarn for a rubber duck crochet pattern, both yarn weight and fiber type are crucial considerations. The chosen yarn weight and fiber type will ultimately determine the final look and feel of the Duckie lovey.
For amigurumi projects, yarn weights such as worsted or sport are often recommended, as they provide a good balance between structure and softness.
Choosing between cotton and acrylic yarn can significantly impact durability and care requirements, so it’s essential to select yarn that aligns with your crafting objectives. Cotton yarn is favored for its breathability and smooth finish, making it an excellent choice for baby projects since it is gentle on sensitive skin. However, its lack of elasticity may lead to less-defined shapes and may require tighter tension while crocheting.
On the other hand, acrylic yarn is more widely available and easy to care for, as it is typically machine washable—a significant advantage for items that will see frequent use.
Acrylic yarn offers vibrant color options and retains its shape well, but it can sometimes be less breathable than cotton, which may affect the overall comfort of the finished product. Understanding these differences will help you make the best yarn choice for your crochet projects.
What Size Crochet Hook Do You Need?
Selecting the appropriate crochet hook size is crucial for achieving the correct tension and gauge in your rubber duck crochet pattern, which ensures that your Duckie lovey is made to the correct size and shape.
While patterns typically recommend a hook size based on the yarn weight, it’s essential to check your gauge to ensure it works for you. Using the right hook can significantly impact the satisfaction of your finished project.
To check your gauge accurately, create a small swatch using the recommended yarn and hook size, then count the stitches and rows within a specified area, usually a four-inch square. This will help determine if your tension aligns with the pattern’s requirements.
If your swatch differs by more than an acceptable margin, you may need to adjust your hook size. For instance, if your stitches are too tight, switching to a larger hook can help loosen your tension, whereas a smaller hook will tighten it.
Additionally, be sure to pay close attention to any gauge notes in the pattern, as they often indicate how crucial gauge is for the success of the final project.
How to Read a Rubber Duck Crochet Pattern?
Learning to read a rubber duck crochet pattern is an essential skill that enhances your crochet experience by helping you understand the instructions, symbols, and abbreviations commonly used in these designs.
Each pattern typically includes a legend or guide that explains the meanings of the various symbols for stitches and techniques.
Abbreviations are employed in crochet patterns to simplify the instructions, making them easier to read. By mastering these important reading techniques, you will be able to complete a wide variety of crochet patterns.
What Do the Symbols Mean?
Crochet symbols represent various stitches and techniques within a rubber duck crochet pattern, acting as visual shorthand that streamlines the crafting process. Understanding these symbols is essential for accurately interpreting the pattern instructions and executing the stitches precisely, which is crucial for creating a well-crafted Duckie lovey.
Many patterns include a guide or legend that explains these symbols, making it easier for both novice and experienced crocheters to follow along.
For beginners, becoming familiar with common symbols, such as the chain stitch (represented by a simple oval) and the single crochet (indicated by an ‘X’), can greatly enhance their crocheting experience. These symbols provide vital information on how to proceed, resulting in cleaner and more accurate projects.
For instance, a symbol for a double crochet stitch may frequently appear in a rubber duck crochet pattern, indicating moments of increased texture and detail in the Duckie’s body. By consistently referencing the symbol chart, crocheters can not only improve their skills but also gain confidence in completing their delightful projects.
What Do the Abbreviations Mean?
Crochet abbreviations are shorthand notations found in rubber duck crochet patterns that simplify instructions and make them easier to follow, especially for complex designs.
Familiarizing yourself with common abbreviations, such as ‘sc’ for single crochet and ‘ch’ for chain, will enable you to read patterns more effectively and execute the necessary stitches accurately.
Understanding this terminology is essential for both beginners and experienced crocheters, as it enhances overall comprehension of the patterns.
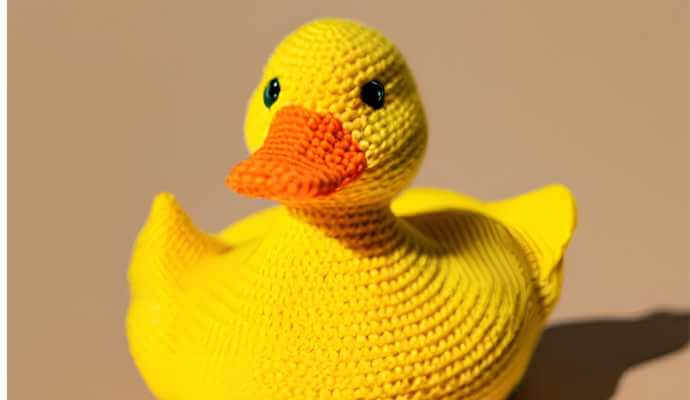
Step-by-Step Instructions for Making a Rubber Duck Crochet Pattern
A rubber duck crochet pattern serves as a comprehensive guide for creating a Duckie lovey, providing step-by-step instructions to ensure successful project completion.
The pattern includes detailed information on how to make the body, head, beak, eyes, wings, and feet.
It also outlines the use of crochet squares to achieve the proper shape and size for the various parts of the duck, as highlighted in many crochet magazines and crochet workshops around the world. These techniques are popular in countries like Poland and South Africa, influencing duck patterns globally.
1. Body
The body of the rubber duck crochet pattern is one of the most crucial components, as it forms the main structure of your Duckie lovey. This section typically begins with a magic ring or chain. Patterns like those from Melissas Crochet Patterns or Puddles the Tiny Duck require careful attention. It is essential to follow the pattern carefully to achieve the desired body shape, which usually consists of crochet squares, ensuring a strong and visually appealing finished product. During this step, you will need to increase stitches to attain the desired width and height, so paying close attention to stitch counts is important.
The main body is constructed using a series of single crochet stitches, often starting with around six stitches in the magic ring and increasing as you work outward. In the initial rounds, you may need to add two stitches in every second stitch.
For instance:
- Round 1: 6 single crochets in the magic ring (6 stitches)
- Round 2: (2 single crochets in the next stitch) 3 times (12 stitches)
- Round 3: (1 single crochet, 2 single crochets in the next stitch) 4 times (18 stitches)
- Round 4: (2 single crochets, 2 single crochets in the next stitch) 4 times (24 stitches)
- Round 5: (3 single crochets, 2 single crochets in the next stitch) 6 times (30 stitches)
It is vital for crocheters to monitor their gauge and tension while making the body. Stitches that are too tight or too loose can significantly affect the final dimensions of the duck’s body. For beginners, gauge is defined as the number of stitches per inch, and maintaining consistent tension is essential to ensure the body remains uniform in size and shape, ultimately setting up the rest of the project for a pleasing final outcome.
2. Head
Creating the head of your rubber duck crochet pattern is one of the most crucial steps, as it significantly influences the final appearance of your Duckie lovey. This process may involve special techniques for shaping and adding details.
As you follow the pattern’s instructions, you might need to use crochet squares or a specific stitch to achieve a rounded shape that will attach seamlessly to the body. The pattern may also include techniques for adding safety eyes, which enhance the character and expression of the head before it is attached to the body.
To ensure proper alignment, it is advisable to attach the head to the body before finishing the top. Use a slip stitch or whip stitch to secure it, making sure that the seams are even.
If you are using safety eyes, ensure they are evenly spaced and positioned slightly above the center line of the head, as this contributes to the whimsical nature of the rubber duck. Additionally, you may choose to embroider a small smile below the eyes to give your creation a friendly face.
3. Beak
The beak of a rubber duck crochet pattern is a crucial element of the toy’s design, contributing significantly to its overall character. Carefully following the pattern instructions will ensure that the shape and size of the beak align with the intended design.
Typically, the beak is crafted as a separate piece and may require specialized stitches to provide definition and texture, making meticulous assembly even more important. Once completed, the beak is sewn onto the head and should complement the overall design of the duck.
To achieve the correct shape for the beak, utilize increases and decreases in your stitching to create the desired dimensions. This technique will help form a rounded edge that resembles the natural shape of a duck’s bill. After establishing the basic shape, you can use surface crochet or embellishments to add finer details.
When it comes time to attach the beak to the head, consider adding an extra stitch or two to reinforce the joining stitches. This reinforcement will prevent the beak from wobbling and visually enhance the design by ensuring it sits properly against the head. Such attention to detail will help create a more cohesive and polished overall look for the rubber duck.
4. Eyes
Adding eyes to your rubber duck crochet pattern is a crucial step that defines the personality of your Duckie lovey. Designers like Justyna Kacprzak and patterns in Your Family Magazine often suggest using either safety eyes or crocheting the eyes directly into the head. If you opt for safety eyes (click here for the ones I use), proper placement is essential to ensure that the final expression of the rubber duck reflects the playful nature typical of these toys.
If you choose to crochet the eyes, following the pattern instructions will help you achieve the correct size and placement.
Safety eyes are extremely durable and easy to use, providing a shiny, professional finish that can withstand significant wear and tear from play. On the other hand, crocheted eyes offer more creative flexibility, allowing you to choose different colors and designs.
Additionally, if you are concerned about small parts posing a choking hazard for young children, crocheted eyes eliminate that risk.
Regardless of the method you choose, placing the eyes about a quarter of the way down from the top of the head typically results in a cute and happy expression. Ensuring that safety eyes are securely fastened or that crocheted eyes are firmly attached will help them stay in place, enhancing both the charm and durability of your cheerful Duckie.
5. Wings
Adding wings to your rubber duck crochet pattern is a delightful feature that brings extra detail and whimsy to your Duckie lovey. You can create the wings by following specific stitch instructions to shape them accordingly.
Depending on your design, the wings can be either simple or intricate, and their assembly should be done with care to ensure they are securely attached to the body. The placement of the wings should enhance the overall design and complement the Duckie’s stance. You can choose between rounded wings or more elaborate finger-like wings that suggest movement.
To make the wings stand out, consider using contrasting yarn colors, or opt for similar colors that allow them to blend seamlessly into the body. Maintaining a tight stitch tension is important to prevent the wings from drooping over time.
A whip stitch is an effective option for attachment; just ensure that both wings are evenly aligned for a balanced appearance. Additionally, you might explore other methods for attaching the wings, such as embroidery or adding small embellishments, to make your Duckie even more fun and unique.
6. Feet
The feet of your rubber duck crochet pattern will add the finishing touch to the playful aesthetic of your Duckie lovey and can be designed to be either simple or more detailed, depending on the pattern.
By following the rubber duck crochet pattern closely, you will be guided through the construction process, ensuring that the feet are sturdy and well-shaped for proper balance. Properly attaching the feet is equally important to ensure that your duck can stand or sit correctly.
When considering the shape and design of the feet, keep in mind that they can vary widely, ranging from classic flippers to more whimsical styles like cartoonish webbed feet.
Use yarn of appropriate thickness to maintain consistency with the rest of your Duckie lovey, and opt for a contrasting color to enhance visual appeal.
Once the feet are crocheted, positioning them correctly will play a significant role; a slight angle may enhance the duck’s cheerful disposition.
Be sure to sew the feet on with strong thread or yarn, ensuring they are secure enough to withstand playful handling. Regularly adjusting the placement during assembly can help achieve the perfect balance, making your Duckie lovey not only adorable but also functional.
Tips for Making a Perfect Rubber Duck Crochet Pattern
To create a flawless rubber duck crochet pattern, like those found in free download collections for personal use, it’s important to follow some key tips that will help you manage tension and stitch count. These factors are essential for ensuring that every part of the Duckie lovey pattern fits together seamlessly, respecting any copyright restrictions.
1. Use the Right Tension
The importance of tension in crochet for the rubber duck crochet pattern lies in its ability to help the crafter achieve an even and accurate gauge, which significantly influences the overall shape and fit of the Duckie lovey.
If the tension is incorrect, the pieces may become too loose or too tight, complicating the assembly of the finished item. When one piece of the rubber duck crochet pattern is crocheted too tightly, it may pull or bunch up, while a piece that is crocheted too loosely may develop holes. Both issues can negatively impact the appearance of the finished Duckie lovey.
Finding the right balance for the crafter’s individual tension style may require experimenting with different yarns or hook sizes, considering the yarn weight. Proper tension is crucial for producing a high-quality final product.
Since tension can vary from person to person and even from project to project, it’s essential to practice making gauge swatches. This practice helps the crocheter determine the correct gauge for their Duckie lovey before beginning the project and allows for early adjustments if necessary.
Gauge swatches should mirror the final product, utilizing the same yarn, hook, and stitches. Consistency is key, so the crafter should be mindful of maintaining uniform tension throughout both the swatch and the actual project. Ensuring proper tension will allow the Duckie components to fit together correctly and ensure that the overall design functions as intended.
2. Count Your Stitches
Accurate stitch counting in your Duckie lovey crochet pattern is essential for ensuring precision in your work and avoiding discrepancies when stitching various parts together. Each component of the Duckie depends on a precise stitch count to achieve the desired size, making it crucial to keep track of your counts while crocheting.
Employing reliable counting methods will enhance your overall accuracy and the quality of the final product.
To ensure dependable stitch counting, tools such as stitch markers can be quite helpful. When placed at the end of each row or after completing a specific number of stitches, a marker provides a visual cue that simplifies tracking your progress.
Many find that writing down their counts on paper or in a digital note helps them concentrate better and prevents the frustration of losing track. This practice should be done consistently, as the precision of this method will significantly impact the cohesion and symmetry of the final product.
For more guidance, consider looking at crochet workshops or crochet magazines such as Your Family Magazine or Holland Designs which often offer useful tips on stitch counting.
3. Change Colors Neatly
If you’re working on a specific design, such as those by Lisa van Klaveren or Heather C Gibbs, paying attention to color changes is crucial.
Changing colors seamlessly in your rubber duck crochet pattern is a valuable technique that enhances the overall appearance of your Duckie lovey and creates cleaner transitions between shades. Mastering this skill will elevate the professionalism of your finished product.
The methods for changing colors in a crochet pattern can vary, but adhering to certain guidelines can ensure that the color change is executed smoothly and blends well with the surrounding stitches.
Some effective methods for achieving perfect transitions include the following:
- Using a slip stitch to attach the new color before beginning the next row or round helps maintain tension and prevents extra yarn tails.
- Crocheting with both the old and new yarns held together for a few stitches creates a gradient effect that enhances flow.
- Additionally, consider the placement of colors; strategically arranging them can improve the balance and visual impact of the piece.
Practicing these variations will not only enhance the look of your rubber duck but also build your confidence in crocheting with color. Moreover, exploring different yarn weights can give you a better understanding of how colors interact with different textures.
How to Customize Your Rubber Duck Crochet Pattern?
Customizing can be inspired by popular designs from amigurumi toys or notable designers such as Melissas Crochet Patterns and Justyna Kacprzak, who offer a variety of unique and creative ideas.
Personalizing a rubber duck crochet pattern fosters creative expression and individuality, resulting in Duckie loveys that are truly unique.
Crafters can experiment with different colors, add accessories, or adjust sizes to suit various preferences and occasions.
This ability to customize the project not only enhances the crafting experience but also leads to a final piece that reflects the creator’s unique style and taste. Just as projects like the Little Yellow Duck Project encourage creativity, so too can your customized rubber duck.
1. Change Colors
By learning different techniques, such as those used in duck patterns by designers like Nina Leon and amigurumi projects, you can master the art of color-changing.
Changing the colors in your rubber duck crochet pattern can dramatically transform the look and feel of your Duckie lovey, allowing you to explore a vibrant color palette that reflects your personal style. By selecting complementary or contrasting colors, you can add depth and visual interest to your project, making it more appealing.
Using proper techniques for changing colors will ensure smooth transitions and enhance the overall beauty of your creation.
When choosing colors, consider the mood you wish to evoke. Bright yellows and blues can create a cheerful and playful aesthetic, while pastel hues may lend a softer, more soothing vibe. It can also be helpful to use a color wheel to determine which shades work harmoniously together.
To ensure smooth transitions between colors, you might try the ‘join-as-you-go’ technique for seamless blending or consider methods like color switching, where you carry the unused yarn along the edge. These techniques not only provide a professional finish but also maintain the integrity of your crochet fabric, ensuring that your rubber duck stands out beautifully.
2. Add Accessories
Accessories for a rubber duck crochet pattern can greatly enhance creativity and personalization. Using unique embellishments is a fun way to make each Duckie lovey one-of-a-kind.
For instance, the duck could be crocheted with a tiny crown or a small umbrella. Adding colorful beads or button eyes can bring the duck to life, while different yarn textures and colors can add depth and richness to the accessory.
There’s no requirement for any two ducks to look alike. By thinking outside the box and incorporating themed costumes for holidays or seasons, you can transform a simple plush into a cherished keepsake.
3. Make Different Sizes
Creating rubber duck crochet patterns in various sizes allows for the production of versatile Duckie lovies, catering to different uses and preferences, from small pocket-sized companions to larger plush toys.
You can easily adjust the size of your rubber duck crochet project by using different yarn weights, hook sizes, or stitch counts, while still maintaining the whimsical charm of the rubber duck. This flexibility enables you to create fun variations for gifting, decoration, or personal enjoyment.
For instance, employing a lighter weight yarn and a smaller hook can yield a tiny rubber duck that serves as a charming accessory for a child’s backpack or a delightful keychain. Conversely, using bulky yarn and a larger hook will result in a bigger rubber duck that can be a cuddly companion and a focal point in a baby’s nursery or playroom.
This approach not only provides a new tactile experience but also meets the diverse needs and preferences of the recipients. Projects like Puddles the Tiny Duck can serve as great inspiration for size variations.
Final Thoughts
Creating a rubber duck crochet pattern is an exciting and fulfilling journey that allows you to craft a Duckie lovey while enhancing your skills and connecting with the broader crochet community. The materials you select, the patterns you explore, and the customizations you implement all foster creativity and provide a sense of accomplishment.
Below is a list of ways in which the experience of crocheting a rubber duck pattern can benefit you personally, as well as contribute to a sense of community.
- This journey involves not only finding the right yarn and hook but also learning new techniques and overcoming challenges you encounter along the way.
- Each stitch serves as a building block for personal development, helping to build confidence and creativity.
- By sharing your journey, experiences, insights, and finished projects with others in the crafting community, you can forge meaningful friendships and create a supportive network that thrives on inspiration and collaboration.
For more creative ideas, check out free downloads available on platforms like Woolly Thoughts by Pat Ashforth and Steve Plummer.
Frequently Asked Questions
What is a rubber duck crochet pattern?
A rubber duck crochet pattern is a set of instructions and guidelines for creating a crocheted toy that looks like a rubber duck. It includes the types of stitches, yarn, and techniques needed to create a finished product. Whether you’re in California, New York City, Poland, or South Africa, these patterns can be customized to reflect local styles and preferences.
Do I need to have a lot of crocheting experience to make a rubber duck?
No, you do not need to have a lot of experience to make a rubber duck using a crochet pattern. Basic knowledge of crochet stitches such as single crochet, double crochet, and slip stitch is sufficient.
Where can I find a rubber duck crochet pattern?
There are many places where you can find a rubber duck crochet pattern, such as online marketplaces, craft stores, and crochet blogs. You can also find free patterns on websites and social media platforms. Try searching for patterns by Melissas Crochet Patterns or Nina Leon for unique designs.
What materials do I need to make a rubber duck using a crochet pattern?
The materials needed will vary depending on the specific pattern, but generally you will need yarn, a crochet hook, stuffing, and safety eyes. Some patterns may also require additional materials such as buttons or ribbon. Always check for any copyright restrictions on the materials used.
Can I customize my rubber duck using a crochet pattern?
Yes, you can definitely customize your rubber duck using a crochet pattern. You can choose different yarn colors, add embellishments, or modify the size and shape of the duck. However, it is important to follow the pattern instructions to ensure a successful outcome. Be mindful of any copyright restrictions when sharing your customized designs.
Is a rubber duck crochet pattern suitable for beginners?
Yes, a rubber duck crochet pattern can be suitable for beginners as long as the pattern is labeled as “easy” or “beginner-friendly”. It may also be helpful to have some basic crochet knowledge and practice with simpler projects before attempting a rubber duck.
