

Crocheting your very own Tweety Bird is a delightful way to bring this beloved character to life using yarn and creativity! This guide provides everything you need to know about the Crochet Tweety Bird Pattern, including how to select the right materials and yarn, as well as understanding abbreviations and stitches. With step-by-step instructions for crafting each part—from the head and body to the wings and feet—you will create an adorable, personalized Tweety Bird. Get ready to unleash your inner crochet artist!
Key Takeaways:
- Select the right materials: Use fine yarn and a small crochet hook for a smaller Tweety Bird, and thicker yarn and a larger hook for a larger bird.
- Learn the basics: Understand the abbreviations and stitches used in crochet patterns, and practice with smaller projects before attempting a complex pattern like Tweety Bird.
- Personalize your project: Add your own unique touches to your Tweety Bird, such as using different colors or adding accessories, to make it truly one-of-a-kind.
What Is Crochet Tweety Bird Pattern?
The Crochet Tweety Bird Pattern is an enjoyable craft that allows crochet enthusiasts to make their own Tweety amigurumi. With its bright yellow yarn, cheerful design, and charming character, this whimsical toy is perfect for children as a plaything or as a decorative piece in any setting. This guide reviews the crochet pattern and outlines techniques such as the magic ring, single crochet, and double crochet, along with step-by-step instructions that make this handmade project a delightful experience for both novice and advanced crocheters alike.
What Materials Do You Need for Crochet Tweety Bird Pattern?
According to the YouTube channel Gigi’s Crochet, you will need several materials to create your own Crochet Tweety Bird pattern. The materials chosen for crocheting a toy pattern play a crucial role in determining both the functionality and aesthetic appeal of the finished toy.
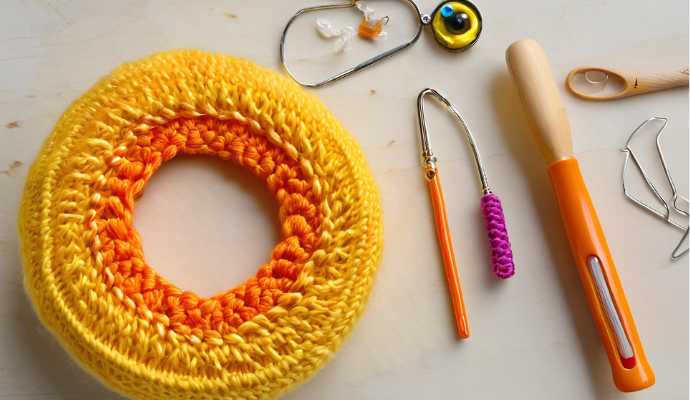
Essential supplies include:
- Bright Yellow Yarn: This will be the main color for your Tweety Bird pattern.
- Orange Yarn: This is used to create Tweety’s beak and feet.
- Crochet Hook: The size of the crochet hook should be matched to the yarn you select.
- Yarn Brands: Opt for high-quality brands such as Red Heart Supersaver or DMC Cotton Perle, as they ensure long-lasting durability.
- Sewing Needle: This tool is useful for attaching the various parts of the pattern together.
- Filling: This is necessary to make your stuffed toy soft and lovable.
What Type of Yarn Should You Use?
“`html
For the Crochet Tweety Bird Pattern, the ideal yarn choices are bright yellow and orange, as these colors accurately represent the character. Durable materials like Red Heart Supersaver offer not only longevity but also vibrant hues, ensuring that the final whimsical toy is both eye-catching and safe for children to play with. Using yellow thread can also enhance the details for a more authentic look.
To enhance the overall tactile experience for small hands, selecting a yarn with a soft texture can bring the character to life more effectively. Brands such as Lion Brand and Bernat offer yarn options with unique textures that can add dimensionality to the character’s design.
Durability is crucial for a toy that will endure endless use, so choosing yarn that blends acrylic with natural fibers strikes the right balance between strength and softness.
What Size Crochet Hook Should You Use?
Using the appropriate size crochet hook for your Crochet Tweety Bird Pattern is essential for achieving even tension and clear definition in the stitches, which ultimately affects the overall appearance of your character. For amigurumi, a common recommendation is to use a crochet hook size between 3.5mm and 4.0mm, particularly when working with materials like DMC Cotton Perle for optimal results. However, the choice of hook size is not the only factor to consider; the interaction between the hook size and yarn weight also influences the quality of the finished product.
A larger hook can create looser stitches, resulting in patterns that appear more airy and casual, while a smaller hook yields tighter stitches for a denser, more structured look. To ensure your stitches are even and suitable for your intended purpose, it can be beneficial to swatch with different sizes of crochet hooks and your chosen yarn. This simple test not only allows you to practice your technique but also aids in pattern making as you embark on your own projects.
Ultimately, making the right choice enhances both the appearance of your work and your enjoyment of the craft.
What Other Materials Will You Need?
Plus yarn and a crochet hook, you will need several other materials to complete your Crochet Tweety Bird Pattern. A sewing needle is helpful for attaching the different sewing parts of your crocheted toy, while filling is necessary to make your stuffed toy soft. Using a slip stitch will help keep your work neat. A pair of scissors is essential for trimming the yarn and cleaning up the edges.
A stitch marker is also useful for marking rounds and tracking your progress, especially during more complicated sections of the pattern where it is easy to lose your place. Creating a comfortable workspace can enhance both creativity and comfort; an ergonomic setup makes the crocheting process more enjoyable and productive.
All of these materials are essential for crafting a beautiful crocheted version of the beloved Tweety Bird. This fun crochet project is part of a delightful crafting journey that allows you to engage in yarn crafting and develop a creative hobby.
How to Read a Crochet Pattern for Tweety Bird?
A crochet pattern for Tweety Bird amigurumi is essential for crochet enthusiasts, as it enables them to read and comprehend the complex instructions and abbreviations commonly found in crochet projects. By learning how to interpret these patterns and symbols, you will gain the skills necessary to execute techniques such as single crochet, double crochet, chain stitch, and others with confidence.
Ultimately, this knowledge will lead you to create a whimsical toy that beautifully captures the essence of the Tweety Bird design, enriching your crafting journey and allowing you to engage in delightful crafting.
What Do the Abbreviations Mean?
Crochet patterns often feature numerous abbreviations that may confuse beginners, but understanding their meanings is essential for successfully completing the Crochet Tweety Bird Pattern.
Common abbreviations include:
- “sc” for single crochet,
- “dc” for double crochet,
- “ch” for chain stitch,
- “inc” for increase,
- “dec” for decrease,
which are fundamental components used to create your cheerful design. These abbreviations serve as a shorthand to streamline the crochet process, enabling crafters to follow along more easily. For example, knowing that “hdc” stands for half double crochet can significantly impact the texture of Tweety’s body.
Familiarity with terms such as “st” for stitch and “inc” for increase not only saves time but also enhances accuracy when navigating the intricate steps of the pattern.
As you embark on this delightful crafting journey, decoding these essential abbreviations will greatly contribute to your overall proficiency and enjoyment in creating the adorable Tweety Bird.
What Are the Different Stitches Used?
The Crochet Tweety Bird Pattern incorporates a variety of essential stitches for amigurumi design, enabling you to shape the toy effectively. Throughout the pattern, you will use single crochet, double crochet, slip stitch, and the crucial increase and decrease stitches to create the different parts of this classic character.
These stitches are fundamental in crafting a delightful and playful design, turning your yarn project into a charming creation that stands out as an adorable character.
Step-by-Step Instructions for Crochet Tweety Bird Pattern
The instructions for creating your own Crochet Tweety Bird offer a step-by-step guide that is simple enough for beginners to follow. They cover everything from making a magic ring to adding the finishing touches to your stuffed toy, making it an enjoyable project and a great way to practice your crochet skills.
This fun activity also provides an opportunity to explore your creative hobbies and enjoy yarn crafting as a rewarding DIY project.
1. Head and Body
The first step in creating your Crochet Tweety Bird is to make the head and body using a magic ring. This technique is essential for forming this delightful whimsical toy as part of your creative crafting journey.
Begin by creating a magic ring, and then proceed with single crochet rounds to shape the head and body, increasing stitches as needed to achieve a smooth and plump appearance. It’s crucial to work the stitches evenly, as this will significantly impact the overall look of your finished product.
For the head, start by making six single crochets into the magic ring, then increase the stitch count evenly in each subsequent round to maintain a rounded shape.
When crafting the body, be sure to follow the exact stitch count and adjust by increasing or decreasing as specified in the pattern. Don’t rush the process; take your time to inspect your work and ensure that the edges of each round are aligned neatly, free of gaps or uneven sections. This careful pattern making is key to crafting a healthy knitted toy that will delight any fan of Tweety Bird.
2. Beak
Next, you will create Tweety Bird’s beak using orange yarn. Although the beak is one of the simplest components of the Tweety Bird design, it is also among the most important, so be sure to make it carefully and attach it securely to the head once it is completed.
To begin crafting the beak, chain 6 stitches and then join them to form a circle. For the next round, make 2 single crochets in each stitch, resulting in a total of 12 stitches.
- In the following round, work (1 single crochet in the next stitch, followed by 2 single crochets in the next stitch) a total of 6 times, bringing the total to 18 stitches.
- In the next round, work (1 single crochet in the next 2 stitches, followed by 2 single crochets in the next stitch) 6 times, resulting in 24 stitches.
At this point, you may choose to add a fifth round to create a thicker beak. Ideally, the beak should be about one-third the diameter of the head. This proportion is important, as it enhances the overall design of Tweety Bird and contributes to the character’s cuteness.
Once you are satisfied with the shape, weave in the ends and securely attach the beak to the head with a few tight stitches.
3. Eyes
The eyes of your Tweety Bird are crafted using black and white yarn to create the pupils and the eye whites, respectively. Simple stitches like the magic ring and chain stitch are employed to form the two eyes, which can be proportioned to complement the brightly colored yarn of the crocheted design.
“`html
You have the option to make the eyes larger for a more expressive look. Additionally, you can add a hint of yellow or blue to the eyes to align with Tweety’s iconic color scheme. For more inspiration, check out the Crochet Tweety Bird free pattern, a resource cherished by crochet enthusiasts.
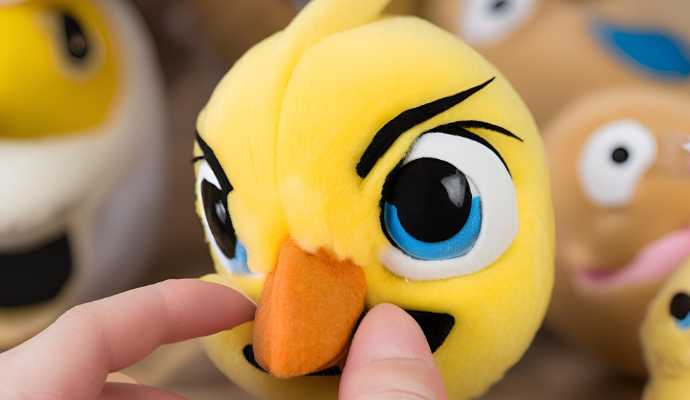
When attaching the eyes to the head, use a thick yarn or thread to ensure they are well-supported and balanced, depending on the expression you wish to convey. This step offers ample opportunities for creativity; you can experiment with different shapes for the eyes, add lashes, or incorporate any other unique touches to make them stand out.
4. Wings
Creating the wings is an enjoyable part of the Crochet Tweety Bird project, lending a lighthearted touch to the design.
By using yellow yarn and following the pattern, you will work in rounds, employing increase and decrease stitches to shape the wings. This process will result in two adorable wings that can be easily sewn onto the body.
It is important to ensure symmetry between the wings, as this will enhance the overall aesthetic of the finished bird.
5. Feet
The final touch to your adorable Tweety Bird is crafting the feet, which are made from orange yarn such as Red Heart Supersaver to complement the beak and enhance the overall character.
Use simple crochet techniques to create two feet, ensuring they are securely attached to the body for a complete and charming look.
Begin by measuring the desired size for each foot, typically around 2 to 3 inches in length, to achieve a proportionate appearance. When crocheting, focus on creating a sturdy structure that is vital for durability, especially since children will be playing with the finished toy.
Once the feet are crafted, use a combination of slip stitches and tight stitches to attach them firmly to the base of the body. This secure stitching not only keeps the feet in place during enthusiastic play but also reinforces the overall integrity of the toy, ensuring it remains a cherished companion for years to come.
Tips for Crocheting Tweety Bird Pattern
To ensure a successful crafting journey and create a Tweety Bird you can be proud of, these helpful tips for crocheting this design will assist you in achieving the desired results. Embrace this creative hobby as a fun activity, perfect for making handmade projects that children will adore.
The tips include adjustments for the toy’s size as well as personalizations to make the project more enjoyable.
How to Make Tweety Bird Bigger or Smaller?
The size of your Crochet Tweety Bird can be easily adjusted, allowing the toy to meet various requirements. By increasing or decreasing stitches in the original crochet pattern, you can achieve the desired size without altering the character of the design.
To create a larger Tweety, for instance, simply add more stitches at the beginning of each round. This approach will make the body more rounded. Conversely, to make a smaller Tweety, consider decreasing the number of stitches toward the end of the rows.
You can also experiment with modifying different areas to adjust the size of the wings or beak. Additionally, the tension or tightness of the yarn can be altered, which will impact both the size and texture of the toy. This flexibility allows you to personalize the design and truly make it your own.
How to Add Personal Touches to Your Tweety Bird?
Modifying the Tweety Bird amigurumi design to reflect your personal preferences can be a delightful way to enhance and personalize your crafting experience. Whether you choose to alter colors, use patterns like a double crochet or slip stitch, or add accessories, these changes can make the already cheerful design even more unique.
Experimenting with different colors can significantly change the overall feel of the design, allowing crafters to use shades they prefer or those that are more readily available.
Adding distinctive accessories, such as a tiny hat, bowtie, or even sunglasses, can infuse the design with a personal touch. Simple modifications, like customizing the character’s smile or eyebrows, can also make the design stand out.
Additionally, you can modify stitching techniques to suit your preferences. If you favor a particular type of stitch or wish to add texture, these alterations can enhance the visual interest of the design.
Embroidery offers another popular method for embellishing designs, allowing you to include details on the face or even add a name and date at the bottom.
Overall, modifying the Tweety Bird amigurumi design is a wonderful way to express creativity and add fun to your project. Each modification tells its own story and serves as a celebration of your artistic expression.
Where to Find Free Crochet Tweety Bird Patterns?
For those eager to embark on their crafting journey, discovering free crochet Tweety Bird patterns can offer a wealth of resources and inspiration within the vibrant crochet community. These patterns are perfect for creating whimsical toys that serve as charming creations for both children and crochet enthusiasts alike.
Numerous websites and blogs regularly post new patterns, tutorials, and craft ideas that cater to crocheters of all skill levels. Popular platforms like Ravelry and Etsy feature a wide array of free crochet patterns, while blogs such as Repeat Crafter Me and AllFreeCrochet provide expert tips and step-by-step guides.
Additionally, social media platforms like Instagram and Pinterest serve as treasure troves for creative ideas and opportunities to connect with fellow crocheters. Joining online forums or Facebook groups dedicated to crochet not only enhances the learning experience but also provides invaluable support and encouragement.
As crocheters immerse themselves in these communities, they can share their projects, seek advice, and draw inspiration from the unique and imaginative designs of others.
Final Thoughts on Crochet Tweety Bird Pattern
The Crochet Tweety Bird Pattern is a delightful project that, while not basic, offers a rewarding crafting experience to create an adorable and safe stuffed toy for children. This project is an ideal way to explore yarn crafting, combining creativity with easy instructions.
The techniques, materials, and customization options involved in bringing this beloved character to life will not only enhance your crochet skills but also boost your creativity.
The satisfaction derived from creating such an appealing piece can be incredibly fulfilling, fostering a sense of accomplishment that motivates you to tackle even more complex designs.
Crafting this cheerful avian friend allows for personal expression while also providing an opportunity to connect with fellow crafters. Sharing your finished projects and experiences in online forums can ignite inspiration in others, encouraging them to explore crochet and enjoy the sense of community that comes with the hobby.
Once you’ve completed your Tweety Bird, be sure to take a picture and share it; your creation might inspire someone else to embark on their own crafting journey!
Frequently Asked Questions
What is a Crochet Tweety Bird Pattern?
A Crochet Tweety Bird Pattern is a set of instructions and guidelines for creating a crochet version of the popular cartoon character, Tweety Bird. It includes step-by-step instructions on how to crochet each part of the bird, as well as detailed images and measurements. This pattern making process transforms bright yellow yarn and orange yarn into a delightful crafting journey.
What materials do I need to crochet a Tweety Bird?
To crochet a Tweety Bird, you will need a set of crochet hooks, yarn in yellow, white, and orange colors, stuffing material, safety eyes, and a yarn needle. Consider using bright yellow yarn like DMC Cotton Perle for a more vibrant look. You may also want to have scissors and stitch markers on hand for easier crocheting.
Do I need to be an experienced crocheter to make a Tweety Bird?
While it helps to have some basic crochet skills, you do not need to be an experienced crocheter to make a Tweety Bird. The pattern includes detailed instructions and images, making it suitable for beginners who are familiar with basic crochet stitches like single crochet and double crochet. This project is an easy crafting opportunity that allows you to explore pattern making.
Can I customize my Crochet Tweety Bird?
Yes, you can definitely customize your Crochet Tweety Bird according to your preferences. You can experiment with different yarn colors and add your own personal touches, such as a bow or a hat. This playful design is a decorative toy that allows for creative expression, making it a unique handmade project.
How long does it take to complete a Crochet Tweety Bird?
The time it takes to complete a Crochet Tweety Bird will depend on your crochet speed and experience. On average, it can take anywhere from 3-5 hours to complete the bird, making it a quick crochet project. However, it may take longer for beginners or those who take their time with each step.
Where can I find a Crochet Tweety Bird Pattern?
You can find a Crochet Tweety Bird Pattern online on various crochet websites, as well as craft stores. You may also find free patterns on blogs or social media platforms. Using bright yellow yarn or yellow thread, start with a magic ring and work single crochet, double crochet, and chain stitches. Follow the step by step instructions for decrease increase techniques and how to sew parts together. Be sure to check the credibility and reviews of the pattern before purchasing or downloading to ensure its accuracy. This delightful crafting journey will lead to creating a cheerful design and whimsical toy perfect for children play.


