


This article provides a guide on how to crochet a Spiderman hat. It covers the necessary materials, including tips on selecting the right yarn and hook size, as well as guidance on how to read patterns. Additionally, the article outlines the steps involved in making Spidey hats and offers helpful tips for achieving a flawless finish.
Key Takeaways:
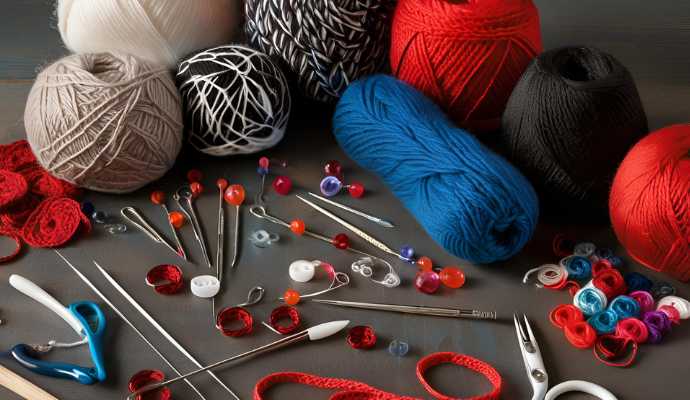
- Choose the right materials: yarn, crochet hook, tapestry needle, and stitch markers to create your Spider-Man beanie.
- Pay attention to yarn and hook size for a good fit. Use abbreviations and stitch explanations when reading a crochet pattern. For a child size, select appropriate measurements to ensure comfort and fit.
- Follow the step-by-step instructions to crochet a Spider-Man hat: start with the brim, create the body, add the logo, and finish the hat. Adjust the size and colors if desired. It takes about a few hours to complete. Refer to a video tutorial for additional help.
What Materials Do You Need?
To undertake a Mayday Parker Spider-Man beanie crochet project, you will need a few essential materials, including suitable yarn, the right crochet hooks, and additional tools like scissors and a tapestry needle to ensure a successful and enjoyable crafting experience. Make sure to follow a detailed tutorial for precise instructions.
For this project, choose a yarn such as Red Heart Super Saver in various colors, including black, blue, white, and red. The most critical tool for crocheting the Mayday Parker Spider-Man beanie is the crochet hook, so it’s important to select the correct size based on your project. Consider using Red Heart Super Saver Cherry Red and Royal Blue for authentic Spider-Man colors.
If you’re crocheting for a child, a hook size ranging from 3.75 mm to 5.5 mm is appropriate. For an adult-sized beanie, opt for a hook size between 5 mm and 6 mm, though you can also use a larger hook for a looser fit.
Additionally, you’ll need a pair of scissors to cut the yarn at the project’s conclusion. It’s also advisable to have a yarn needle, preferably a tapestry needle with a rounded tip, for weaving in loose ends, and stitch markers to help keep track of your progress. Use stitch markers effectively to mark important points and maintain your stitch count.
Overall, the Mayday Parker Spider-Man beanie is a fun project suitable for crocheters of all skill levels, although it may be best suited for advanced beginners and beyond.
Yarn
When making your Spider-Man beanie, it is recommended to use Red Heart Super Saver yarn in black, blue, white, and red colors, as these choices allow for the most realistic design.
The quality of the yarn not only affects the beanie’s appearance but also its durability and comfort. The medium thickness of Red Heart Super Saver ensures that the beanie maintains its shape while providing warmth and comfort.
By following the design of the original Spider-Man suit, the bright red serves as the main color and the deep blue acts as a secondary accent, both of which are available in the Red Heart line.
Additionally, texture and weight preferences are important; selecting the right yarn can enhance the crafting experience and result in a beanie that is both visually appealing and comfortable to wear. Ensure your yarn matches the desired gauge for a perfect fit.
Crochet Hook
Crochet Hook Size: A 5mm crochet hook is ideal for crocheting a Spider-Man beanie, but smaller sizes, such as 4.5mm or 3.5mm, can be used for tighter stitches.
Choosing the right crochet hook size significantly impacts the appearance and fit of the finished project. A larger crochet hook creates a looser gauge, resulting in a more relaxed and airy design, which may be suitable for thinner yarns. Conversely, a smaller crochet hook produces tighter stitches, leading to more defined designs and greater structure. Use crochet hooks like 5mm, 4.5mm, or 3.5mm depending on your desired gauge and yarn thickness.
For projects like beanies that are meant to fit snugly, the 4.5mm crochet hook offers an excellent middle-ground option, balancing versatility with fit.
Understanding how hook sizes interact with yarn thickness ensures that the final project is both visually appealing and functional.
Tapestry Needle
A tapestry needle is an essential tool for completing your Spider-Man beanie, as it allows you to weave in ends and secure any braids or embellishments you choose to add. Using the appropriate size tapestry needle not only ensures a smooth crafting experience but also enhances the project’s overall appearance.
When selecting a needle, consider the thickness of the yarn to prevent any snags or damage; a larger needle is typically more suitable for bulky yarns, while a smaller needle works better with finer threads.
To use the tapestry needle effectively, thread it with a manageable length of yarn and gently pull it through the stitches to create a clean finish. This attention to detail not only secures your work but also adds a polished touch to your creation.
Stitch Markers
Stitch markers are an essential tool for crocheting the Spider-Man beanie, particularly when working on more intricate designs. They serve as visual guides, helping crocheters maintain accurate stitch counts and mark important aspects of the project, such as the beginning of a round or the starting point for shaping areas.
By using stitch markers effectively, crocheters can minimize the risk of losing stitches and miscounting, which can hinder progress on the entire project. When a stitch marker is placed in your work, it becomes easier to track your progress, allowing you to focus more on the artistry of crocheting rather than the calculations.
To ensure accuracy without feeling overwhelmed, consider placing a stitch marker every time you change stitches or after every ten stitches. For a fun project, check out this Crochet Spiderman Hat Pattern.
How to Choose the Right Yarn and Hook Size?
Choosing the right yarn and crochet hook size for a Spider-Man beanie, whether it’s for a child or an adult, is essential for creating a well-fitting custom piece.
To ensure that your beanie is well-made and fits properly, it is important to consider factors such as gauge, the number of yarn strands, and precise measurements.
How to Read a Crochet Pattern?
Reading a crochet pattern is an essential skill for creating your Spider-Man beanie, as it includes important abbreviations and instructions for the stitches used in the design.
Abbreviations
Crochet patterns frequently use abbreviations to simplify the instructions, making it essential to understand these terms for the success of your Spider-Man hat project.
Here are the most common abbreviations you will encounter in your crochet pattern, along with their meanings:
- DC: Double crochet
- SC: Single crochet
- CH: Chain stitch
- HDC: Half double crochet
- MC: Magic ring
- R: Row
- F: Forward
- CA: Color A
Stitch Explanation
Basic crochet stitches, including the magic ring, slip stitch, single crochet, half double crochet, and decrease, are essential techniques needed to create your Spider-Man beanie. These stitches are utilized in various ways to form the base and develop the unique design of the beanie.
Starting with the magic ring is advantageous, as it provides an adjustable center that can be pulled tight for a neat finish at the crown of the beanie. The slip stitch is ideal for joining rounds, as it creates an almost invisible seam with no gaps between the rounds. The single crochet stitch offers a sturdy foundation, while the half double crochet stitch adds the right amount of height and creates a cozy texture.
Mastering the decrease stitch is crucial for shaping the top of the beanie, as it involves pulling two individual stitches together without disrupting the overall stitch pattern.
For those who are less experienced with these stitches, it can be helpful to practice each one individually before attempting to combine them into a project.
How to Crochet a Spiderman Hat?
Creating a Spider-Man hat with crochet is a fun and rewarding craft project. Whether you are making matching hats for kids or adults, this project allows you to express your creativity while following a structured pattern to achieve an impressive final result. Join the crafting community on social media to share your progress and get project tips from other crocheters.
In this section, we will guide you through the process step by step, providing you with all the information you need for a successful and enjoyable crafting experience.
Step 1: Starting with the Brim
The first step in crocheting your Spider-Man hat is to create the brim, which establishes the foundation for the entire project and determines the hat’s gauge and fit. Use Red Heart Super Saver yarn and a 5mm crochet hook for a child size, or adjust for an adult size as needed.
To begin, you will need to chain a specific number of stitches, typically between 60 to 80; however, the exact count will depend on your gauge and the desired size of the hat. It is essential to maintain even tension to ensure uniformity throughout the brim.
Be diligent in counting your stitches as you progress, and consider using stitch markers to help you keep track of your work and identify key points. These markers can be valuable tools for maintaining your stitch count and preventing accidental increases or decreases that could affect the final shape of the hat. Use stitch markers every ten stitches to ensure accuracy.
For a clean edge, remember to slip stitch into the first chain of each row and keep your work flat without twisting it. Paying attention to these details will help you create a sturdy and polished brim that beautifully complements the Spider-Man design.
Step 2: Creating the Body of the Hat
The next step after completing the brim is to create the body of the hat, where you will incorporate the main colors to mimic Spider-Man’s color scheme. This stage requires careful attention to stitch techniques, as achieving an even texture is essential. Incorporate surface crochet for the webbing design to enhance the Spider-Man look.
First, measure the desired height of the body section to ensure a proper fit, and maintain control over your gauge by crocheting a test swatch. In this section, you will frequently change yarn colors, such as Red Heart Super Saver in Cherry Red or Royal Blue, so be mindful of keeping your edges clean by carrying the yarn strands along the edge or using a slip stitch to close any gaps.
If you are following a specific crochet pattern, using stitch markers to designate your rows can help ensure you stay on track. Additionally, don’t hesitate to count your stitches often to confirm that you are proceeding correctly, especially if you are working on a kids project or matching hats for both child size and adult size.
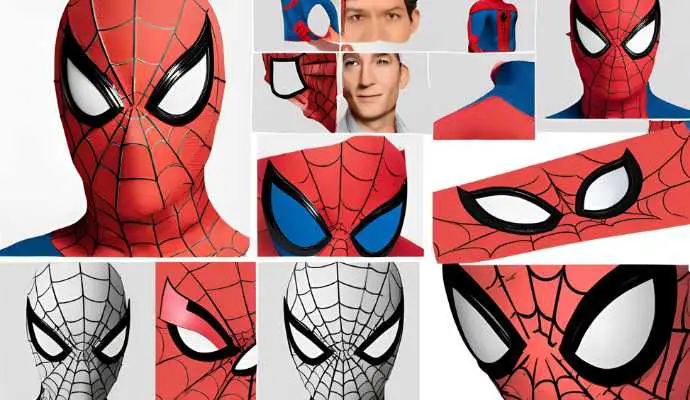
Step 3: Adding the Spiderman Logo
Adding the Spider-Man logo to your custom beanie allows your creativity to shine through as you utilize surface crochet techniques to replicate the webbing and iconic design elements associated with the character, inspired by Mayday Parker’s adventures.
By following a simple process, you can transform your headwear into a striking piece that showcases your enthusiasm for this beloved superhero. Begin by sketching the logo on paper to visualize the final outcome, and then gather your materials, ensuring you have the right colors—such as red, black, and white—to accurately represent Spider-Man.
When applying the colors, start with the primary red base to form the logo’s shape, and then carefully layer the black web lines and emblem. To achieve clean lines, practice your stitches before the actual application, and consider using a smaller hook for greater precision.
Remember, this is your design, so feel free to add personal touches or embellishments, such as glitter or additional colors, to make your hat truly stand out.
Step 4: Finishing the Hat
The finishing touches in making a Spider-Man hat are crucial steps that enhance the quality and durability of the final product. This process includes weaving in ends and making adjustments to the sizing, such as adding ear flaps with braids for extra warmth and style. Don’t forget to use a tapestry needle for neatness.
Tapestry needles are used to weave in any ends left from color changes or the initial cast-on, giving the Spider-Man hat a polished appearance. It’s important to check the fit by trying the hat on after each adjustment; the hat should fit snugly but not be too tight or too loose.
If you plan to add a pom-pom to the top of the hat or create felt appliqués to sew on, use a few tight stitches to secure these pieces in place. This ensures that the Spider-Man hat maintains its shape during regular use.
The sense of accomplishment that comes from completing a custom-designed beanie is truly unmatched. It serves as a testament to the effort and creativity invested in its creation and can be worn with pride or given as a thoughtful gift. Happy crafting, and enjoy the admiration your artistic skills will undoubtedly receive!
Tips and Tricks for Crocheting the Perfect Spiderman Hat
These project tips and tricks can enhance your experience while crocheting your Spider-Man hat, as well as improve the final result. They address some of the most common challenges faced by crocheters and offer design inspiration for your creative project.
For instance, many advanced beginners struggle with controlling tension or mastering new crochet techniques, but online forums and social media groups can provide valuable troubleshooting assistance and guidance. Engaging with other members of the crafting community allows you to share ideas and techniques, and posting photos and tips about your progress can inspire others, fostering a sense of community around the craft.
Remember to take your time, experiment with different types of yarn, and seek the opinions of fellow enthusiasts who share your passion.
Frequently Asked Questions
In this section, we will address some frequently asked questions about crocheting a Spider-Man hat, providing clarity on common concerns and enhancing your crafting journey. For a detailed guide, check out the Crochet Spiderman Hat Pattern.
Can I Adjust the Size of the Hat?
Yes, you can adjust the size of your Spider-Man hat by altering the measurements and stitch counts in the crochet pattern to meet your needs.
To ensure a proper fit for either a child or an adult, start by measuring the head circumference. Typically, child sizes range from 20 to 22 inches, while adult sizes range from 22 to 24 inches.
If the hat is too small, simply add stitches or rows as needed, while maintaining the proportions of the Spider-Man design. Conversely, if the hat is too large, reduce the number of stitches.
Be sure to keep a record of any changes you make to maintain the overall appearance of the Spider-Man hat.
Can I Use Different Colors for the Hat?
Absolutely! Different yarn colors can be utilized for the Spider-Man hat, enabling variations in the crochet pattern and allowing for personal expression. Feel free to experiment with different hues, such as black yarn, blue yarn, and white yarn to add unique touches to your design.
For instance, a teal and maroon color combination could replace Spider-Man’s traditional red and blue. Additionally, pastel colors like mint green and lavender could provide a softer aesthetic.
Using metallic yarns could also create a striking visual effect. While the iconic webbing pattern of the Spider-Man hat must remain consistent, there is plenty of room for creativity with color choices. Consider using Red Heart yarn for its vibrant colors and durability.
How Long Does It Take to Crochet a Spiderman Hat?
The time required to crochet a Spider-Man hat can vary depending on your skill level and the complexity of the pattern. On average, it may take anywhere from a few hours to a couple of days.
Several factors can influence this time commitment, including the specific stitch techniques used and your familiarity with the chosen crochet patterns. Beginners might spend extra time learning the basics of crochet terminology, magic ring, and proper use of crochet hooks, such as the 5mm crochet hook or 4.5mm crochet hook, while more experienced crafters can complete their projects more swiftly.
It’s important to remember that practice leads to improvement; as your skills develop, finishing a project like a fun Spider-Man hat will become quicker and more enjoyable.
Whether you’re a novice or have some experience, embracing the learning process will not only result in better hats but also boost your confidence in your crochet abilities.
For more guidance, consider watching a video tutorial on YouTube to enhance your crochet project skills.
Frequently Asked Questions
What supplies do I need to make a Crochet Spiderman Hat?
To make a Crochet Spiderman Hat, you will need red yarn, blue yarn, black yarn, a crochet hook, scissors, and a tapestry needle. You may also need a stitch marker, a measuring tape, and possibly a 6.5mm crochet hook for certain sections.
Is a Crochet Spiderman Hat pattern suitable for beginners?
Yes, this pattern is suitable for advanced beginners who have some basic crochet skills, such as single crochet and half double crochet. The pattern uses simple stitches and the instructions are easy to follow, making it a great introduction to crafting a beanie.
Can I adjust the size of the Crochet Spiderman Hat?
Yes, you can adjust the size of the hat by using a different size crochet hook, such as a 6.5mm or 3.5mm crochet hook, or by changing the number of stitches in the pattern. You can also try making a gauge swatch to determine the correct size for your hat, ensuring it fits the desired circumference, whether for a child size (20 inches) or an adult size.
Do I need to know how to change colors to make a Crochet Spiderman Hat?
Yes, this pattern requires you to change colors to create the iconic Spiderman design. Make sure to practice techniques like decrease for fine tuning. However, there are many tutorials available online that can help you learn how to change colors in crochet and master this creative project.
Can I sell Crochet Spiderman Hats made from this pattern?
Yes, you can sell hats made from this pattern as long as you credit the original pattern designer. Consider joining an affiliate program to earn a commission on your creations. However, you cannot sell or distribute the pattern itself.
Are there any special techniques used in this Crochet Spiderman Hat pattern?
This pattern uses some special techniques such as color changes, crocheting in rounds, and working with front and back post stitches. It might also involve using a magic ring for starting the project. However, the instructions are detailed and easy to follow, making it accessible for all skill levels, ensuring a fun and rewarding crafting experience.
