


Crocheting a cherished character like Pooh Bear offers a wonderful opportunity to blend creativity with craftsmanship, bringing a friendly bear from the Hundred Acre Woods to life. In this guide, you’ll discover everything you need to create your own Pooh Bear crochet pattern, including an introduction to the basics of crochet, selecting the right materials like Premier Parfait yarn and safety eyes, and mastering essential stitches such as the magic ring and single crochet. Whether you are an experienced crocheter or just starting out, you will find helpful tips, detailed instructions, and variations in this beginner’s guide to inspire your project. Prepare to bring this lovable bear to life with your own unique flair, giving it an adorable look that fits perfectly in any childhood room!
Key Takeaways:
- A Pooh Bear crochet pattern is a set of instructions for creating a crocheted version of the iconic Winnie the Pooh character, a beloved Disney creation.
- In order to make a Pooh Bear crochet pattern, you will need specific materials and knowledge of basic crochet stitches such as single crochet, chain stitch, and the magic ring.
- Pay attention to tension and use stitch markers when making a Pooh Bear crochet pattern for best results. There are also variations of the pattern available in different sizes, colors, and with added accessories to create your own woodland friends.
What Is a Crochet Pattern?
A crochet pattern is a set of written or charted instructions that guides crafters in creating various items using yarn and crochet techniques. Patterns are essential tools for making crochet projects and can be used by both novice and experienced crocheters.
They range from basic designs suitable for beginners to highly detailed amigurumi creations, such as those offered by Wonder Crochet and Marizza Toys, that require a more advanced understanding of crochet stitches and techniques.
Patterns help crocheters accurately interpret designs, select the appropriate type of yarn, like Premier Parfait, and achieve the best possible results. In the art of crochet, patterns serve as the catalyst for creating everything from home goods and decor to functional items, toys, and gifts.
What Is a Pooh Bear Crochet Pattern?
A Pooh Bear crochet pattern is a type of amigurumi pattern that features Winnie the Pooh, the beloved Disney character known for his friendly and comforting personality.
These patterns typically utilize amigurumi techniques, such as the magic ring and single crochet, to create a small, stuffed bear that showcases the character’s distinctive features.
Pooh Bear crochet patterns have become popular among crocheters due to their nostalgic connection to childhood, their role as a comfort character, and their suitability as nursery or children’s room decor.
When crafted with soft pastel yarn and safety eyes, these patterns yield plush toys that make wonderful gifts and comforting companions for children, ideal for decorating a nursery or gifting to celebrate special occasions.
What Are the Materials Needed for a Pooh Bear Crochet Pattern?
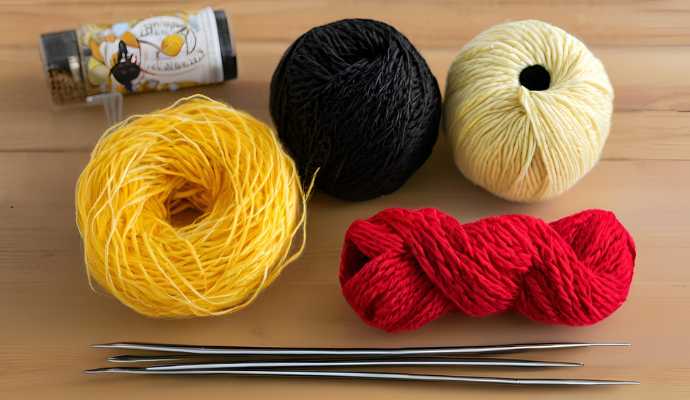
Creating a Pooh Bear crochet pattern requires specific materials, including yarn, safety eyes, polyfill stuffing, a crochet hook, a darning needle, and various sewing pins and other craft supplies, all of which can be sourced through affiliate links on platforms like Amazon.
Using high-quality yarn, such as Premier Parfait by Estako Softy, in the appropriate weight for plush toys ensures a soft and cuddly texture essential for crafting adorable characters.
Safety eyes not only add a charming touch but also ensure that the toy remains safe for children, making it an ideal gift idea for young ones. Polyfill stuffing provides the necessary volume to make the Pooh Bear shape huggable and ensures that each part of the amigurumi holds its shape. Selecting a crochet hook of the right size for the yarn weight, along with sewing pins and other crafting supplies, will facilitate the assembly of all the pieces, ensuring a neat and professional finish.
Employing vibrant yarn colors in shades of yellow and red enhances the character’s cheerful personality, reminiscent of the playful scenes in the Hundred Acre Woods, and adds a whimsical touch to the overall design. A darning needle is essential for creating invisible stitching, ensuring that all pieces are securely attached without compromising the aesthetic appeal.
The choice of materials significantly impacts the durability of the plush toy and influences how cuddly and visually appealing Pooh Bear will look when displayed or gifted as a part of a nursery or children’s room decor. Each careful selection of material contributes to the creation of a delightful and lasting masterpiece that truly embodies the spirit of this beloved Disney character, making it a cherished addition to any collection of woodland friends.
What Are the Basic Stitches Used in a Pooh Bear Crochet Pattern?
The fundamental stitches in a Pooh Bear crochet pattern include the magic ring, single crochet, half double crochet, and slip stitch, essential for crafting the character’s iconic look.
The magic ring creates a tight, adjustable loop that forms the center of the bear’s head. The single crochet stitch serves as the primary stitch throughout the pattern, resulting in a dense and sturdy fabric that maintains its shape, vital for achieving the adorable look of this cherished character.
The half double crochet stitch is utilized to add height and texture to the bear’s ears and body. Slip stitches facilitate seamless transitions between different sections of the pattern.
Beginners are encouraged to practice these stitches on small swatches and to familiarize themselves with helpful tips, such as maintaining even tension and using high-quality yarn, ensuring their amigurumi project is a success. Regular practice will enhance their skills and boost their confidence.
How to Read a Crochet Pattern?
Reading a crochet pattern can initially seem complicated, but with some practice and an understanding of common symbols and abbreviations, it becomes a straightforward process that is essential to the crochet experience. Most crochet patterns share a similar structure and typically include the following components:
- Materials Needed:
- Yarn: Specify the brand, type, weight, color, and quantity.
- Hook: Indicate the size (in mm or US sizes).
- Other Notions: Include items such as needles, pins, stitch markers, scissors, etc.
- Gauge: Provide the number of stitches and rows per inch or the dimensions required to complete a square, if applicable.
- Stitches: List the types of stitches (abbreviated) that will be used in the pattern.
- Step-by-Step Instructions:
- Offer an abbreviated set of instructions to follow for completing the project.
While not all crochet patterns contain all these elements, they form the basic building blocks of any crochet project.
Common Crochet Symbols and Abbreviations
Familiarity with common crochet symbols and abbreviations will enhance your ability to interpret patterns accurately, whether you’re working with a free pattern or an intricate design from platforms like Allison’s blog or online shops. Some of the most common crochet symbols include those that you might encounter in patterns from designers like Estako Softy or online communities such as Facebook and Instagram:
- ch: Chain
- sc: Single crochet
- dc: Double crochet
- trc: Triple crochet
- sl st: Slip stitch
- est: As established in the previous row/round
- beg: Beginning (of row or round)
- st(s): Stitch(es)
- rep: Repeat
It is important to note that in the UK, a single crochet is referred to as a double crochet, while a double crochet in the UK is called a single crochet in the US. Other crochet symbols may refer to specific stitches established in previous rows or rounds. To gain a better understanding of more complex crochet symbols, consider reading a crochet book or watching an instructional video that relates to your specific pattern.
Example of a Simple Crochet Pattern
Measurement: Approx. 42 inches (107 cm) wide x 72 inches (183 cm) long
Yarn: Lion Brand Homespun (Medium 4), 4 skeins of 320 yards (292 m) each
Hook Size: H-8 (5 mm) crochet hook
Pattern Stitches:
- ch = chain
- sc = single crochet
Pattern Instructions:
- Chain 130 stitches for the desired width.
- Row 1: Single crochet in the 2nd stitch from the hook and in each remaining stitch across the row (129 stitches).
- Row 2: Chain, turn, and single crochet in each stitch across.
- Repeat Row 2 until the desired length is achieved.
With an understanding of how to read a crochet pattern, you can create a wide variety of crocheted items. Crochet patterns are available for baby items such as hats, blankets, and booties, as well as for women’s clothing and accessories like ponchos, scarves, and jewelry. There are also patterns for men’s accessories like scarves and hats, along with projects such as dog blankets and stuffed animals, including beloved characters like Eeyore from the Winnie the Pooh series. In fact, patterns can be found for nearly any item, including stuffed animals known as amigurumi, which are popular among fans of the Jonas Brothers and Disney franchises.
What Do the Symbols and Abbreviations Mean in a Crochet Pattern?
In crochet patterns, symbols and abbreviations act as a shorthand that efficiently conveys essential instructions, making them crucial for the successful execution of projects.
For example, you may encounter abbreviations such as ‘ch’ for chain, ‘sc’ for single crochet, and ‘sl st’ for slip stitch, among others. Each symbol represents a specific stitch or action, which reduces the length of the written instructions and allows crocheters to follow along more easily.
Learning these symbols is a key step toward mastering the ability to read and understand crochet patterns, whether for creating simple projects or intricate amigurumi designs. Understanding the specific meaning behind each symbol not only boosts confidence but also enhances a crocheter’s capacity to tackle more complex designs.
For instance, ‘dc’ stands for double crochet, a stitch that creates taller fabric, while ‘hdc’ refers to half double crochet, which strikes a nice balance between height and compactness. The abbreviation ‘tog’ signifies that stitches should be worked together, a technique often used for decreasing stitches, whereas ‘rep’ indicates that certain sections should be repeated.
By familiarizing themselves with these key crochet abbreviations and symbols, crocheters can embark on their journey through various crochet patterns, transforming it into an enriching and enjoyable experience. Whether creating a friendly bear like Winnie the Pooh or other woodland friends, each project brings a unique charm.
How to Make a Pooh Bear Crochet Pattern?
Creating a Pooh Bear crochet pattern is a step-by-step process that incorporates various techniques and materials. This free pattern is an excellent starting point. The process consists of the following steps:
- Making the head
- Creating the body
- Crafting the arms
- Assembling the legs
- Forming the ears
- Shaping the nose and mouth
- Putting all the pieces together
- Adding details and finishing touches
Each step requires specific techniques and materials to achieve the desired appearance of the finished Pooh Bear. By following the step-by-step instructions, you will enhance your skills in amigurumi crochet.
You will also learn to use safety eyes and polyfil stuffing to ensure that the bear is both cute and cuddly, making it an excellent gift idea for children.
Step 1: Start with the Head
The first step in this amigurumi pattern is critical for setting the foundation.
The first step in creating a Pooh Bear crochet pattern is to make the head, which serves as the foundation for the entire character.
Begin by crocheting a magic ring, which will establish a base for a series of stitches that will ensure a tight closure for the head. Using a crochet hook and high-quality yarn such as Premier Parfait can make a significant difference in your final product.
After forming the magic ring, use single crochet stitches to gradually build up the head, carefully following the pattern’s instructions to achieve the desired size and appearance. This step is crucial for capturing the character’s friendly and pleasant face, so it is important to take your time and ensure accuracy.
To create a solid base, pull the yarn tightly into the magic ring, forming a loop through which you can easily insert the stitches. Maintain even tension with each single crochet stitch, ensuring that it is neither too loose nor too tight.
If the tension is too loose, the fabric will become floppy, whereas overly tight tension will make it difficult to crochet subsequent stitches, resulting in a hard or stiff fabric.
According to the pattern, you will typically increase the number of stitches by following specific rounds, starting with six stitches and adding more in successive rows. Pay close attention to any specified counts for increases and decreases, as these are vital for shaping the head correctly.
Step 2: Create the Body and Legs
The next section of the Pooh Bear crochet pattern focuses on the body and legs, which contribute to the overall shape and structure of the plush character. It’s important to use soft pastel colors and polyfil stuffing to enhance the bear’s adorable look.
The body is typically worked in rounds using the single crochet stitch, ensuring a snug fit and firm structure. While crocheting the body, it is important to maintain even tension on your stitches to achieve a smooth appearance without gaps. Adding polyfil stuffing gradually while you work can help maintain the shape.
If the pattern includes color changes or stripes for the body, carefully follow the instructions on how to switch yarns without losing your place. Using stitch markers to indicate increases or specific rounds can help create a more organized working process.
When crocheting the legs, ensure they are aligned evenly with the body to achieve better balance, making sure they have the same stitch count as indicated in the pattern. As you work, regularly compare the size of the body and legs against the completed head to ensure all parts of the character remain proportional, resulting in a well-crafted and cohesive final product.
Step 3: Make the Arms and Ears
In step 3 of the Pooh Bear crochet pattern, you will create the arms and ears, which are essential for completing the bear’s shape and adding character.
The arms are crocheted following the pattern and utilize the same stitch techniques as the body to maintain consistent texture and density. The recommended stitch count typically ranges from 12 to 15 stitches, which is ideal for ensuring that the arms fit snugly when attached to the body. Using sewing pins can help with the precise placement of limbs.
The ears are shaped using a combination of single crochet and half double crochet stitches to achieve a rounded appearance. The positioning of these features is important; placing the arms at a slight angle can create a welcoming look, while positioning the ears slightly above the eyes can enhance the bear’s charm.
Careful assembly of these elements not only improves the crochet character’s appearance but also contributes to a more inviting feel, ensuring that Winnie the Pooh embodies the warmth and friendliness he is meant to convey.
Step 4: Add the Details
The final step in completing your Pooh Bear crochet pattern is to add details such as safety eyes and other facial features of your choice. After installing the safety eyes, you can stuff the body and head with polyfil stuffing to give them shape. These details will enhance the friendly bear’s look, making it perfect for a children’s nursery or a childhood room.
This step is essential for achieving the classic look of your Pooh Bear and ensuring he is soft and huggable. Be sure to sew on a smile or any other features you desire for the bear’s face, allowing you to create a truly unique companion.
Consider adding extra flair by creating clothes or incorporating accessories, such as a small red shirt or a honey pot, once you have finished crocheting.
For the safety eyes, make a small hole in the crocheted fabric using a needle or an awl before inserting them. When adding the polyfil stuffing, do so in small amounts and press it down gently to avoid lumps. Check for evenness to ensure the bear is not lopsided.
Don’t hesitate to experiment with different colors and features to personalize your creation!
What Are the Tips and Tricks for Making a Pooh Bear Crochet Pattern?
To create a Pooh Bear crochet pattern like those inspired by Disney’s Hundred Acre Woods, consider the following tips:
To create a Pooh Bear crochet pattern, consider the following tips:
- Select the right yarn and materials
- Practice basic stitching techniques
- Learn to manage tension
These tools and techniques are beneficial for beginners and will enhance both the quality of your finished Pooh Bear and your skills as a crocheter. It’s also helpful to follow a beginners guide to ensure you’re familiar with basic techniques.
Beginners should focus on maintaining proper tension, utilizing stitch markers, and choosing high-quality yarn and stuffing materials to ensure the bear has an adorable appearance and lasting durability.
1. Use High-Quality Yarn
The choice of yarn in a Pooh Bear crochet pattern plays a crucial role in shaping the overall look of the project. The type of yarn significantly influences the final appearance and texture of your creation. Using yarn from brands like Estako Softy or Marizza Toys can provide the desired softness and durability.
High-quality yarn not only enhances the bear’s signature soft and cuddly aesthetic but also ensures its durability, making it an ideal option for a toy that a child may carry around and play with frequently. When selecting yarn, consider the fiber content and color options that best reflect the character of Pooh Bear, as this will contribute to a more delightful finished product. Including affiliate links to purchase recommended yarn and craft supplies can also be helpful for other crocheters.
A blend of acrylic and polyester can provide a good balance of softness and durability, ensuring that your Pooh Bear remains snuggly even after being hugged many times. Opting for a buttery yellow for the bear’s body and a warm brown for its accents will accurately capture the character’s image.
Exploring different textures is also important; a velvety finish can make the bear especially appealing to small children. If you’re uncertain, always test a swatch before beginning your project, and remember to check the washing instructions to maintain the yarn’s fresh appearance and texture.
2. Pay Attention to Tension
Maintaining consistent tension while crocheting a pattern is crucial to ensuring that your work appears neat and professional. When following a crochet pattern for a Pooh Bear, even tension across the stitches helps prevent gaps or inconsistencies that could detract from the bear’s cuteness.
To achieve the proper tension, it is important to recognize its significance, particularly when creating an amigurumi pattern. Using the appropriate hook size and regularly checking your stitches are two effective strategies.
If your tension is too tight, consider switching to a larger hook size or relaxing your grip. Conversely, if your tension is too loose, try using a smaller hook size or making your stitches more deliberate.
By continually monitoring your tension throughout the project, you can ensure that every aspect of your plush remains in shape, allowing the features of your Pooh Bear to truly shine. This attention to detail will ensure your bear has the comforting character of Winnie the Pooh.
3. Use Stitch Markers
Stitch markers can be incredibly helpful when working on a Pooh Bear crochet pattern, as they allow you to easily track your progress and stitch counts. These markers are particularly useful for indicating the start of rounds or marking important locations within the pattern.
By helping you keep track of where you are and what needs to be done next, they can be especially beneficial during more complex or lengthy sections of the project. This tool not only saves time but also reduces frustration, allowing you to focus on enjoying the creative process and ensuring that your Pooh Bear takes the correct shape and proportions as you work.
When using various stitch patterns, stitch markers provide clarity by allowing you to quickly identify sections that require special attention, such as color changes or increases.
Crafters can use them in different ways; for instance, some prefer locking markers for complicated projects, while others opt for traditional markers to denote the end of a row.
Proper use of stitch markers also enables crocheters to maintain an accurate stitch count, making it easier to address dropped stitches or necessary adjustments before they become larger issues.
These benefits enhance the crocheting experience, making it easier and more enjoyable for both novice and experienced crafters alike. For more tips and shared experiences, consider joining online communities on platforms like Facebook and Instagram, where fellow crocheters share their works and advice.
What Are Some Variations of the Pooh Bear Crochet Pattern?
Exploring different variations of the Pooh Bear crochet pattern can lead to the creation of other beloved characters from the Hundred Acre Woods, such as Eeyore or Tigger. These variations can add to a collection of adorable, comfort characters suitable for any nursery or children’s playroom.
Exploring variations of the Pooh Bear crochet pattern opens up endless creative possibilities, allowing individuals to customize their projects in unique ways, using elements like safety eyes and polyfil stuffing for a more adorable look.
For instance, one can create mini or oversized versions of Pooh Bear to cater to different preferences or use cases, making it a perfect gift idea. Additionally, experimenting with color combinations can transform the traditional Pooh Bear into a completely different look, suitable for a childhood room or nursery.
Incorporating accessories, such as scarves or hats, can further enhance the character and personality of the finished creation, making it a friendly bear reminiscent of Winnie the Pooh and his woodland friends from the Hundred Acre Wood.
1. Different Sizes
You can create Pooh Bear in various sizes by adjusting the yarn weight, such as using Premier Parfait or Estako Softy, crochet hook size, and stitch counts according to the pattern specifications. This flexibility allows you to produce results ranging from small enough to serve as a keychain to life-sized toys that make delightful displays.
Such versatility is important for crafting Pooh Bear toys for different audiences, from children to adults who appreciate the charm of Disney’s Winnie the Pooh.
If you prefer a smaller Pooh, consider using a lighter yarn weight, such as sport or worsted, along with a corresponding smaller hook size. A size H or I hook may be suitable, as it will keep the yarn tightly crocheted while allowing enough detail to be added.
Conversely, if you aim to create a larger Pooh, opt for bulky yarn and a larger crochet hook, such as a size J or K. You will need to adjust your stitch count to ensure the arms, legs, and face are proportionate, but this is simply a matter of following the pattern’s guidance.
2. Different Colors
The Pooh Bear crochet pattern is traditionally created using soft pastel colors, which are the primary choices for this project. However, many other colors are also possible, and different shades of the same color can be combined to create a unique look, inspired by Disney’s magical touch.
Here are some alternative color ideas for your Pooh Bear crochet project:
- Earthy Colors: Olive green and warm brown can give your creation a cozy, woodland feel, blending seamlessly with nature-inspired decor.
- Vibrant Colors: Turquoise and hot pink provide a modern interpretation that adds a whimsical pop to your decor.
- Trending Colors: Pastel mint or a monochrome palette offer a contemporary twist on a classic character. Combining colors like cream and peach can create a soft, dreamy bear.
- Fun Colors: Neon green or a rainbow mix are perfect choices for children and those young at heart.
The impact of color is one of the most noticeable aspects of any crochet project, and the right selection can help the piece fit beautifully into its intended space.
3. Adding Accessories
Accessories can enhance your Pooh Bear crochet pattern by adding a unique touch and highlighting its character. Incorporating whimsical elements inspired by the Hundred Acre Wood, along with amigurumi patterns, significantly improves the overall aesthetic.
For instance, you could choose brighter colors to create a red sweater reminiscent of Pooh’s or design his tiny friends from the series, complete with an Eeyore bow or a Tigger tail. Each accessory contributes a new story, providing enjoyment for both the maker and the viewer.
Additionally, using different yarn weights can introduce texture variations that are visually appealing. Adding accessories, potentially sourced through affiliate links from sites like Amazon, not only reflects the maker’s personality but also enhances the experience for those who will use the finished project in the future.
Where Can I Find a Pooh Bear Crochet Pattern?
A Pooh Bear crochet pattern is readily accessible online, thanks to numerous resources available for crafters eager to create this beloved character.
Many websites, blogs, and social media platforms, such as those featuring Allison’s Wonder Crochet or Marizza Toys, offer free patterns, making it easy for both beginners and experienced crocheters to embark on this enjoyable project.
Crafting communities on Facebook and Instagram serve as popular hubs for connecting with fellow crafters, showcasing their Pooh Bear crochet projects, discussing ideas like using a magic ring or single crochet technique, and sharing links to patterns.
Additionally, some of these communities may provide affiliate links to purchase patterns directly from designers or craft supply stores.
Frequently Asked Questions
What is a Pooh Bear Crochet Pattern?
A Pooh Bear Crochet Pattern is a set of instructions and guidelines for creating a stuffed teddy bear inspired by the beloved character from the Winnie the Pooh series using crochet techniques, often involving materials like polyfil and yarn, and tools such as a crochet hook and sewing pins.
Where can I find a Pooh Bear Crochet Pattern?
There are many websites and online marketplaces where you can find Pooh Bear Crochet Patterns, as well as physical stores that sell crochet supplies. A simple internet search can help you find the perfect pattern for your project.
Do I need any special skills to follow a Pooh Bear Crochet Pattern?
Yes, some basic crochet skills are required to successfully follow a Pooh Bear Crochet Pattern. You should be familiar with basic stitches such as single crochet, double crochet, and slip stitch.
Can I customize my Pooh Bear Crochet Pattern?
Absolutely! You can always add your own personal touches and make modifications to the pattern to create a unique and one-of-a-kind Pooh Bear. You can also experiment with different yarn colors and textures to make your bear even more special.
Are Pooh Bear Crochet Patterns suitable for beginners?
It depends on the complexity of the pattern. Some Pooh Bear Crochet Patterns may be more suitable for experienced crocheters, while others may be beginner-friendly. A beginners guide can help, and it’s best to read the pattern carefully and determine if it’s within your skill level before starting the project.
Can I sell items made from a Pooh Bear Crochet Pattern?
Yes, you can sell items made from a Pooh Bear Crochet Pattern as long as you credit the original designer and do not mass produce the item. It’s always best to check the specific pattern for any restrictions or guidelines on selling the finished product.
